Why We Carry Out Air Tightness Testing
Air leakage is a major issue for homeowners, especially in light of the rising heating and cooling costs across the UK and Europe. Air leakage can lead to higher energy consumption, higher carbon emissions and indoor air quality issues this is where air tightness testing can play its part.
Air tightness testing is a technique that can be used to quantify the amount of air leakage of a building fabric. The air tightness test measures the rate of air leakage through a building fabric by pressurising or depressurising a building and measuring the difference in pressure across different sections of wall, floor and roof. By reducing air leakage in newbuild/existing homes, you can lower your heating bills by up to 30%.
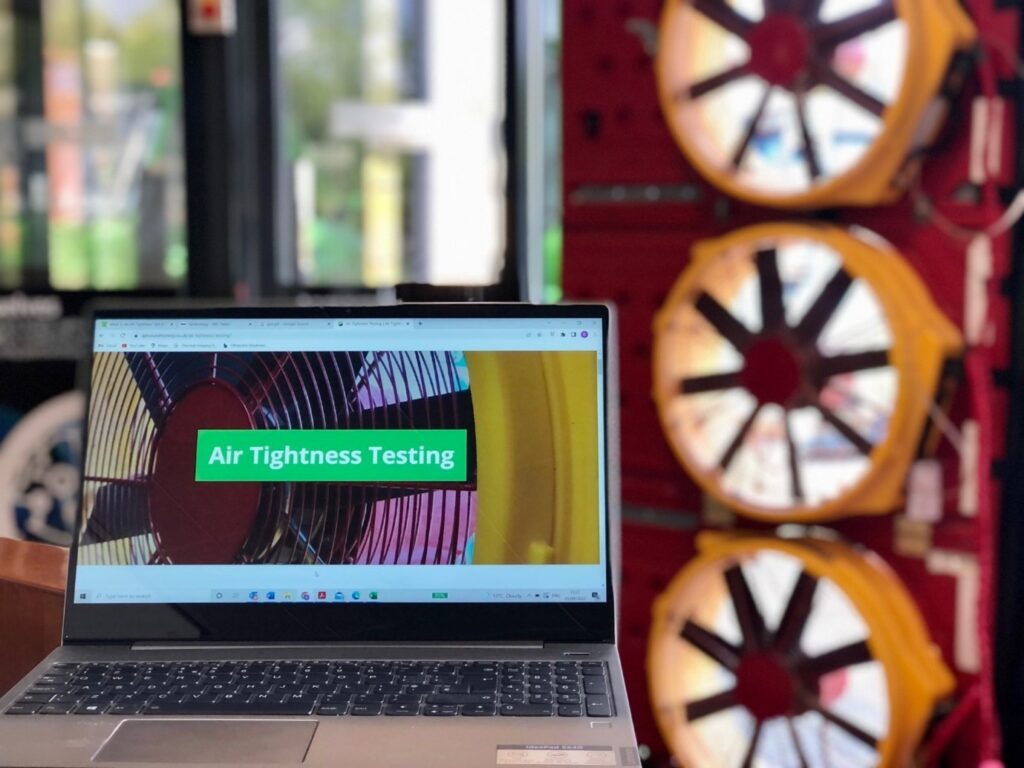
Our equipment for undertaking commercial air tightness testing.

Lowering Air Leakage in Homes
Lowering air leakage in homes is Faily straight forward. Firstly, it is important to identify the location of the air leakage, this can be undertaken via a smoke leakage survey which details each air leakage paths within the building envelope. Thereafter, the air leakage paths can be sealed to lower the air leakage rate of building. Combined air tightness and smoke testing is especially useful for identifying leaks in large buildings with lots of M&E etc. as it identifies areas in hard to reach areas such as structural steels penetrating the envelope etc.
Air tightness testing is no evasive and low impact.
Air tightness testing is a non-invasive technique, that is a quick and very low impact as the equipment simply fits into an existing door opening, we do not fix anything to the building itself. Also, to help client get ready for their air tightness test, we always send out our informative checklist to them prepare for the testing. Please download our air tightness checklist for more information on how to prepare your building for the air tightness test.
How is an air tightness test carried out?
Our blower door fan system mounts into a standard size door-sized housing (900mm x 2000mm) which is then adjusted to suit the size of the door frame. We then set up the blower door equipment as follows.
- Firstly, we check the main areas are temporarily sealed such as AC/HVAC intake and exhaust grills, kitchen, utility and bathroom extract fans, relief dampers, etc.
- We find a suitable doorway to temporarily install our blower door fan system (depending on building size).
- We then record the first series of environmental measurements such as internal and external temperatures as well as barometric pressures and internal and external temperatures.
- We turn on the fan equipment and take measurements between 25-70Pa in 5Pa increments, recording the pressure differential at each step.
- We then record the second set of environmental measurements.
- Finally, our air test engineers calculate the total air flow required to achieve a pressure differential of 50 Pa, divided by the total building envelope area – this calculation will show leakage rate in m³/h.m² @ 50 Pa.
- If a building fails the air tightness test, we pressurise the building (blows air into) to around 50 pascals of pressure. This forces air to flow through cracks or air leakage paths throughout the building envelope.
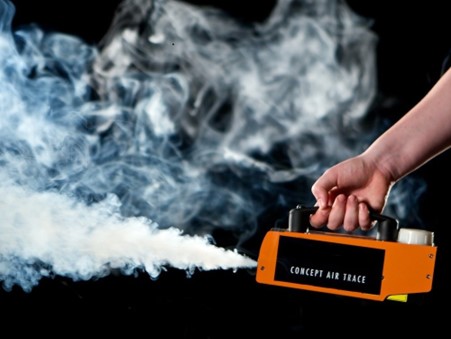
- We turn on our smoke machine and walk around the house or commercial building, highlighting, and recording all the air leakage paths through the building envelope and a report is sent across to our client detailing the air leakage paths.
- For a large commercial air test, we install a large fan panel across the doorway of the building, this usually houses 3 high power blower door fans; however, the above process is similar for both commercial and residential testing.
smoke machine for highlighting air leakage paths in buildings

What’s a good level of air tightness for my project?
With many existing Victorian houses or commercial buildings, the air leakage can be as high as 15m3/hr/m2, which is very poor when you consider a high percentage of new dwellings are getting between 3 to 5m3/hr.m2, and many commercial buildings below 3m3/hr/m2. So, what’s a “good” level of airtightness for your building? Well, for houses that don’t have mechanical ventilation, a good air tightness target would be between 3-5m3/hr/m2. For a dwelling with mechanical ventilation its best if your figure is below 3m3/hr/m2.
Why is excess Air Leakage an issue?
There are many reasons poor air tightness can be problematic, such as Excess air leakage through the building envelope causes energy to be consumed when replacement air is conditioned, either via cooling or heating.
- Large penetrations – especially at low level can cause the ingress of rodents such as mice and rats.
- Excess draughts, through the building can badly affect the occupiers of the dwellings and commercial buildings such as offices. If cold damp air is blowing into the building it can be uncomfortable in both hot and cold weather.
- Excess air leakage can lead to condensation issues, as the air can blow through the floors, walls, and ceilings and usually contains water vapour, these uncontrolled air leaks can cause condensation, mould, and rot issues.
- Large amount of air leakage can bring polluted/toxic outdoor air into a building from, for example, buy main road, fuel garage, bins, restaurants, or external ventilation. Any uncontrolled air that enters a building is often loaded with pollutants, especially if you are close to a main road etc.
- Excess noise pollution
What is the building envelope?
The building envelope, or enclosure as its also known is all of the elements of the outer shell that maintain a dry, heated, or cooled indoor environment and facilitate its climate control, i.e., heating and cooling. The main elements of the building envelope are the floor, walls and roof. This also includes window and doors.
A robust air seal line with help air tightness
Many companies don’t fully understand the importance of the air seal line in regard to air tightness. The air seal line is usually the building envelope; however, this is not always the case. In many instances buildings may have plant rooms where are heavily vented to outside atmosphere, in these instances the air leakage line will be the internal wall that divides the plant room from the rest of the dwelling.
There are many reasons why the air leakage line fails, this can be down to the incorrect sequencing of construction work, such as the late addition of mechanical and electrical pipework & cables just prior to the air test which introduces additional penetrations through the newly completed building fabric, leading to air tightness test failure.
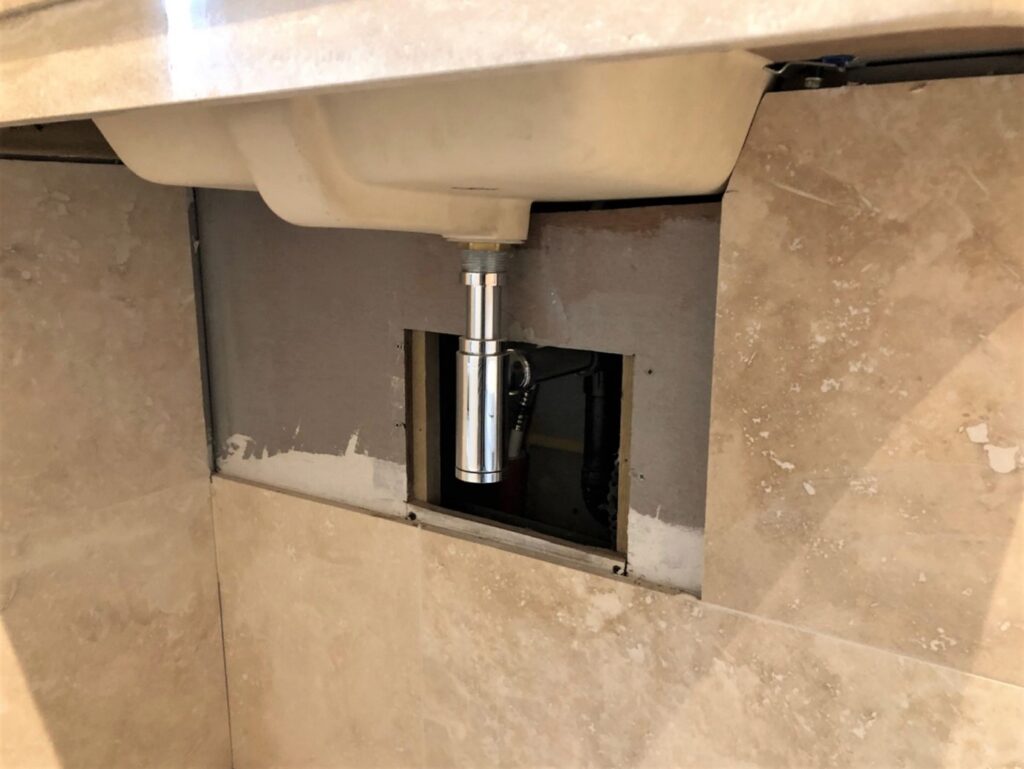
A large air leakage path under the sink

Employ an air tightness champion
By employing an air tightness champion at the beginning of the project, you will have a far higher change of passing the air tightness test at the first attempt. The Airtightness Champion will usually be tasked with the coordination between subcontractors and the design team.
The airtightness champion, will also undertake the following site tasks:
- Subcontractor toolbox talks: Brief the construction team of the importance of airtightness and their collective role in achieving it.
- Clearly identify the location of the air barrier within the building envelope.
- Monitor the quality of site works, by instituting a regimen of inspection during construction, with particular regard to ensuring the air barrier is uncompromised by shoddy workmanship.
- Organising intermediate airtightness tests during construction and make trades aware of the importance of good air tightness.
- Ensure that the air barrier is complete prior to covering up by other work and trades, such as the installation of kitchen cupboards over service penetrations, which can lead to expensive uncovering and remedial work.
- Ensure that final checks are made to the building prior to booking in the air tightness test.
- Ensure that air tightness testing is scheduled well advance to achieve maximum benefit for purposes of remedial work to prevent delays in handover.
Improving air tightness by identifying leaks
At Air Pressure Testing, we are happy to provide you with general air leakage design advice for your building envelope and onsite guidance, using our vast amount of knowledge as a UKAS testing laboratory, we can quickly ascertain the most common air leakage paths such as:
- Behind kitchen units.
- Behind Utility Cupboards
- Around Boiler Cupboards
- Gaps between skirting board and floor on each floor level.
- Around External Windows and Doors
- Around poorly fitted trickle vents.
- Around Patio doors.
- Gaps around the stairs.
- Around loft hatch.
- Gaps around the shower trays and bath panels
APT Sound testing can help you pass your air tightness test!
We provide advice and guidance on how to pass your air leakage test at the first attempt. We are happy to provide you with general air leakage design advice for your building envelope and onsite guidance. Upon completion of your project, we provide Nationwide UKAS Accredited Tightness Testing for domestic and commercial buildings to help you demonstrate Building Regulation Part L Compliance.
Please download our air tightness checklist for more information on how to prepare your building for the air tightness test or contact us on 01525 303905 or info@airpressuretesting.net