Author: admin

Noise Surveys for New Developments

Noise Surveys for New Developments

A noise survey and report should be submitted during the pre-application process and discussions on planning applications. In many circumstances a planning condition will stipulate that a noise survey will need to be undertaken. Noise surveys are normally carried out prior to completion, however the local authority may also require post a BS 8182 noise level survey to prove that the noise standards have been achieved within the living rooms and bedrooms.

Noise Surveys


The following information will usually need to be included within the noise survey report.

  1. The reason and scope of the report.
  2. Location plan of the proposed development and likely receptor points such as the nearest residential window/s.
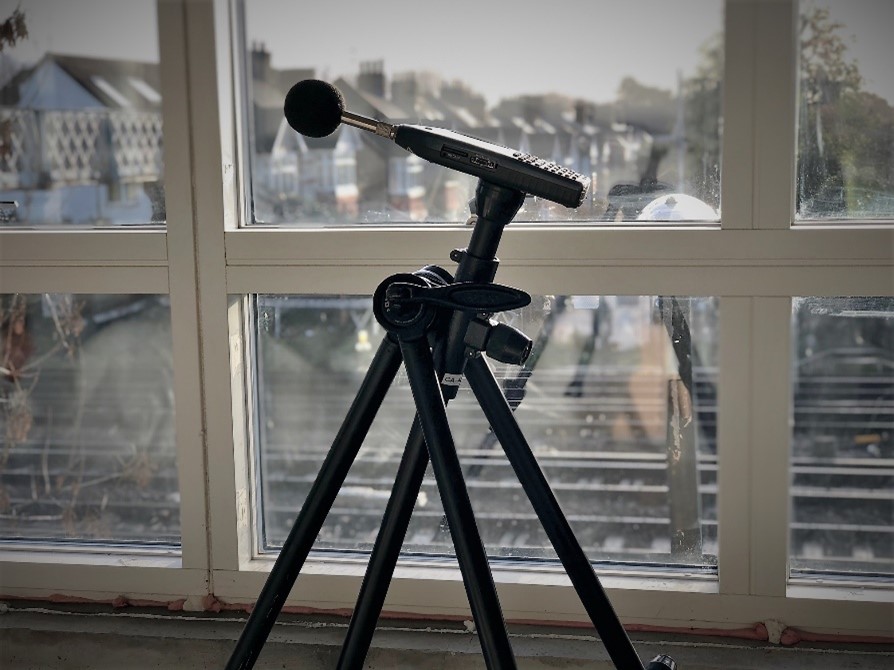
  3. The noise survey Methodology including the noise monitoring location, the equipment used and the weather conditions during the noise survey.
  4. Reasons for deviations from standard methods.
  5. Full table of results.
  6. A comparison of survey results against the noise standards.
  7. Recommendations for noise control measures – acoustic barriers etc.
  8. Full calculations against noise reductions expected to support any suggested noise control measures.

When is a noise survey and PPG24 report required?
A noise survey and PPG24 report may be required at the application stage or once planning
permission has been granted. A noise survey and report are required if:

• the proposed development with commercial areas that may create noise which may affect nearby noise sensitive properties. For example, a new commercial activity near existing residential properties.
• the proposed development positioning will be sensitive to noise and is likely to be affected by existing noise sources i.e. busy roads, railway, airports or commercial activity.

What is the noise Survey report for?
The noise survey report is to demonstrate that:

• the source of noise is evaluated and quantified
• nearby noise sensitive receptors identified
• noise receptors have been determined with reference to noise standards

The noise survey report (where required) will also set out control measures where it is necessary to reduce noise to acceptable levels. For example, the installation of different glazing e.g. from double to triple glazed panels or acoustic trickle vents are installed so that internal noise standards are met.

When should a noise survey report be submitted?
A noise survey report should be submitted during pre-application discussions or
more commonly during a planning application. In some circumstances, a planning condition will be included on the planning permission requiring the submission of a noise report.

As background noise surveys are usually carried out prior to completion of a development, compliance with any noise standards are demonstrated by calculation. However, the local authority may also request a post-completion noise survey assessment to prove that noise standards have been achieved.

APT is suitably qualified to carry out noise assessments and provide a noise survey reports
A noise survey must be carried out by a suitably qualified acoustic consultant. We have vast amount of experience and skill in dealing with noise surveys for the planning applications for all types of developments throughout the United Kingdom.

NEC Noise Exposure Categories (NECs)
There are four Noise Exposure Categories based on the level of noise at the development. The NEC in which the site falls determines to what extent noise should be considered in the granting of planning permission.


The NEC(s) for a development are usually determined by monitoring noise levels. Potential mitigation options can then be assessed by calculation, and/or the use of noise modelling. Appropriate noise mitigation can then be incorporated into the development at the design stage.


Planning is awash with often contradictory guidance in regards to noise. The standards, codes of practice do not precisely cover all aspects noise and the subsequent requirements. PPG24 tries to address this by the undertaking of noise surveys at the planning stage to assess the overall suitability of the site’s noise climate for residential development. With it comes the possibility of noise control measures being necessary as part of the planning.


Problems relating to noise during the planning stages can usually be avoided or resolved with a good, detailed and accurate acoustic assessment report. various mitigation measures.


We undertake accurate on-site noise assessments to suit the needs of a client’s problem and their pocket, and deliver concise and clear reports in a timescale which is again designed to suit the client. If there are problems with the noise levels, APT can propose various mitigation measures to help you comply with PPG24 or BS4142 noise surveys.


If you would like more information on noise surveys for your new development, then please contact us on 01525 303 905 or visit our website at: www.aptsoundtesting.co.uk

Improving Acoustics in Dwellings

Improving Acoustics in Dwellings

When designing a new project containing multiple dwellings, why go further than just meeting the basic regulations. For instance, if you only manage to achieve the minimum requirements for compliance with Building Regulations Part E for sound testing, then the chance of noise complaints will usually be higher than if you better it by 5-7dB.  

Sound Insulation Testing

Improving Acoustics in Dwellings
The World Health Organisation defines noise as ‘unwanted sound’ and such noise in buildings can have significant effects on the people (residents) who occupy them. If a person is subjected to excess noise for long periods, it can result in physical discomfort or mental distress and in many cases noise complaints. The WHO estimates that around 50% of the population of the European Union live in areas are exposed to noise levels that do not ensure acoustic comfort to their inhabitants and more than 30% are exposed to noise levels at night which is at a level disturbing to sleep this is simply not good enough.

Within homes, a noisy neighbour can be one of the main problems experienced in attached housing. It’s estimated that up to 4 million people in Britain have had their lives disturbed by noisy neighbours.

The best way to combat excess noise is to ensure that proper precautions are taken at the design stage of the project and thereafter during construction of the building. Noise transmission levels should be compatible with the building’s usage with the correct acoustic climate provided in each space.

The UK has the building regulations and a number of sector specific guidance documents covering noise, these are:

  • Approved Document E
  • Building Bulletin 93
  • Health Technical Memorandum 08-01
  • BS8233
  • BS4142

There are strong arguments for considering solutions which go above and beyond just meeting the minimum requirements in the above regulations. For instance using acoustic ceiling products and partition systems it is possible to create environments that offer greater acoustic comfort for occupants go above and beyond the standard Building Regulations requirements, which should have a positive impact on health, well-being and productivity.

Firstly, get advice on acoustic design before starting construction. The most effective way to ensure you improve the acoustics on your project and pass your sound test at the first attempt is to plan your project with sound insulation in mind. This does not need to be costly, and can save considerable time and cost at the end of the project, by reducing the chance of needing to undertake remedial works and re-testing.

The two main areas to take into consideration are usually the dividing wall and floor partitions. If you are unsure of how to build the separating wall and floor partitions and associated junctions across your project don’t panic, we can offer an acoustic design service. The degree of guidance you require can vary from site to site; however, we can cater for every eventuality by offering sample sound testing to establish the sound insulation performance of your existing wall and floors. Thereafter we can undertake more targeted design review using the information at hand.

When your project is underway, we can visit site and check the construction is being constructed as designed. Even minor alterations can have a significant impact on the effectiveness of your sound insulation measures.

If you have a new project and you need help with your acoustic design and/or sound testing then please email us at: info@aptsoundtesting.co.uk  or call us on 01525 303905. If you want more information on our full range of services please visit our website at: www.aptsoundtesting.co.uk

If you would like to download more information on how to prepare for your sound testing, please click download our sound testing checklist.

Sound Testing Services for London  & the UK

Sound Testing Services for London  & the UK

London is a massive UK city containing over 5 million properties. In this overcrowded environment, it is essential that noise transference between properties in kept to an absolute minimum for the occupant’s well-being.

APT Sound Testing Services undertake UKAS accredited Part E sound testing throughout London and the UK. We have extensive knowledge regarding the way different materials and construction methods can influence the results of a sound test, to ensure your company achieves complies with Sound Testing Regulations Part E.

Sound Testing Services

APT Sound Testing Services
Pre-completion sound testing under part E has been a mandatory requirement since July 2003. All new build properties and conversions which were built after this date require 10% of each party wall/floor construction type to be tested. Sound Testing is to be carried out between pairs of rooms separated by party walls or floors. In usual circumstances, the room/s to be sound tested will be the living rooms and bedrooms, which are classed as the two main habitable rooms.

The sound test procedure involves setting up a noise source in a room on one side of the party wall or floor and measuring the noise on both sides of the partition.

Airborne sound tests may also be required between horizontally and vertically separated pairs of rooms. The sound tests are undertaken by using a sound source, amplifier and loudspeaker to generate a high noise level in one room (the source room). Noise measurements are then taken in both the source and receiver rooms using a prescribed number of source and microphone positions. The background levels in the receiver room are measured and the reverberation time in the receiver room is also measured. From the results, the airborne sound insulation (DnT,w + Ctr) is calculated and compared to the requirements of Approved Document E.

For vertically separated rooms, an Impact sound test may also be required. This sound test is undertaken using a tapping machine which drops a series of weights onto the floor of the upper room. The noise level in the lower (receiver) room is measured for a prescribed number of source and microphone locations. The background levels in the receiver room are measured and the reverberation time in the receiver room is also measured. From the results, the impact sound insulation (LnT,w) is calculated and compared to the requirements of Approved Document E.

UKAS Accredited Sound Testing
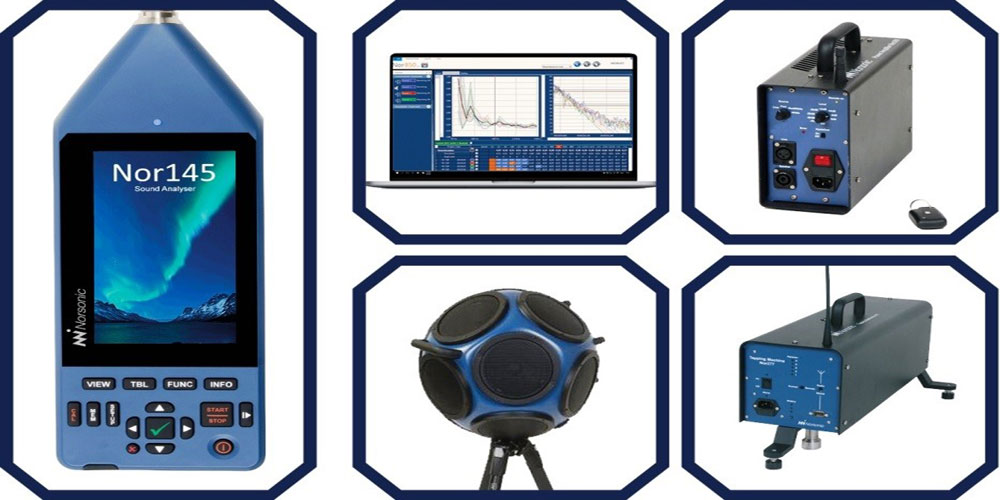
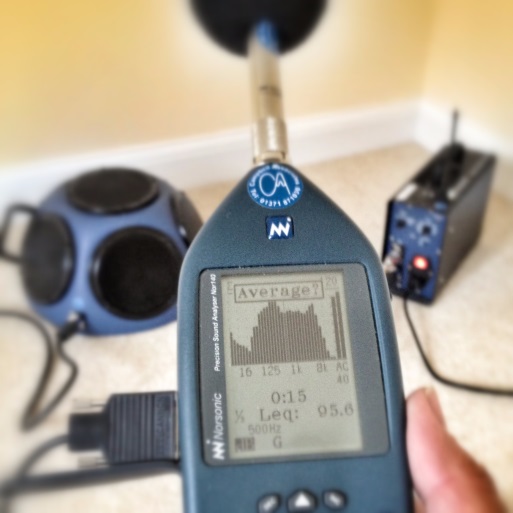
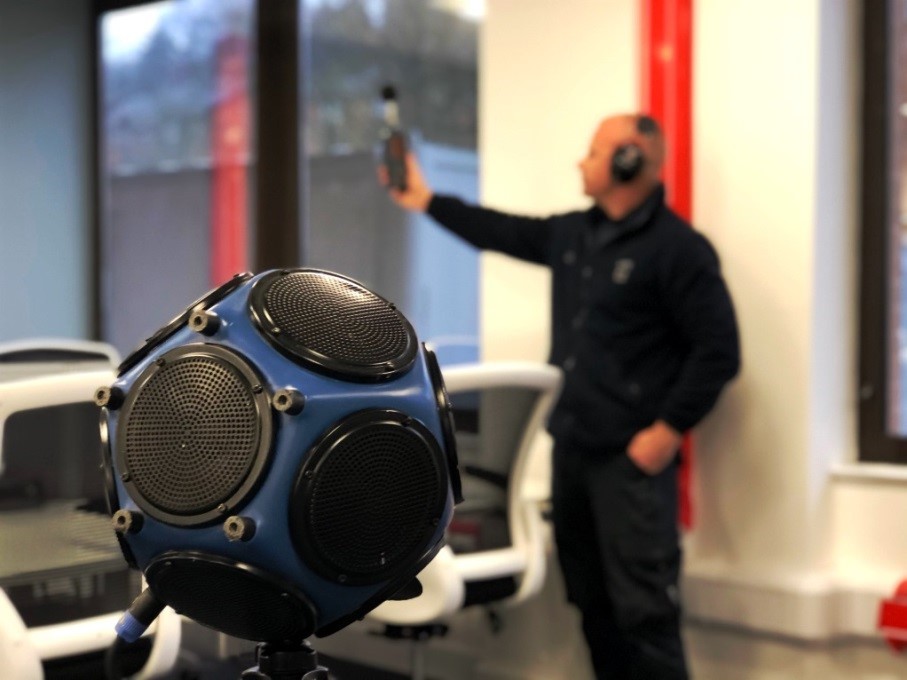
Our sound test engineers carry all the latest Norsonic equipment, which are class one rating and all of our acoustic testing/sound testing, is completed to a strict quality controlled standard. We provide full UKAS Accredited sound testing.

Pre-completion sound testing is generally carried out at the request of the Building Control Officer. The guidance contained within Approved Document E gives detailed recommendations for the partitions to be tested and for the number of sound tests that should be carried out. We recommend that the proposed sound testing is agreed in advance with the Building Control Officer prior to the London sound testing.

We can undertake both acoustic airborne sound testing to allow for speech, television etc, and impact sound testing to allow for footfall etc. This is in accordance with the requirements of Approved Document E of The Building Regulations and the relevant European and International standards.

The testing methods for airborne and impact sound insulation testing in London are in full accordance with: the suggested methods presented in BS EN ISO 140-parts 4 and 7: 1998.

If you are in the construction stage of a new project and are not sure if your design will pass the building regulations then visit our Sound Testing Services website and we will check your acoustic design and offer advice (if required) for the wall or/and floor partitions. Alternatively, if you require sound testing for your London project please contact us now on 01525 303 905.

Sound Insulation Testing on London Developments

Sound Insulation Testing on London Developments

London is a huge city containing over 8 million people. In this crowded environment it is essential that noise transference between properties in kept to a minimum between new and existing buildings for the occupant’s wellbeing.

To help control noise issues APT Sound Testing undertakes UKAS accredited Part E sound throughout London and the South East. When there are problems with noise transference between dwellings, and the building’s design is called into question we can offer advice on how to upgrade the wall and/or wall partition.

Sound Testing

We has extensive knowledge regarding the way different materials and construction methods can influence the results of a sound test, this helps to ensure to ensure your company achieves compliance with the Sound Testing for Part E of Building Regulations.

Sound Testing Services in London
Pre completion sound testing in London has been a mandatory requirement since July 2003. All new build properties and conversions which were built after this date require 10% of each party wall/floor construction type to be tested. Sound insulation testing is to be carried out between pairs of rooms separated by party walls and/or floors. In is usual to test between living rooms and bedrooms, which are classed as the two main habitable rooms; however, other rooms can be used if this is not possible.

We are also experiencing a rise in the amount of sound testing that’s required to existing London buildings. We have carried out a large amount of sound tests in council/housing association blocks, where the residents are experiencing excess noise between the dividing wall and floor partitions. We also undertake sound testing to existing flats where the lease stipulates that wooden floors should not be used instead of carpets and as a result the noise levels have increased through the floors. In all these instances we can undertake sound testing to highlight the existing noise levels so acoustic upgrades – if required) can be targeted and implemented.

Our test procedure involves setting up a noise source in a room on one side of the party wall or floor and measuring the noise on both sides of the partition. Airborne sound testing may also be required between horizontally and vertically separated pairs of rooms.

The sound insulation testing is undertaken by using a sound source, amplifier and loudspeaker to generate a high noise level in one room (the source room). Noise measurements are then taken in both the source and receiver rooms using a prescribed number of source and microphone positions. The background levels in the receiver room are measured and the reverberation time in the receiver room is also measured. From the results, the airborne sound insulation (DnT,w + Ctr) is calculated and compared to the requirements of Approved Document E of Building Regulations.

For vertically separated rooms, Impact sound testing may also be required. This sound test is undertaken using a tapping machine which drops a series of weights onto the floor of the upper room. The noise level in the lower (receiver) room is measured for a prescribed number of source and microphone locations. The background levels in the receiver room are measured and the reverberation time in the receiver room is also measured. From the results, the impact sound insulation results (LnT,w) is calculated and compared to the requirements of Approved Document E of Building Regulations.

APT Sound Testing Services
Our sound test engineers carry all the latest Norsonic equipment, which are class one rating and all of our sound insulation testing, is completed to a strict quality controlled standard. We provide full UKAS Accredited sound insulation testing and air testing.

If you would like advice on your acoustic design or sound testing in London, please contact APT Sound Testing now on 01525 303905 or visit our Acoustic & Sound Testing Services website.

Improving Sound Insulation in Floors

Improving Sound Insulation in Floors

If you have experienced excess noise from your neighbours above you, you will know the stress that accompanies of domestic noise pollution. On new properties the Building Regulations set out clear requirements for soundproofing, which can reduce – but not eradicate – excess noise through floors. Unfortunately, on old conversion properties, sound insulation wasn’t a priority, which has led to excess noise pollution for millions of households and by modern standards a sound testing floor failure.

Most original dividing floors (pre-2004) are not built with acoustics in mind. Most existing floors without recent acoustic upgrades, will usually achieve 30-35dB for airborne sound and 66-74dB for Impact Sound. Obviously, these figures fall well short of the minimum requirements of Approved Document E, which requires a 43dB & 64dB sound insulation reduction.

Many existing floors are constructed from 200mm x 50mm wooden joists, with a 20mm existing floorboard directly fixed to the top of the joists and a single later of plasterboard/lathe and plaster below the joists – as shown in Plate A below.

Plate A – a picture of an existing floor partition with poor sound insulation

Sound Insulation in Floors

Typical reasons for sound test failures through floors

There are many reasons for floors having poor sound insulation values, and noise flanking is often one of the main culprits. Here are 10 common reasons for noise flanking through floors in new and converted properties.

  1. Where lightweight blocks have been used in the inner envelope construction. This allows sound to travel along the lightweight blocks both vertically and horizontally from dwelling to dwelling.
  2. Bridging an acoustic floor system with skirting, or via screwing down the floor system directly to the joists.
  3. Resilient bars missing or fitted incorrectly to the underside of the floor joists, i.e. screw that are too long.  
  4. Excess recessed lights have been fitted into an acoustic ceiling, without incorporating acoustic socks to the top of the light or an extra plasterboard lining above.
  1. Not using the correct acoustic insulation, in our experience the minimum mass of the acoustic insulation should be 60kg/m3.
  2. The direct fixing of plasterboard and/or floorboards to joists without using a resilient membrane to improve isolation values.
  3. Through continuous windows that are not secondary glazing that run vertically through dwellings, such as an office and/or church conversions.
  4. Along structural joints along the perimeter wall and floor joint. These areas should be filled with acoustic mastic)
  5. Structural steels that run through one property to the other without material isolation, i.e., plasterboard is screwed directly to the steel offering little or no noise isolation.
  6. Service penetrations/pipework which run continuously through separate properties without having adequate boxing, such as kitchen and bathroom services.

Plate B – Our Sound Testing Equipment

Sound Insulation in Floors

Our 3-step plan to reduce noise through floor partitions

If your floor partition is letting through too much noise don’t panic, we can offer our 3-step plan to help you reduce noise in your property.

  1. Sample Sound Insulation Testing (pre-construction works)

We visit site to undertake sample sound testing to your existing floor partition to check ascertain the sound insulation performance of the floor. Thereafter, once the sound levels have been established and targeted acoustic design can be undertaken to ensure compliance with Building Regulations Part E.

  • Acoustic Review of your Project. 

We undertake an acoustic design review and produce a report of the required acoustic upgrades required to improve the sound insulation performance of the floor partition. and detailing. Wherever possible we will try to ensure that the acoustic solution is straightforward to install for the installation teams.

  • Precompletion Sound Testing (post construction works)

We undertake the final precompletion testing to ensure the acoustic design and installation have improved the sound insulation values of the floor partition.

A simple acoustic upgrade to improve sound insulation in floors.

There are many quick and simple solutions to improve the sound insulation performance in floors. One of the easiest acoustic upgrades is to retain the existing joists, between the joists install a 100mm RW60 acoustic insulation. Above the joists install 22mm T&G boarding with a 6mm resilient membrane bonded to the top of the T&G board. The top of the floor can then be finished with engineered flooring and/or carpet. Below the joists install resilient bars, ensuring the correct length screws have been used in the installation. Below the resilient bars install 2 layers of 15mm soundboard – ensure all boards are properly lapped, and the perimeter joints (usually 5mm) are filled with acoustic mastic. Also ensure all service boxing has two layers of 15mm board and SVP pipes etc, are wrapped in acoustic wool.

Plate C – A picture of APT acoustic engineer undertaking party floor sound testing.

Sound Insulation in Floors

We can help improve your sound insulation.

We can help upgrade the sound insulation in your home. Using our many years of experience in building acoustics, we can offer a total acoustic party floor solution for new and conversion projects. We have previously helped hundreds of architects and developers with their acoustic design and testing requirements on projects ranging from a couple of units, up to apartment blocks containing hundreds of flats. Using our experience and knowledge, we always try to provide the best solution considering material costs and on-site buildability.

To improve the sound in insulation in floors, you need to conder improving/introducing the following 5 elements to the floor design and construction:

  • Adding Mass
  • Introducing Isolation
  • Adding Absorption
  • Introducing Resilience
  • Adding Stiffness

APT acoustic engineer undertaking party floor sound testing in London.

How APT Sound Testing can help 

APT provides acoustic testing, consultancy to help home owners, architects and developers achieve the minimum requirements of Part E of new build and/or conversion projects. We also carry out our specialist Lease Condition sound testing where specific sound reduction requirements are required.

We can propose various designs accounting for:

Where possible we try to propose an off the shelf solution, which is often the cheapest option. Many other companies will try to push a bespoke ‘specialist’ solution that is often much more expensive and more difficult to install. We are also a UKAS accredited company, so you can be sure of a friendly and professional service providing a ‘one stop’ solution for all your acoustic requirements.

If you would like more information in regards to sound testing service and/or acoustic design services please contact us on 01525 303905 or email us at info@aptsoundtesting.co.uk, or for more information please visit our website at www.aptsoundtesting.co.uk

Why We Carry Out Air Tightness Testing

Why We Carry Out Air Tightness Testing

Air leakage is a major issue for homeowners, especially in light of the rising heating and cooling costs across the UK and Europe. Air leakage can lead to higher energy consumption, higher carbon emissions and indoor air quality issues this is where air tightness testing can play its part.

Air tightness testing is a technique that can be used to quantify the amount of air leakage of a building fabric. The air tightness test measures the rate of air leakage through a building fabric by pressurising or depressurising a building and measuring the difference in pressure across different sections of wall, floor and roof. By reducing air leakage in newbuild/existing homes, you can lower your heating bills by up to 30%.

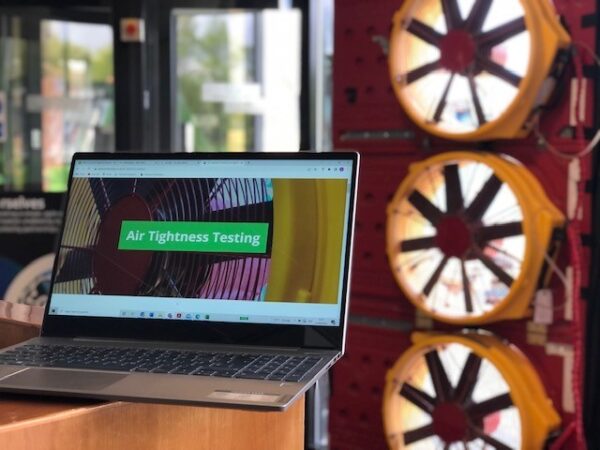
Our equipment for undertaking commercial air tightness testing.

Air Tightness Testing

Lowering Air Leakage in Homes

Lowering air leakage in homes is Faily straight forward. Firstly, it is important to identify the location of the air leakage, this can be undertaken via a smoke leakage survey which details each air leakage paths within the building envelope. Thereafter, the air leakage paths can be sealed to lower the air leakage rate of building. Combined air tightness and smoke testing is especially useful for identifying leaks in large buildings with lots of M&E etc. as it identifies areas in hard to reach areas such as structural steels penetrating the envelope etc.

Air tightness testing is no evasive and low impact.

Air tightness testing is a non-invasive technique, that is a quick and very low impact as the equipment simply fits into an existing door opening, we do not fix anything to the building itself. Also, to help client get ready for their air tightness test, we always send out our informative checklist to them prepare for the testing. Please download our air tightness checklist for more information on how to prepare your building for the air tightness test.

How is an air tightness test carried out?

Our blower door fan system mounts into a standard size door-sized housing (900mm x 2000mm) which is then adjusted to suit the size of the door frame. We then set up the blower door equipment as follows.

  1. Firstly, we check the main areas are temporarily sealed such as AC/HVAC intake and exhaust grills, kitchen, utility and bathroom extract fans, relief dampers, etc. 
  2. We find a suitable doorway to temporarily install our blower door fan system (depending on building size).
  3. We then record the first series of environmental measurements such as internal and external temperatures as well as barometric pressures and internal and external temperatures.
  4. We turn on the fan equipment and take measurements between 25-70Pa in 5Pa increments, recording the pressure differential at each step.
  5. We then record the second set of environmental measurements.
  6. Finally, our air test engineers calculate the total air flow required to achieve a pressure differential of 50 Pa, divided by the total building envelope area – this calculation will show leakage rate in m³/h.m² @ 50 Pa.
  7. If a building fails the air tightness test, we pressurise the building (blows air into) to around 50 pascals of pressure. This forces air to flow through cracks or air leakage paths throughout the building envelope.
  8. We turn on our smoke machine and walk around the house or commercial building, highlighting, and recording all the air leakage paths through the building envelope and a report is sent across to our client detailing the air leakage paths.
  9. For a large commercial air test, we install a large fan panel across the doorway of the building, this usually houses 3 high power blower door fans; however, the above process is similar for both commercial and residential testing.

smoke machine for highlighting air leakage paths in buildings

smoke machine

What’s a good level of air tightness for my project?

With many existing Victorian houses or commercial buildings, the air leakage can be as high as 15m3/hr/m2, which is very poor when you consider a high percentage of new dwellings are getting between 3 to 5m3/hr.m2, and many commercial buildings below 3m3/hr/m2. So, what’s a “good” level of airtightness for your building? Well, for houses that don’t have mechanical ventilation, a good air tightness target would be between 3-5m3/hr/m2. For a dwelling with mechanical ventilation its best if your figure is below 3m3/hr/m2.

Why is excess Air Leakage an issue? 

There are many reasons poor air tightness can be problematic, such as Excess air leakage through the building envelope causes energy to be consumed when replacement air is conditioned, either via cooling or heating.

  • Large penetrations – especially at low level can cause the ingress of rodents such as mice and rats.
  • Excess draughts, through the building can badly affect the occupiers of the dwellings and commercial buildings such as offices. If cold damp air is blowing into the building it can be uncomfortable in both hot and cold weather.
  • Excess air leakage can lead to condensation issues, as the air can blow through the floors, walls, and ceilings and usually contains water vapour, these uncontrolled air leaks can cause condensation, mould, and rot issues.
  • Large amount of air leakage can bring polluted/toxic outdoor air into a building from, for example, buy main road, fuel garage, bins, restaurants, or external ventilation. Any uncontrolled air that enters a building is often loaded with pollutants, especially if you are close to a main road etc.
  • Excess noise pollution

What is the building envelope?

The building envelope, or enclosure as its also known is all of the elements of the outer shell that maintain a dry, heated, or cooled indoor environment and facilitate its climate control, i.e., heating and cooling. The main elements of the building envelope are the floor, walls and roof. This also includes window and doors.

A robust air seal line with help air tightness

Many companies don’t fully understand the importance of the air seal line in regard to air tightness. The air seal line is usually the building envelope; however, this is not always the case. In many instances buildings may have plant rooms where are heavily vented to outside atmosphere, in these instances the air leakage line will be the internal wall that divides the plant room from the rest of the dwelling.

There are many reasons why the air leakage line fails, this can be down to the incorrect sequencing of construction work, such as the late addition of mechanical and electrical pipework & cables just prior to the air test which introduces additional penetrations through the newly completed building fabric, leading to air tightness test failure.

A large air leakage path under the sink

air leakage path


Employ an air tightness champion

By employing an air tightness champion at the beginning of the project, you will have a far higher change of passing the air tightness test at the first attempt. The Airtightness Champion will usually be tasked with the coordination between subcontractors and the design team.

The airtightness champion, will also undertake the following site tasks:

  • Subcontractor toolbox talks: Brief the construction team of the importance of airtightness and their collective role in achieving it.
  • Clearly identify the location of the air barrier within the building envelope.
  • Monitor the quality of site works, by instituting a regimen of inspection during construction, with particular regard to ensuring the air barrier is uncompromised by shoddy workmanship.
  • Organising intermediate airtightness tests during construction and make trades aware of the importance of good air tightness.
  • Ensure that the air barrier is complete prior to covering up by other work and trades, such as the installation of kitchen cupboards over service penetrations, which can lead to expensive uncovering and remedial work.
  • Ensure that final checks are made to the building prior to booking in the air tightness test.
  • Ensure that air tightness testing is scheduled well advance to achieve maximum benefit for purposes of remedial work to prevent delays in handover.

Improving air tightness by identifying leaks

At Air Pressure Testing, we are happy to provide you with general air leakage design advice for your building envelope and onsite guidance, using our vast amount of knowledge as a UKAS testing laboratory, we can quickly ascertain the most common air leakage paths such as:

  • Behind kitchen units.
  • Behind Utility Cupboards
  • Around Boiler Cupboards
  • Gaps between skirting board and floor on each floor level.
  • Around External Windows and Doors
  • Around poorly fitted trickle vents.
  • Around Patio doors.
  • Gaps around the stairs.
  • Around loft hatch.
  • Gaps around the shower trays and bath panels

APT Sound testing can help you pass your air tightness test!

We provide advice and guidance on how to pass your air leakage test at the first attempt. We are happy to provide you with general air leakage design advice for your building envelope and onsite guidance. Upon completion of your project, we provide Nationwide UKAS Accredited Tightness Testing for domestic and commercial buildings to help you demonstrate Building Regulation Part L Compliance.

Please download our air tightness checklist for more information on how to prepare your building for the air tightness test or contact us on 01525 303905 or info@airpressuretesting.net  

Air Tightness Testing Services

Air Tightness Testing Services

APT Sound Testing – Our Air Tightness Testing Service

Air tightness testing, also known as blower door testing, is the process of measuring the amount of air leakage from a building through the building envelope. To try and help our clients better understand and prepare for their air tightness testing, we have tried to explain and answer our customer’s most common questions. For more information on our air tightness testing services you can also visit our Services Page.

What is Air Tightness Testing for Building Regulations?

Air testing is mandatory in the United Kingdom and is governed by Part L of the Building Regulations, this split into two parts; for domestic properties Part L1A should be used and for commercial properties Part L2A should be referenced.

Building Regulations Part L states air tightness testing should be carried to check the air leakage that occurs through a buildings envelope. The air leakage test checks the amount of air that escapes through gaps or air leakage paths through the building fabric. If the building is more air tight, less energy will be being needlessly lost, thus lowering the carbon emissions of the building. Air testing also shows how efficient a building is at retaining conditioned air which will also put less straight on your mechanical and ventilation system. Failing to maintain adequate air tightness can lead to up to 50% of heat loss from within a building to the outside atmosphere.

Air Tightness Testing

What air leakage target do I need to achieve?

Most new dwellings and commercial buildings need to achieve an air leakage of 3m3/hr/m2 to 5m3/hm2, this rate would usually be acceptable by building control and your SAP assessor as an acceptable result, although you need to check each your designed SAP assessment as there may be items within your buildings design that that may affect this figure.

How long does the air test take?

Most air tightness tests can be completed in 1-2 hours if they pass straight away; however, tests can take much longer if they initially fail. It usually speeds up the process if customs prepare their buildings in-line with our air tightness checklist as its means we can start the testing as soon as we arrive on site instead of waiting for the client to tape up areas, or make upgrades to the building envelope.  We also offer a smoke testing service to locate the air leakage paths within a building envelope which can also take extra time; however this often allows our clients to seal and pass their building at the first attempt even if their building initially fails the air test.

Air tightness testing

How do you undertake an air tightness test?

The air tightness test is undertaken in-line with Building Regulations Part L1 & L2 and ATTMA TS1 & TS2. Basically we measure the pressure differential across the envelope of the building by means of the temporarily installation of a large fan inside a door panel. Thereafter, a range of static pressures and environmental readings are taken. The fan is switched on and the air pressure in the property is gradually increased or decreased and the differential pressure is recorded at each step, usually from 25 Pa to 70 Pa. The total air flow required to achieve a pressure differential of 50 Pa is calculated and divided by the total building envelope area to provide the leakage rate in m3/h.m2@50Pa.

How do I prepare my building for the air test?

The more complete you’re building the more chance you have of passing the air tightness test at the first attempt. We send our and air test checklist with every quotation to help our client prepare for the testing. It is our aim to help clients pass their air test at the first attempt.

Basically you prepare the building in-line with our checklists and the items below, you will generally have a much better chance of passing the testing at the first attempt.

  1. The building envelope should be fully complete; this includes walls, floors and ceilings.
  2. All doors and windows must be fully fitted and able to shut tightly against their seals.
  3. All electric fittings must be installed and functional.
  4. All mechanical fittings must be installed and functional.
  5. Gaps within walls and floors must be sealed.
  6. All service penetrations must be fully sealed through the building envelope. 
  7. Bathrooms and kitchens must be fully fitted and all service penetrations sealed.
  8. All mechanical ventilation turned off with grilles sealed.
  9. All trickle vents to windows and doors must be sealed.
  10. All fireplaces must be sealed.
  11. Ensure water is present in soil pipes.
  12. 240v power must be available on site.

Whether you need air tightness test please contact us on info@aptsoundtesting.co.uk  to obtain a no obligation quote. If you need more information on how to prepare your building for the air test please download our air tightness testing checklist. 

Alternately, please visit our website at www.aptsoundtesting.co.uk, for more information on our precompletion testing services

Sound Testing Services in London

Sound Testing Services in London

London is a massive city containing over 5 million properties. In this overcrowded environment it is essential that noise transference between properties in kept to an absolute minimum for the occupant’s wellbeing.

We undertake UKAS accredited Part E sound throughout London. We have extensive knowledge regarding the way different materials and construction methods can influence the results of a sound test, to ensure your company achieves complies with Sound Testing Regulations Part E.

Sound Testing Services

Sound Testing Services
Pre completion sound testing under part E has been a mandatory requirement since July 2003. All new build properties and conversions which were built after this date require 10% of each party wall/floor construction type to be tested. Sound Testing is to be carried out between pairs of rooms separated by party walls or floors. In usual circumstances, the room/s to be sound tested will be the living rooms and bedrooms, which are classed as the two main habitable rooms.

The sound test procedure involves setting up a noise source in a room on one side of the party wall or floor and measuring the noise on both sides of the partition.

Airborne sound tests may also be required between horizontally and vertically separated pairs of rooms. The sound tests are undertaken by using a sound source, amplifier and loudspeaker to generate a high noise level in one room (the source room). Noise measurements are then taken in both the source and receiver rooms using a prescribed number of source and microphone positions. The background levels in the receiver room are measured and the reverberation time in the receiver room is also measured. From the results, the airborne sound insulation (DnT,w + Ctr) is calculated and compared to the requirements of Approved Document E.

For vertically separated rooms, an Impact sound test may also be required. This sound test is undertaken using a tapping machine which drops a series of weights onto the floor of the upper room. The noise level in the lower (receiver) room is measured for a prescribed number of source and microphone locations. The background levels in the receiver room are measured and the reverberation time in the receiver room is also measured. From the results, the impact sound insulation (LnT,w) is calculated and compared to the requirements of Approved Document E.

Our sound test engineers carry all the latest Norsonic equipment, which are class one rating and all of our acoustic testing/sound testing, is completed to a strict quality controlled standard. We provide full UKAS Accredited sound testing.

Pre-completion sound testing is generally carried out at the request of the Building Control Officer. The guidance contained within Approved Document E gives detailed recommendations for the partitions to be tested and for the number of sound tests that should be carried out.

We recommend that the proposed sound testing is agreed in advance with the Building Control Officer prior to the London sound testing.

We can undertake both acoustic airborne sound testing to allow for speech, television etc, and impact sound testing to allow for footfall etc. This is in accordance with the requirements of Approved Document E of The Building Regulations and the relevant European and International standards.

The testing methods for airborne and impact sound insulation testing in London are in full accordance with: the suggested methods presented in BS EN ISO 140-parts 4 and 7: 1998.

If you are in the construction stage of a new project and are not sure if your design will pass the building regulations then contact us at info@airpressuretesting.net and we will check your acoustic design and offer advice (if required) for the wall or/and floor partitions. Alternatively if you require sound testing for your London project please contact APT Sound Testing services today on 01525 303 905.

What is an Electrical Thermal Imaging Survey?

What is an Electrical Thermal Imaging Survey?

An Electrical thermal imaging survey is a non-evasive and non-destructive procedure using infrared technology.
Thermographic inspections are the only technique of work that is able to identify any electrical issues like the ones above, in a quick non-disruptive manor or to more precise safety standards. Not only is the thermal imaging fast and safe, it is also a great way to minimise costs as it allows defects to be detected before the equipment fails meaning you don’t need to pay out as much to get it fixed.

As infrared electrical inspections can spot faults before they occur, they can help to extend the life cycle of electrical equipment and identify energy savings for your industry. To try and help clients understand the what involved in a thermal imaging survey, please see our article: A Technical Explanation of Thermal Imaging Surveys.

Designing Buildings to Pass Sound Testing

What’s Involved in an Electrical Thermal Imaging Survey?
Thermal imaging is commonly used for inspections of electrical systems and components in all shapes and sizes. The use of thermography in any electrical installation can help identify faults before they occur, thereby preventing breakdowns, the need for replacement and even fires within the systems and buildings.

An electrical thermal imaging survey using a thermal imaging camera can be used on different types of equipment including:

• Busbar systems
• Distribution boards and fuse boards
• High voltage systems
• Transformers
• Control panels
• Batteries
• UPS systems
• Switchgears and switchboards


Using infrared technology on electrical infrastructure is a renowned method of predictive maintenance and done correctly it can be effective at fault finding prior to equipment failure but it needs to be carried out correctly. Our strict protocols ensure that the faults we document are indeed items that require investigation and possibly remedial work and not simply loaded circuits manifesting temperature.

Thermal imaging can help identify many potential failures such as:

• Poor Connections – Thermal imaging can detect the problems of a poor electrical connection early, the same goes for instances where the electrical cabinets may be overloaded.
• Electrical Leakage – Thermal imaging Surveys are able to find any evidence of a leak happening, in time for you to undertake remedial to preventing possible harm to you and damage to your building/s.
• Insulator Defects – Using thermography you can be protected from the dangerous parts of electricity, ensuring insulators are working properly.
• Internal Fuse Damage – Helps to prevent the risk of a fuse blowing, from an extensive current flowing through it.
• Oxidation of High Voltage Switches – thermography helps highlight potential resistance between connectors, enabling you to finding the problem before it occurs

Our Electrical Inspections involve:

• All panels removed where acceptable, safe to do so and on the Permit to Work
• All electrical equipment/panels/cubicles etc inspected have their own individual trend page which includes a thermogram and digital image, ambient, measured and delta T trending of temperature
• Trending compares data automatically between inspections. Last four thermograms are included on each page and all trend data is captured and displayed in a table and also in graphical format for Measured, Ambient and Delta T (meas/Amb) to allow for condition monitoring of equipment.

Detailed thermal imaging Fault Reports
Our detailed thrmal imaging reports contain fault pages that include a load correction formula is utilised during the inspection. Using component rating, actual load, measured temp and ambient temp, the following values are produced:
• Load corr temp: estimate of component temp if operating at 100% load
• Fault severity based on load corr temp – ref temp (from BS7671)
• Estimation of maximum amps to apply whilst keeping temperature beneath reference temp (BS7671)
• Instant report generation which can be emailed to the client at the end of the inspection

Why use a Level 3 Thermography Engineer on your electrical survey
The importance of using one of our Level 3 trained thermographers cannot be understated as they are trained to be write predictive maintenance and inspection practices and to develop test procedures and ascertain severity criteria. To try and help clients prepare for the thermal imaging survey to their building, we have written the following article: How we carry our thermal Surveys on commercial buildings.

To try and help facility managers with their electrical and mechanical surveys, we have also written the following article: thermal imaging inspections for facilities management. Also, throughout the UK BREEAM projects are becoming more common place.

BREEAM provides extra points to projects that have a BREEAM Thermal survey undertaken, as not many clients are aware of this, we have included more information in our article ‘What is a BREEAM thermal Imaging Survey’. Also to try and help clients prepare for their survey please download our Thermal Imaging Checklist.

APT Sound Testing use the latest high resolution thermal imaging cameras to undertake our Thermographic Surveys throughout London and the Southeast. Thermal imaging is one the quickest and easiest ways to undertake fault diagnosis on your buildings, as thermography can quickly and accurately identify building faults and a easy to follow report, so the defects can be quickly indented and rectified by the contractors.


We pride ourselves on offering a proactive service from start to finish. We have extensive experience of assessing thermal performance on many electrical systems on all types of buildings from commercial launderettes, right through to large power stations.


If you would like more information in regards to Thermography Surveys in London, please contact us now at: info@aptthermography.net or call us direct at: 01525 303 905

Sound Insulation Testing Terminology

Sound Insulation Testing Terminology

Sound Insulation Testing Terminology
Developers and landlords may need to improve sound insulation over a wide range of houses and flats. This may be due to the fact they have just built a new development that requires sound insulation testing under Part E or as part of a general refurbishment program, i.e. changing houses into flats.

Sound Insulation Testing

Describing Sound Insulation Testing

Often confusion can arise from the large amount of ‘terms’ used in conjunction with acoustic design and sound insulation testing. To help with this we have made a list of the following terms for clarity:

Absorption
This is the conversion of sound energy into heat, often by the use of a porous material.

Absorbent Material
This is a material that absorbs sound energy, such as acoustic mineral wool.

Airborne sound
This is sound which is propagated from a noise source through the medium of air. Examples of these are speech and sound from a television

Airborne Sound Transmission
This is direct transmission of airborne sound through walls or floors. When sound energy is created in a room, for instance by conversation, some of the energy is reflected or absorbed by room surfaces but some may set up vibrations in the walls and floor. Depending on both the amount of energy and the type of construction, this can result in sound being transmitted to adjacent parts of the building.

Air Path
This is a void in construction elements, which adversely affects the performance of sound resisting construction. Examples of air paths include incomplete mortar joints, porous building materials, gaps around pipes and shrinkage cracks – this can also effect the air tightness results.

Bonded resilient cover
This is a thin resilient floor covering normally of minimum 3-5mm thickness, which is bonded to the isolated screed surface to reduce impact sound transmission such as footfall noise, however it has a lesser effect when it comes to airborne noise.

Cavity stop
This is a proprietary product or material such as mineral wool (fibre) used to close the gap in a cavity wall.

Composite Resilient Batten
This is composed of a timber batten with a pre-bonded resilient material to provide isolation between the flooring surface layers and floor base.

Cradle/Saddle
This is an intermediate support system (with a resilient layer base, either pre-bonded or already integral) using levelling packer pieces to support a timber batten, isolating it from the floor base.

Decibel (dB)
This is the unit used for different acoustic quantities to indicate the level with respect to a reference level.

Density (kg/m3)
This is the mass per unit volume, expressed in kilograms per cubic metre (kg/m3). Blockwork is commonly referred to by industry in terms of strength (in Newtons). However, it is the density that has the important role in terms of sound insulation.

Direct transmission refers to the path of either airborne or impact sound through elements of construction.

DnT,w
This is the weighted standardized level difference. A single-number quantity (weighted) which characterises the airborne sound insulation between two rooms, in accordance with BS EN ISO 717-1:1997

Façade Testing
This Standard – ISO 140-5:1998) specifies the testing methods to evaluate the sound insulation in buildings and building elements for facades. Three rounds of a proficiency testing scheme for airborne sound insulation measurements have been performed according to the methods specified in the standard for a whole facade by using an external loudspeaker as the noise source.

Flanking element (flanking wall)
This is any building element that contributes to the airborne sound or impact transmission between rooms in a building which is not the direct separating element (i.e. not the separating wall or separating floor).

Flanking strip or edge strip
This is a resilient strip using foamed polyethylene normally 5 mm thick, which is located at the perimeter of a floor to isolate the floor boards from the walls and skirtings.

Flanking transmission
This is airborne or impact transmission between rooms that is transmitted via flanking elements and/or flanking elements in conjunction with the main separating elements. An example of a flanking element is the inner leaf of an external wall that connects to the separating ‘core’ of a wall or floor.

Flexible closer
This is a flexible cavity stop or cavity barrier which seals the air path in cavities linking adjoining dwellings.

Floating floor treatment (FFT)
This is a timber floating floor system which may use battens, cradles or platform base, all of which use a resilient layer to provide isolation from the base floor and adjacent wall elements.

Gypsum based plasterboard
This is a dry lining board applied to walls, ceilings and within floating floor treatments which has gypsum content. It may also have fibre reinforcement within the board.

Impact sound
This is sound which is propagated from a noise source through a direct medium. An example of this is footfall on a floor.

Impact sound transmission
This is sound which is spread from an impact noise source in direct contact with a building element.

Isolation
This is a strategy to limit the number and type of rigid connections between elements of construction.

L’nT,w
This is the weighted standardized impact sound pressure level. A single-number quantity (weighted) to characterise the impact sound insulation of floors, in accordance with BS EN ISO 717-2: 1997.

Mass
This is a physical quantity that expresses the amount of matter in a body. Walls and floors may be described in terms of the surface density (mass per unit area, kg/m2) of the wall face or the floor surface, which is the sum of the surface densities of each component of the construction. The density of materials is expressed as mass per unit volume, kg/m3, which can be provided via the core structure and linings such as in-situ concrete or solid dense block walls.

Mass per unit area (or surface density)
This is is expressed in terms of kilograms per square metre (kg/m2). This is often used to describe boards, panels, flooring and dry linings (see gypsum based board).

Resilience
This can reduce structural vibration transmission and still maintain material performance and overall dimensions, examples include floating floor treatments such as resilient battens or cradles, or resilient ceiling bars.

Resilient ceiling bars
This acoustic solution is generally metal based and vary in thickness from 11 mm to 30 mm. They are mounted perpendicular to the joist span direction and can increase both airborne and impact sound insulation. Care should be taken to ensure that the ceiling board fixings into the resilient bar do not come into contact with the joists and reduce the potential performance.

Resilient noggin
This is a small section of resilient ceiling bar which is used to assist in bracing non load bearing partitions.

Rw
This is a single-number quantity (weighted) which characterises the airborne sound insulation of a building element from measurements undertaken in a laboratory, in accordance with BS EN ISO 717-1: 1997

Sound Insulation Testing
Sound Insulation Testing is required near the end of a development to show that the performance of the party wall and floor partitions meet the standards as stipulated in Building Regulations Approved Document E. The testing methods for airborne and impact sound insulation is in full accordance with the suggested methods presented in BS EN ISO 140-parts 4 & 7: 1998.

Stiffness
This is can improve low frequency sound insulation, for example in floors, by reducing the potential for deflection or movement of the primary structure, therefore the correct spacing and depth of joists is important. If you have a project that requires acoustic design and/or sound insulation testing please let us know. APT Sound Testing will ensure you will have direct contact with the allocated acoustician from the start of the process, through to the successful completion of the sound insulation testing. 

If you would like more information in regards to acoustic services, please contact us at info@aptsoundtesting.co.uk, call 01525 303905 or visit our website at: www.aptsoundtesting.co.uk