Author: admin

Why Have I Failed my Sound Insulation Test?

Why Have I Failed my Sound Insulation Test?

This is one of the most common questions we get asked by clients when their property has failed the sound insulation test. One of the main reasons for acoustic partitions failing the Part E sound test is often down to poor isolation of material/s, which can lead to excessive noise flanking. Noise Flanking is a term used by acoustic engineers to describe where sound passes through an acoustic partition due to the abutment of materials.

The noise simply hits the one side of the wall and then travels through the construction via a noise bridge. This can be areas such as the incorrect use of masonry wall ties i.e. solid fishtail ties, used in place of specified acoustic wall ties.

Sound Insulation Test

Sound Insulation Testing
Unwanted noise travelling along flanking paths can make the building structure vibrate, which can cause sound to radiate into your room. One simple cost effective solution is to build another wall or ceiling in front of the original, to offer extra isolation. For this upgrade to work you need to make sure that the independent wall or ceiling is not directly connected to the existing failed partition; so it provides isolation between materials.

Another reason for excessive noise flanking is often down to the use of down to the use of lightweight blocks in the construction of the building envelope. Due to the lightweight mas of the inner wall it allows sound to transmit from dwelling to another, both vertically and horizontally. If a building has failed its sound testing, it is essential to establish if the problem is due to direct transmission, flanking transmission or a combination of both so that the most cost and time effective remedial treatment can be designed and applied to the failed partitions. 

One of the easiest ways to reduce the chance of sound testing failures due to excessive noise flanking transmission is through a careful consideration to the acoustic design at the start of the project.  Unfortunately, by simply specifying high performance wall and floor partitions, it is no guarantee to adequate sound isolation and successful sound testing.

We offer preconstruction design advice to help you achieve successful sound testing in-line with Building Regulations Part E. We also offer onsite inspection services to ensure that the sound insulation elements are being installed as per manufactures guild-lines, as it’s no use having good acoustic design if it not being installed properly on site.

During early design and construction process, we visit site to conduct a comprehensive acoustic design survey and review, we also take this opportunity to meet; where possible, the site/project manager, architects etc.

The first stage of the acoustic design is to send through the design drawings – to include sections etc. We then review the design to check that the construction details proposed are capable of passing the sound tests. This usually takes place straight after planning has been approved as increased cost savings can be realised at the earliest stage, we will evaluate the construction methods and materials specified to ensure that they are capable of meeting the acoustic requirements of Approved document E.

The typical areas we check are:

a.            There are no flanking points, where isolated partitions are wrongly mechanically fixed together to caused noise bridging.

b.            The walls and floors design are acoustically robust, to comply with Building Regulations Part E.

c.             The acoustic treatments for Soil Pipes, Stair Cases Steel Beams etc. to ensure they are acoustically fit for purpose, as these are some of the areas that get usually missed.

d.            Acoustic floor treatments are compatible with the proposed floor finishes i.e. Carpets, Laminates, Floor Tiles and under floor heating systems.

We also provide on-going design support service, so you will have direct contact with the allocated acoustician from the start of the process through to the successful completion of the project. One of the most important services is the going site survey visits which allow our clients to feel confident about the outcome of testing at the end of the build.

The site visits let us check that the installation teams are installing the acoustic materials as per manufacturers avoiding crucial onsite mistakes. You can often have a compliant design which still fails due to poor workmanship; the site survey visits negate the risk of sound test failure.

We also offer an acoustic advice service for clients that have failed their sound testing. We offer simple solutions to reduce the noise levels and achieve compliance with Part E. We can supply simple easy to follow acoustic design reviews, utilising our extensive knowledge of different materials and construction methods

If you require more information about acoustic design and/or sound testing on your project, please visit the APT Sound Testing website or call direct on 01525 303 905.

Sound Testing to Minimise Noise Transference

Sound Testing to Minimise Noise Transference

Sound Testing to Minimise Noise Transference
There are many different types of intrusive sounds that can penetrate through external walls, party walls and separating floors. And these are a major concern for the inhabitants and users of both residential and commercial buildings.

In many existing buildings, where noise is a problem, any noise reduction is welcomed, giving comfort and relief by improving the quality of the living space. In residential building conversions, alterations must be designed to minimise the risk of disturbance from external noise sources from both neighbouring properties or from outside noise sources via the building façade.

Defining Noise

There are many ways to define noise; usually it’s any unwanted, unpleasant or unexpected loud sound’. Most people will be disturbed by any unexpected loud noise, but many are able to become accustomed and de-sensitised to constant background noises as long as these do not vary in pitch or become too loud or intense. A couple of examples of this are:  residents living under an airport flight-path or adjacent to a railway line.

Noise usually originates from outside the building envelope, via sound sources such as  traffic, horns, alarms and sirens, however noise can also be generated from within buildings via household activities such as televisions, radios and washing machines or badly maintained mechanical plant. Equipment such as old central heating boilers and air conditioning units, can generate significant whine and hum acoustics which can be very upsetting to certain ‘sensitive’ people and can greatly affect the person/s wellbeing. The preferred background (ambient) noise level in dwellings is 35dB. This is very often reduced to 30dB for sleeping areas as this is seen as the most sensitive area within a dwelling.

The subsequent noise intensity is measured in decibel (dB) units and uses a logarithmic scale. A 10dB increase in noise is normally perceived as a ‘doubling’ in loudness. The table below gives the typical decibel level of some example sound sources.

SOUND LEVEL (dB)DESCRIPTIONSOURCE EXAMPLE
10
20
40-50
50-60
70
80
Very faint
Quiet
Normal
Noisy
Loud
Very loud
Normal breathing
Whisper at 1.0 metre
Light traffic at 50 metres
Loud speech
Busy street, pub or restaurant
Vacuum cleaner or hairdryer

Improving Sound Insulation

In order to consider the options for tackling noise problems, it is necessary to have a basic understanding of sound behaviour and acoustic design.

In most instances the weakest acoustic area of the external walls will be window units. In existing buildings these are often Sash units and many councils do want them replaced as they are one of the most important features within the external façade of existing buildings.

As a result many councils/local authorities will not let you remove and replace original window units unless the frames are rotten and beyond reasonable repair, however despite this decent acoustic improvements can still be made by installing a draught-proofing strip to the opening lights, and by providing an acoustic caulk seal around the window frame. If it’s extremely noise secondary glazing units can be installed along with demountable shutters. One of the simplest improvements can be made via the installation of good quality heavy curtains fixed close to the wall; this can also be one of the most attractive upgrades and can also help keep heat within the home – a double winner!

If the building is being subdivided into new apartments then the walls between apartments will need to be sound tested in-line with Part E for Converted Dwellings. In this instance we can undertake sample sound testing on walls and floors to check the existing sound insulation performance.  We have considerable experience in all matters related to architectural acoustic design and detailing. We can help develop the initial acoustic design from the initial design scheme stage right through to the pre-completion sound testing. Our approach is robust and does not leave any room for errors using our In-depth knowledge of acoustic materials, construction systems and Regulations we can provide the following:

  1. Sample sound testing to identify the acoustic performance of the existing building to allow for targeted acoustic upgrades.
  2. Acoustic testing of existing wall façades to ISO 140-5, to check the existing sound levels so new targeted wall upgrades can be specified.
  3. Provision of cost-effective and practical acoustic solutions
  4. Thorough understanding of the desired character of the space
  5. Specification of External Building Fabric and including walls, doors and windows in order to minimise noise break-in, or break-out for privacy and overall acoustic quality

If you would like more information in regards to acoustic design or sound testing on your project, please contact us now at: info@aptsoundtesting.co.uk or call us direct on 01525 303 905.

Designing Buildings to Pass Sound Testing

Designing Buildings to Pass Sound Testing

Designing Buildings to Pass Sound Testing
From the very start of the design phase of a new building, it’s extremely important that careful consideration is given to the acoustic element the building.

By getting us involved at the start of the design process we can undertake a comprehensive acoustic design reviews and on-going site surveys. We always advocate meeting with the design team at the earliest opportunity to go through all acoustic elements for the building’s design, taking into account the site constraints and the most cost effective method of achieving Part E of Building Regulations. We try to forward of any possible ‘onsite’ construction problems and difficulties in achieving successful acoustic construction and subsequently the sound testing for Part E.

Designing Buildings to Pass Sound Testing

Completing the Acoustic Design Review
Once we have completed the acoustic design review our services don’t finish there. We provide the site team with on-going design support and site visits. You will have direct contact with the allocated acoustician from the start of the process through to the successful completion of the project.

Once the first phase of the building is completed, we can undertake sample sound testing to ensure the acoustic design and onsite construction methods are sufficient to pass Part E sound testing.

When it comes to refurbishment projects i.e. house converted into flats and/or an office block into flats we can undertake a sample test of the existing wall and floor construction. Once we have established the sound levels for the existing construction we can then look at extent of the acoustic upgrades to attain Part E Complaisance. This is much more effective than just forwarding an acoustic design that may be to excessive and expensive when the existing construction is already ‘acoustically’ robust and therefore only needs to improve by a few dB.

One problem we often encounter (without our design input) is that the building marginally fails during the sound test. The potential problem that is often overlooked is that many types of acoustic design/materials have attained an acoustic rating within a laboratory. It is very difficult and extremely unlikely that the sound levels achieved on a construction site will be as good as in the confines of a stringent laboratory environment.

When the construction assembly is tested in the lab, it is also certified and an exact description of the materials and the installation techniques are described in detail and followed to the letter, obviously this should be replicated on the your site as closely as possible, however this seldom happens. This is one of the reasons why a 5dB point difference is allowed between the construction design on paper and the actual on site construction performance. When you consider that sound doubles every 10dB, then 5dB can make a huge difference to the overall performance of the dividing partition under test. If consideration is not allowed for during the design process then there will be a greater chance of a sound test failure on your project. 

Another potential problematic area of sound transference and potential sound test failures is down to flanking sound. Noise flanking is when travels along a continuous path due to insufficient isolation/break within the building wall & floor elements. One of the most common flanking paths is along the inner leaf of an external cavity wall. This may be due to lightweight block construction resulting insufficient mass to prevent noise transference.  

Unwanted noise travelling along flanking paths makes the building structure vibrate and this causes the sound to radiate into your room. One solution is to build another wall or ceiling in front of the original, but not connected to it (often called an independent wall or ceiling). APT can help to locate the flanking sound and propose a cost effective design that will pass the sound testing and satisfy Part E of Building Regulations.

For the smaller projects, we undertake a more simplified acoustic design service consisting of a review of the design drawings, such as to floor plans and sections. This usually takes place straight after planning has been approved as increased cost savings can be realised at the earliest stage. We can also undertake sample sound testing if the client is not sure of the existing onsite construction.

We can then evaluate the building design to ensure that it the walls and floors are capable of meeting the acoustic requirements of Approved document E.

Some of the main areas we consider are:

•             There are no potential flanking points, where isolated partitions are wrongly mechanically fixed together to caused noise bridging or the wrong materials have been specified such as lightweight blocks etc.

•             The acoustic treatments for Soil Pipes, Stair Cases Steel Beams etc. to ensure they are acoustically fit for purpose, as these are some of the many areas that get missed.

•             Acoustic floor treatments are compatible with the proposed floor finishes i.e. Carpets, Laminates, Floor Tiles and under floor heating systems.

•             The Lighting specification to, ensure they are acoustically complaint to the overall design i.e. down lighter design etc.

If you would like more information in regards to sound testing please follow our blog at: http://soundtestinguk.blogspot.co.uk or contact us on 01525 303 905 or visit the APT Sound Testing website.

Sound Insulation Testing for Part E

Sound Insulation Testing for Part E

Sound Insulation Testing for Part E – Common Questions & Answers
Over the last couple of years APT have collated and answered the most common asked questions in regards to sound insulation testing.


What is Sound Testing for Part E of Building Regulations?
Sound insulation is the property of a wall and /or dividing partition to resist the passage of noise. The sound Insulation testing is a method of quantifying the sound insulation performance of walls and/or floors. Sound Insulation testing can be carried out on party walls, party floors or facades of any building.

How many sound tests should I need on my Project?
Approved Document E states that one set of sound tests is required for every 10 units in a group or sub-group. A group or sub-group is defined where significant differences in construction or layout occur, for instance:

• For a pair of semi-detached Houses – a set of tests would usually comprise two airborne sound insulation tests of a separating wall.
• For Flats (up to 10 units) – a six pack would normally be required, this comprises of: two airborne wall tests, two airborne floor tests and two impact floor sound tests. The easiest way to work out the number of tests required is to multiply 1 x 6 packs for every 10 flats, i.e. if you have 22 flats you will require 3 x 6 packs which equals 18 sound tests in total
• For Rooms for Residential Purposes (student accommodation, hotel rooms, care homes etc.) – a set of tests would usually comprise: one airborne sound insulation tests of a separating wall; one airborne sound insulation test of a separating floor; one impact sound transmission test of a separating floor.
How are plots selected for sound testing?

APT will usually specify the amount of sound insulation tests that are required. We first look at the floor plans then work out a testing schedule taking into account testing through the projects ‘habitable rooms’ i.e. lounges & bedrooms where possible.

We will also try and undertake testing across walls and floors in different areas of the building and through different partition types i.e. if one wall is made of masonry and the other met-sec partitioning. When we have specified the sound testing schedule it should always be checked by building control and/or the client to seek their approval before the commencement of sound testing.

How do I Prepare my Site for Sound Insulation Testing?
APT always send out a checklist with our fee proposals to help you prepare for the sound testing, as we always want our clients to be fully prepared so they can pass their sound testing at the first attempt.

How long will the sound testing take?
The time taken to undertake the sound testing varies with site conditions, but generally a ‘6 pack’ set of tests on houses and flats takes about one to two hours. Obviously this depends on the site being fully prepared in line with our sound testing checklist.

Will the sound insulation testing disrupt work on site?
Relatively quiet conditions are needed to take accurate measurements. This means that anyone working in the testing area will have to leave temporarily and any noisy works in the vicinity of the test rooms will need to be halted i.e. using power tools or loud hammering etc.

How do I know if I’m ready for a sound insulation test?
We send out a checklist with all quotations to allow our clients to check they are ready for the sound testing. Basically the plots should be at least at second fix stage – for further details please refer to our checklist.

What if I only have 110V and not 240V on site?
Unfortunately we cannot undertake the testing; we will need 240V to undertake the sound testing.

Should I inform my neighbours of the impending sound testing?
If the building is attached in any way to occupied properties then you will need to inform the neighbours. We need to gain access to the neighbouring properties to undertake the sound test as we test the wall partition. You will also need to ensure that access is provided to the neighbouring properties throughout the sound testing.

Can you offer acoustic advice to help me to pass my sound testing?
APT offer an acoustic design service to help you design your buildings partitions to pass Part E sound testing. If you send through the relevant drawings such as sections and floor plans during the design stages of the project, we can check the design to see if there are any junctions or details where ‘noise flanking’ may occur, we can then advise if any changes are required to lower the chance of sound test failures.

Rest Assured. We believe in working with our clients on all types of projects from small end of terrace developments up to large blocks of flats. We believe that by being involved at the beginning of a project we can often save our clients expensive and difficult remedial works at the completion stage of a project.

If you would like more information on our full range of our acoustic services please contact us now at info@aptsoundtesting.co.uk or call us on 01525 303905.

Precompletion Sound Testing for Part E

Precompletion Sound Testing for Part E

Precompletion Sound Testing for Part E
Over the last decade the APT team has provided thousands of sound insulation tests across London and the Southeast, and using this amassed knowledge of how different construction types effects the acoustic performance of party walls and floors, we have managed to help customers such as architects, developers and homeowners to pass their sound insulation testing at the first attempt.  

Many people fail to achieve the minimum requirements of Building Regulations Part E, due to poor-design and construction. Good acoustic design is not difficult to achieve if the following four elements are considered during the design phase of the project. The four main elements are: Mass, Decoupling, Absorption and Damping – consider these from the beginning of your design and you will usually pass the sound test for Building Regulations Part E.

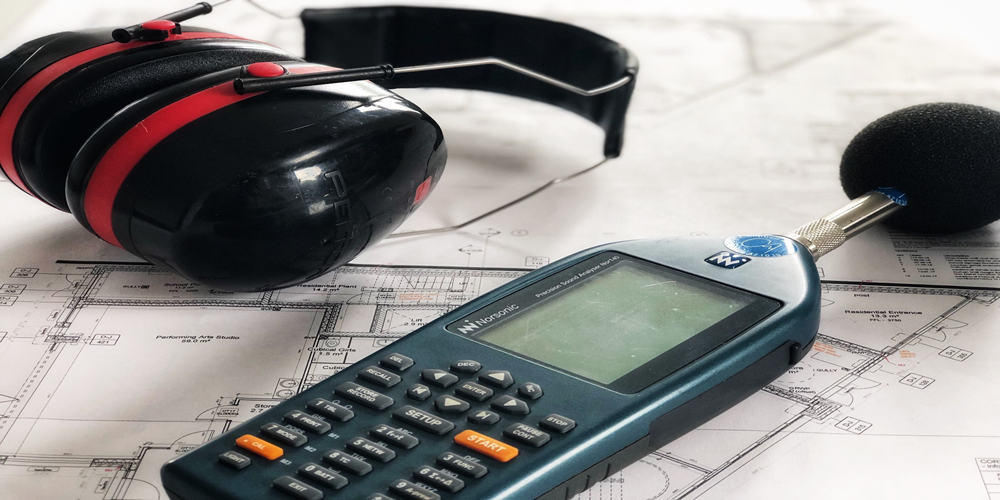
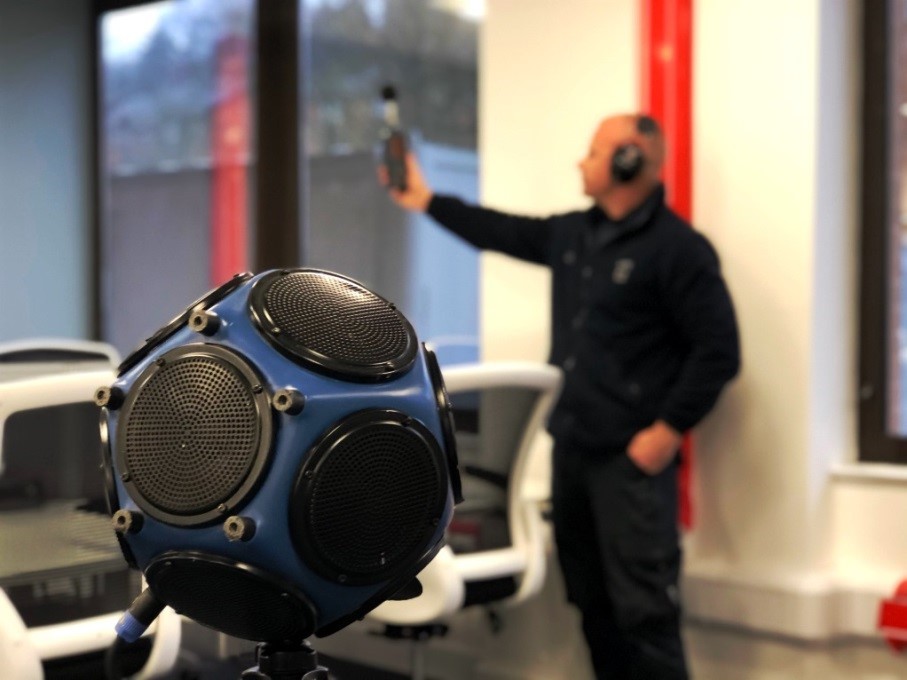
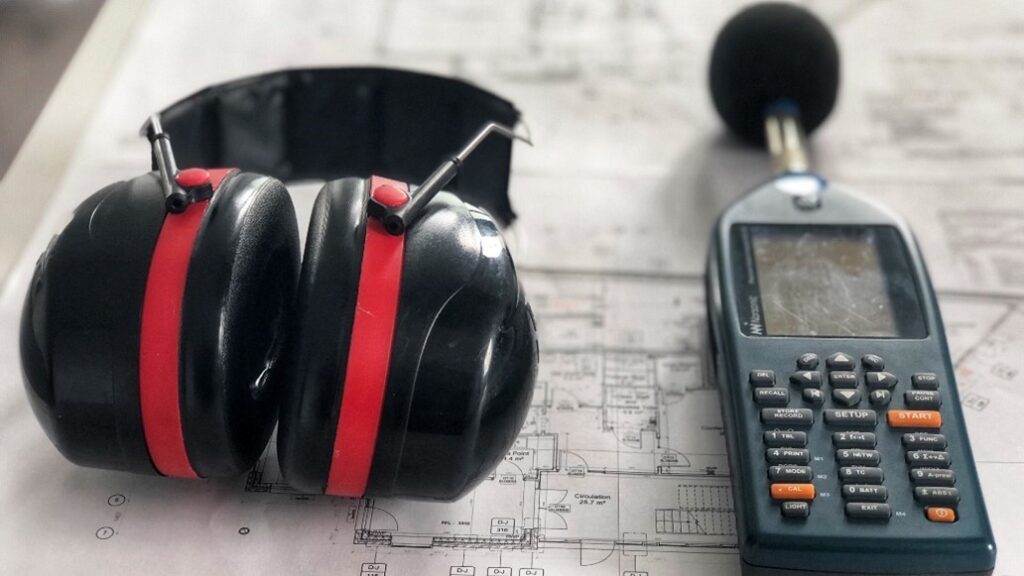
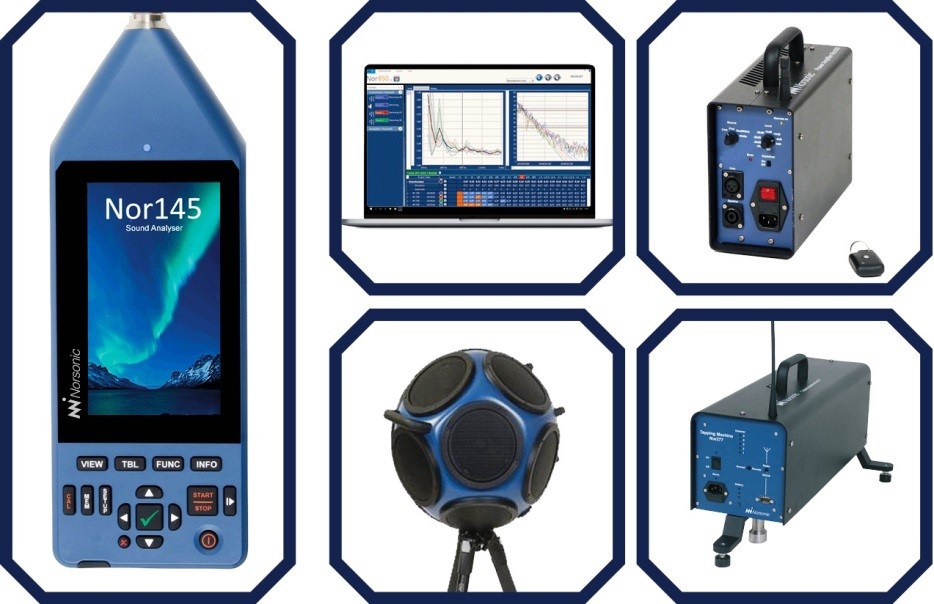
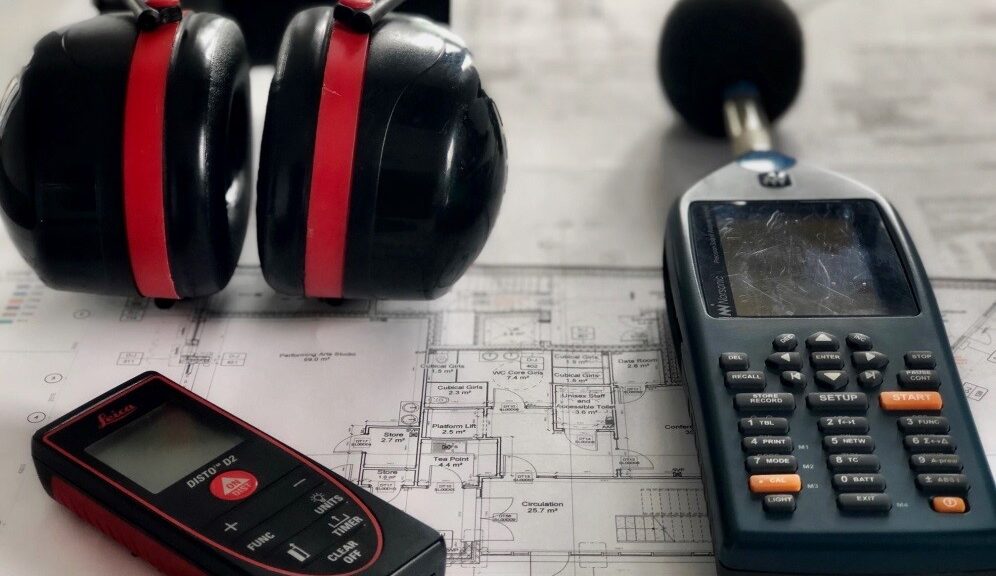
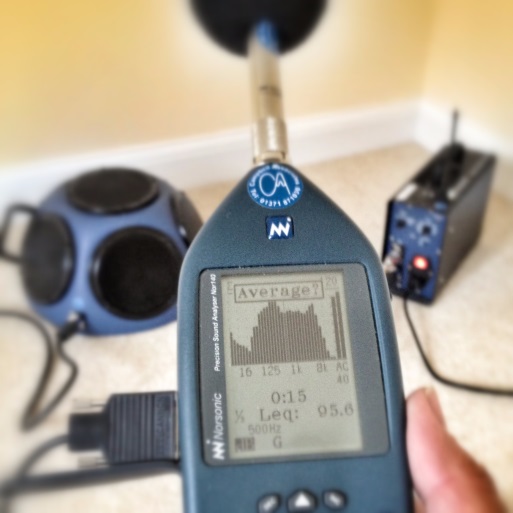
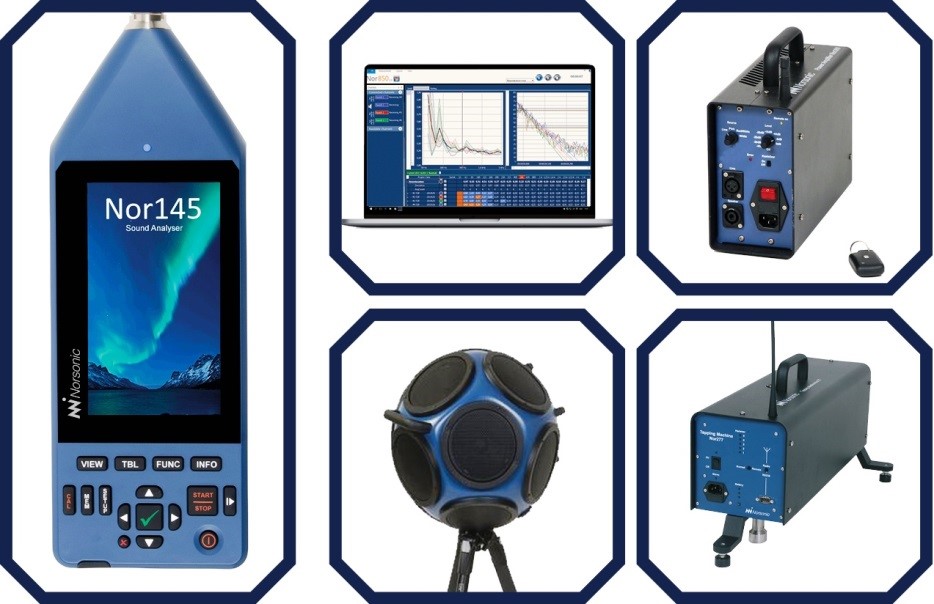
Acoustic Design and sound insulation test equipment used for Part E.

The usual culprits for excess noise are often televisions, music systems, and voices. Heightened airborne sound wave can strikes walls and floors, and the pressure variations cause the wall to vibrate resulting in noise. This noise (vibrational energy) is transferred through the wall and floor partitions, which is radiated as airborne sound into neighbouring dwellings.

The 4 elements of robust soundproof design to pass party wall sound testing

There are 4 main elements of soundproofing that need to be considered to pass sound testing through walls. It’s worth noting that all 4 elements throughout the process, all of which have a direct relation to the conduction and transmission of sound vibrations, they are: Mass, Decoupling, Absorption and Damping. If you incorporate all the four elements into your party wall design, then airborne sound transference should be kept to a minimum and you will pass your precompletion sound testing.

Here is more information on each of the four main elements:

Adding mass

The first (and often the most important) element of any acoustic upgrade is adding mass. If you add mass to the wall and floor construction the soundwaves will struggle to vibrate the wall/floor partition as it will have less movability, making it more tortuous for the sound vibrations to travel through the partitions.  One the most common ways to add mass to a new or existing wall is by adding soundboard to each side of the wall. Soundboard is quick to install and is one of the easiest ways to decrease sound vibration, although its’ not so good at reducing deep bass sound at lower frequencies.

Add Decoupling

The second element of good soundproofing design is the introduction of decoupling. The term ‘decoupling’ in acoustic construction,  is to separate objects or constructions such as introducing a cavity between two layers of drywall, thus separating the two main wall constructions. This provides a layer of air between the walls which provides good sound insulation and direct noise transference via noise flanking etc.  Decoupling can also be achieved with resilient sound clips and/or resilient acoustic bars or channels. Extra framing via double stud or staggered stud walls is also an efficient way to decouple walls. In almost every instance sound vibrations transfer easiest via solid connections, so decoupling reduces this risk.

Resilient sound clips are small metal and rubber connections that attach to the timber of blockwork with screws. Resilient bars are then installed to the clips and plasterboard is then fastened to the channel. Sound clips provide acoustic decoupling by suspending the plasterboard on the resilient bars approx. 25-40mm from the timber or blockwork wall. This type of system is often favoured by customers as provides a minimal build up in comparison to constructing double leaf walls.

Adding absorption

The addition of absorption is the third element of good acoustic design is the introduction of noise absorption materials such as acoustic slabs and roll insulation.

The introduction of acoustic insulation materials such as Gyproc RW3 mineral wool (min mass 45kg/m3) can be a good place to start. The material is placed into the wall to absorb soundwaves and is very good reducing low-level noise issues. The other good thing about acoustic insulation is it’s easy to handle and install.  The acoustic slabs are dense and effectively block out noise frequencies crossing the party wall and/or floors.

If you are installing a metal and/or timber stud wall/floor, you can simply insert the acoustic slab straight into the void, making sure it’s fitted neatly between the metal /timber wall studs, or timber/metal floor joists. Double check that there isn’t any sagging or holes in the material as you are installing the insulation and that should be it.

Add damping

The fourth element of robust soundproofing design is the introduction of noise damping within the party wall and floor. Noise damping materials can be acoustic resilient layers and rubber panels which help to reduce vibration within the partition construction. Dense rubber panel systems are high performance wall soundproofing solution aimed at providing good noise damping performance. The dense recycled rubber membrane is fairly easy to install and will provide a reliable soundproofing-barrier.

Noise damping materials such as Regupol, are usually quite easy to fit, as the acoustic rubber membrane just needs to be cut to size and stuck to the party wall and/or floor. also, the supplier usually provides an adhesive as part of rubber membrane system.  

Acoustic Design and sound insulation test equipment used for Part E.

Let us help you with your acoustic design and sound testing

Getting the soundproofing design right from the word go, is essential for building designers and construction companies. APT Sound Testing can help in all areas of acoustic design and sound insulation testing. For more information on our UKAS accredited sound testing or acoustic  design services, please contact us at info@aptsoundtesting.co.uk  or call us on 01525 303905. 

Alternately for more information on how to prepare for your precompletion sound testing please download our sound testing checklist, or visit our website at www.aptsoundtesting.co.uk
Please Note: although we take every care to ensure the information was correct at the time of publication. Any written guidance provided does not replace the user’s professional judgement. It is the responsibility of the duty-holder or person carrying out the work to ensure compliance with relevant building regulations or applicable technical standards.

Adding damping

The fourth element of robust soundproofing design (or acoustic design) is the introduction of noise damping within the party wall construction. Noise damping materials can be acoustic resilient layers and rubber panels which help to reduce vibration within the party wall construction. Dense recycled rubber panel systems are high performance wall soundproofing solution aimed at providing good noise damping performance. Unlike other acoustic solutions, this dense recycled rubber is fairly easy to install and will provide a reliable soundproofing-barrier

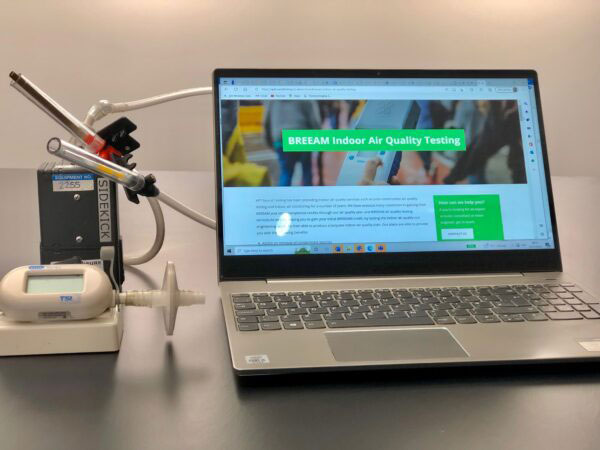
BREEAM Indoor Air Quality Testing

BREEAM Indoor Air Quality Testing

What is third party BREEAM Indoor Air Quality Testing

Its common knowledge that poor air quality within the indoor environment can result in occupants experiencing a number of symptoms ranging from fatigue to shortness of breath. Factors such as poor ventilation and air pollutants can be the main cause of what is commonly known as Sick Building Syndrome.

Achieving good Indoor Air Quality (IAQ) is a major component of indoor environmental quality, which is a function of BREEAM for occupant wellbeing.  Quantifying indoor air quality through measurement and analysis informs building owners, operators, and occupants, of ventilation system effectiveness and the safety of the environment we live, work, and socialise in. 

APT provides high quality Indoor air quality testing to meet the requirements of schemes such as BREEAM, Leed and Well to identify, mitigate and implement IAQ strategies.

We can undertake accredited indoor air quality testing for the following:

  • Sample Testing for formaldehyde (CH2O) to BS EN 16000-3
  • Sample Testing for total volatile organic compounds (TVOC) to BS EN 16000-6.  

The indoor air quality sampling identifies the presence of volatile organic compounds TVOCs and formaldehyde. Where the levels of these compounds are found to exceed the prescribed limits, to claim the extra BREEAM credit for air quality it must be identified that appropriate measures have or will be undertaken in accordance with the IAQP to reduce the levels to fall within the limits.

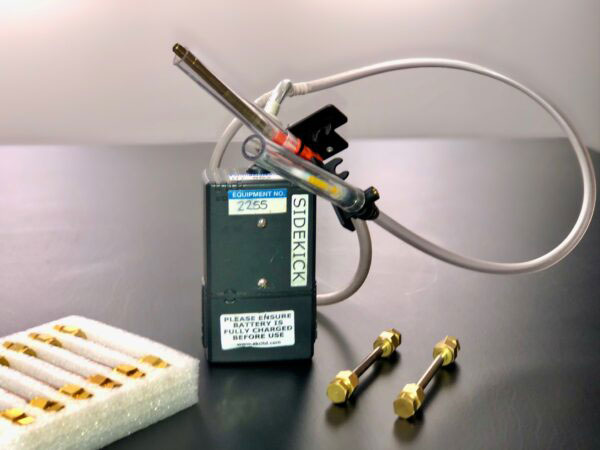
Indoor Air Quality Testing

When do I undertake BREEAM Indoor Air Quality Testing?

Your project must be nearing completion before an BREEAM Indoor Air Quality Test can be carried out. The sampling identifies the presence of volatile organic compounds TVOCs and formaldehyde. Where the levels of these compounds are found to exceed the prescribed limits, to claim the BREEAM credit it must be identified that appropriate measures have or will be undertaken in accordance with the IAQP to reduce the levels to fall within the limits.

What rooms/areas do I need to test during the IAQT

Indoor air quality samples should be performed only in rooms that are expected to be occupied for long periods of time such as bedrooms, living rooms, classrooms, offices, etc. A representative number of these rooms should be sampled. In larger rooms, such as open-plan office areas, additional sampling locations may be required.

What are the main chemical compounds you will be testing for?

When testing for the BREEAM standard the main compounds we will be testing for are Formaldehyde and Volatile Organic Compounds (VOC’s). Formaldehyde is a commonly used chemical compound is a colourless, distinctive, strong and pungent smelling substance, it is also flammable. Formaldehyde is often used within industries for various purposes such as the manufacturing of building materials.

Volatile Organic Compounds (VOCs) are gases that are given off by many indoor sources. Concentrations of most volatile organic compounds include a variety of chemicals that can cause eye, nose and throat irritation, shortness of breath, headaches, fatigue, nausea, dizziness and skin problems and are higher in indoor than outdoor.

Indoor Air Quality Testing

What Indoor Air Quality Levels do I need to achieve for BREEAM

To meet the BREEAM requirements the formaldehyde concentration the indoor air at post-construction should not exceed 0.1mg/m3, averaged over 30 minutes. The total volatile organic compound (TVOC) concentration in indoor at post-construction should not exceed 0.3mg/m3, averaged over 8 hours.

How do I prepare my Building for the Indoor Air Quality Testing?

With every fee proposal we also attach our air quality checklist to help our customers prepare for the testing. Here is a quick summary of what action you need to undertake to prepare your building for the testing:

Restrict construction: if possible, at least 24 hours before air quality evaluation only minimal construction efforts should be taking place and no new volatiles should be introduced such as decorative finishes including water-based coatings, silicon seals, adhesives and others sealants.

Building flush out: flush out the inside air of the building with as much outside air as possible. This step can be accomplished by simply opening natural ventilation windows and/or running the HVAC systems. The building should be ventilated with 100% outside air. The building should be thoroughly ventilated for 24-48 hours prior to our attendance.

Finishes: All interior finishes should be installed, including but not limited carpeting, doors, paint, files. Movable furnishings such workstations and partitions are not required but should be in place at the time of the test.

Restrict cleaning: All activities likely to introduce volatiles into the indoor environment should be restricted. This applies to cleaning, the use of air fresheners, window, surface or other cleaners, polishes, waxes and other surface treatments.

BREEAM Indoor Air Quality Testing

What happens if we fail the BREEAM Indoor Quality Testing?

If we undertake the indoor quality testing and the building fails as the compounds are found to exceed the prescribed limits, to claim the BREEAM credit for air quality it must be identified that appropriate measures have or will be undertaken in accordance with the Indoor Air Quality Plan. Also, within our indoor quality test report we will make recommendations to reduce the levels to fall within the limits.

It’s worth noting that some compounds such as Formaldehyde, can persist in furniture for up to 6 months. VOCs can accumulate in buildings from a variety of sources, there are many cases where new build occupancy starts whilst VOCs are still high.

Will I receive a BREEAM compliant indoor air quality test report?

Yes, of course. After the indoor air quality test, we will send you a fully complaint BREEAM indoor air quality test report. The report will highlight which gases are present within your building, and where they are likely to have come from. Where we can, we will tell you what you can do to improve the air quality.

We can provide your BREEAM Indoor Air Quality Testing requirements

Here at APT we have significant experience in carrying out post-construction Indoor Air Quality (IAQ) testing across London and the Southeast. We are familiar with the stringent methods that are specified under BREEAM Hea02.

Our expert team will also provide free advice and guidance to your project manager to help to create the correct environment for the air quality tests, which is essential if you want to pass at the first attempt.

Call us on 01525 303905 or email us on info@aptsoundtesting.co.uk about our Indoor Air Quality Testing services. We are here to help! Alternatively, please visit our contact page here.

Complying with Stringent Air Test Targets

Complying with Stringent Air Test Targets

Complying with Stringent Air Test Targets
For many residential dwellings the new air leakage rate will drop to  5m3/hr/m2, however if you only undertake air testing to a sample of dwellings then you need to better this target by 2m3/hr/m2 resulting in an air leakage rate of 3m3/hr/m2.  This more stringent target, although difficult to achieve can be passed at the first attempt; although, careful consideration must be shown to the air tightness design and ‘on site construction’ from the start of the project.

Once of the main reasons of air tightness test failures, is not knowing where the air seal line is. It is usually the inner envelope of the building; however, sometimes it may be a new extension to the building so the air seal line may actually be an existing internal wall. If you are unsure about the air seal line on your building/s its best to ask your architect and/or contact us.

We offer the following air tightness services to help you

•           Air Tightness design reviews – to ensure the air seal line has been adequately designed. 

•           Air Tightness site visits – to ensure the onsite construction is correct.

•           The air tightness test

•           Dual smoke survey – in the event of an air test failure to highlight the air leakage paths. 


Good Tips for Air Tightness Design

Good detailing and materials selection needs to be high on the list of priorities for all members of the team, right from the start of the project to ensure that:

•           The airtightness barrier layer is identified

•           The correct products are used where required

•           The relevant areas are monitored throughout the construction phase

The use of certain types of ‘temporary’ products such as adhesive tapes or expanding foam should be avoided since these do not perform over the life of the building.

Tips for Walls

Dry-Lining (dot & dab) walls
Ensure that the external walls are completed and fully sealed prior to constructing internal stud partitions over them. The gap at the bottom of the plasterboard should be sealed to prevent air loss behind the board and into ceiling/roof spaces. Alternatively the gap between the bottom of skirting boards and the floor can be sealed. Avoid/minimise service outlets such as sockets, data outlets etc. in the dry lining of external walls as they are rarely well sealed.

Block-work
Standard block-work is not impermeable. The block density and standard of mortar joints have a significant impact on the overall permeability of the construction. Full mortar joints are preferable. Painting block-work reduces the permeability and two coats of emulsion can make a significant improvement. All gaps between block work and intermediate floors, roof members, windows/doors, steel columns, etc. should be sealed.

Timber Frame/Metal Studding
Ensure that the external walls are completed and fully sealed prior to springing internal stud partitions from them. Avoid/minimise service outlets such as sockets, data outlets etc in the dry lining of external walls as they are rarely well sealed. Like the dot and dab walls, the gap at the bottom of the plasterboard should be sealed to prevent air loss behind the board and into ceiling/roof spaces.

Tips for Floor Constructions

Cast In situ Concrete Slab
This type of floor usually provides the best type of airtight seal, since the concrete fills any voids, both horizontally and vertically.

Pre-cast Hollow Concrete Floor Planks
The hollow core of this type of floor can allow air to track horizontally and end up outside the airtight layer of a cavity wall. The problems are made worse with drainage and service penetrations, which if poorly sealed allows air to enter the hollow core and escape. Care should be taken to ensure all penetrations are sealed properly. it is also prudent to seal  the ends of the concrete planks.

Beam and Block Floors
This type of floor construction can lead to similar problems to those described for the pre cast planks above.

Timber Floors:
Any penetrations passing through the top of the floor layer or the underside layer of (e.g. radiator pipes, waste pipes, boiler flues) need to be sealed where they pass through the timber/plasterboard layer

Tips for Ceiling Constructions

Plasterboard & Lay in Grid Ceilings
Where roof/ceiling voids exist, lay in type false/suspended ceilings do not form an airtight barrier layer. Plasterboard type ceilings – if plastered and the edges sealed are significantly better than other types of lay in ceilings.

Tips for Doors And Windows 

Doors & Windows

Door and window frames need to be sealed to the internal air tight barrier and not just sealed to the external façade. Window sills are often an area which performs particularly poorly and should be fitted after the cavity has been sealed using an appropriate cavity closer. For Windows & doors, refer to BS EN 12207 Windows & Doors Air Permeability Classification & BS EN 6375 – Use class 4 or better 3m3/(h.m2)@ 100Pa. Lift shafts have a permanent vent to outside at the head of the shaft and should be fitted with effective doors seals at each landing. Any floor or ceiling voids adjacent to the shaft should also be adequately sealed to prevent leakage.

Tips for Mechanical & Electrical Systems:

The airtight barrier generally steps inside the building to include plant rooms as part of the external space. The plant room partition walls and sometimes service riser walls therefore require careful sealing around all mechanical and electrical service penetrations. Avoid using conventional fire stopping materials to form the airtight barrier, as these are seldom suitable. Particular care is needed to fill voids inside the electrical service trunking.

Tips for Sanitary Services

Careful consideration should be given to sealing the underside of all wall mounted toilets as the underside of the toilets are susceptible to air leakage where the SVP terminates through the wall. All drainage traps including floor gullies and air handling plant condensate traps should be filled with water prior to the air test.

Whether you need a full on-going air tightness design/consultancy service, or a simple air test, we have the knowledge and experience to ensure your building passes first time.

If you are unsure of the air tightness test service you require, please call us on 01525 303905 or visit theairpressuretesting.net website today and we will guide you through the process, ensuring that you receive the right level of advice at the right time.

Sound Insulation Testing & Consultancy

Sound Insulation Testing & Consultancy

Sound Insulation Testing & Consultancy
We offer a no nonsense professional proactive approach to acoustic design, onsite construction checks and pre-completion sound testing. Using our on-going, proactive approach we ensure clients receive professional advice every step of the way, with an on-going continual consideration of cost.

The importance of undertaking design reviews and on site construction checks is often forgotten resulting in sound test failures at the end of the project prior to building control signoff. This can be extremely costly in terms of programme and possible claims by the client. By undertaking careful acoustic design from the initial design stage through to completion it greatly reduces the risk of sound testing failure.

Acoustic Design
We have considerable experience in all matters related to architectural acoustic design and detailing. We can help develop the initial acoustic design of the project from the initial design scheme stage. Our approach is robust and does not leave any room for errors using our In-depth knowledge of acoustic materials, construction systems and Regulations we can provide the following:

>>> Provision of cost-effective and practical acoustic solutions

>>> Thorough understanding of the desired character of the space

It is essential that strong communication among the members of the design team members is essential, to facilitate this we can undertake design meetings and site inspections to finalise the acoustic solutions in full accordance with the project’s aims.

Specification of External Building Fabric and including walls, doors and windows in order to minimise noise break-in, or break-out for privacy and overall acoustic quality within dwellings.

Acoustic testing of existing wall façades to ISO 140-5, to check the existing sound levels so new targeted wall upgrades can be specified.

Acoustic Investigation and design of rooms/spaces for a wide range of environments such as schools, offices and commercial spaces.

Site Visits
We offer a site survey service which allows our clients to feel confident about the outcome of their sound testing at the end of the build. The site visits let us check that the installation teams are installing the acoustic materials as per manufacturers avoiding crucial onsite mistakes. You can often have a compliant design which still fails due to poor workmanship; the site survey visits negate the risk of sound testing failure.

A Few Simple Design Considerations
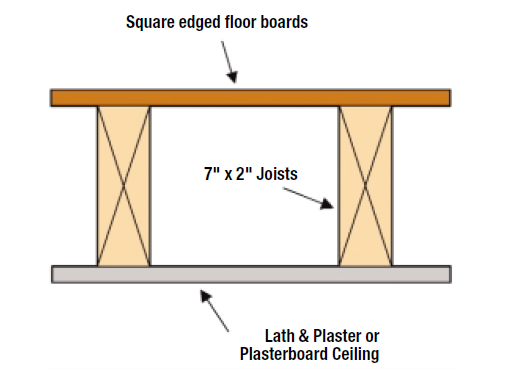
The use of suspended ceilings will help improve the performance of the floor partition. Including a resilient acoustic layer or adopting an “acoustic” flooring system will improve the impact and airborne performance of a floor

Avoid using lightweight blocks in the inner envelope construction as sound will travel along these both vertically and horizontally from dwelling to dwelling.

Use carpet in hallways/corridors to lower reverberation levels.

Key considerations of acoustic design are:

>>> Careful design consideration for all separating walls and floors

>>> Careful design consideration for all internal wall and floor performance

>>> Careful design consideration for the external/internal building façade.

>>> The specification of glazing/curtain walling

>>> The specification of doors

>>> The specification of ventilation

>>> The building/s orientation and layout

>>> Careful design consideration if using lightweight external walls and roofs

>>> Careful design consideration for all internal wall and floor performance

>>> Careful design consideration to reverberation control and room acoustics

>>> Acoustic screening from external noise such as fencing etc.

>>> Acoustic protection from plant rooms, communal areas etc.

>>> Noise exposure of outdoor spaces such as gardens, balconies.


Defect Diagnosis & Remedial Advice
We occasionally get involved with projects that have failed the sound testing – even though we weren’t initially involved with the project. Often it is due to the inclusion of inadequate materials or robust acoustic design and isolation of materials.

Using our considerable experience in building acoustics, we are able to diagnose the reasons for potential the sound testing failure and recommend a cost-effective solution. Often, the reasons for the partition failure are obvious to the test engineer in which case the advice will be minimal and subsequent design advice costs will be minimal; however sometimes, there are more technical issues which require detailed diagnosis and invasive investigation, such as the use of lightweight blocks throughout the inner envelope wall on a block of flats.

Whatever the acoustic problem we can usually find an acoustic solution that will provide a sufficient acoustic design to satisfy Part E of Building Regulations. If you have suffered a sound testing failure then get in touch with us as soon as possible, as we should be able to offer you an expedient solution helping you to achieve practical completion in the quickest time possible.

If you would like more information in regards to sound testing or acoustic design, please follow our blog at: http://soundtestinguk.blogspot.co.uk/, or contact us on 01525 303905 or visit our website at: www.aptsoundtesting.co.uk  
Designing Buildings to Pass Sound Testing

Designing Buildings to Pass Sound Testing

Designing Buildings to Pass Sound Testing
From the very start of the design phase of a new building, it’s extremely important that careful consideration is given to the acoustic element the building.

By getting us involved at the start of the design process we can undertake a comprehensive acoustic design reviews and on-going site surveys. We always advocate meeting with the design team at the earliest opportunity to go through all acoustic elements for the building’s design, taking into account the site constraints and the most cost effective method of achieving Part E of Building Regulations. We try to forward of any possible ‘onsite’ construction problems and difficulties in achieving successful acoustic construction and subsequently the sound testing for Part E.

Acoustic Design Services

Acoustic Design Services
Once we have completed the acoustic design review our services don’t finish there. We provide the site team with on-going design support and site visits. You will have direct contact with the allocated acoustician from the start of the process through to the successful completion of the project.

Once the first phase of the building is completed, we can undertake sample sound testing to ensure the acoustic design and onsite construction methods are sufficient to pass Part E sound testing.

When it comes to refurbishment projects i.e. house converted into flats and/or an office block into flats we can undertake a sample test of the existing wall and floor construction. Once we have established the sound levels for the existing construction we can then look at extent of the acoustic upgrades to attain Part E Complaisance. This is much more effective than just forwarding an acoustic design that may be to excessive and expensive when the existing construction is already ‘acoustically’ robust and therefore only needs to improve by a few dB.

One problem we often encounter (without our design input) is that the building marginally fails during the sound test. The potential problem that is often overlooked is that many types of acoustic design/materials have attained an acoustic rating within a laboratory. It is very difficult and extremely unlikely that the sound levels achieved on a construction site will be as good as in the confines of a stringent laboratory environment.

When the construction assembly is tested in the lab, it is also certified and an exact description of the materials and the installation techniques are described in detail and followed to the letter, obviously this should be replicated on the your site as closely as possible, however this seldom happens. This is one of the reasons why a 5dB point difference is allowed between the construction design on paper and the actual on site construction performance. When you consider that sound doubles every 10dB, then 5dB can make a huge difference to the overall performance of the dividing partition under test. If consideration is not allowed for during the design process then there will be a greater chance of a sound test failure on your project. 

Another potential problematic area of sound transference and potential sound test failures is down to flanking sound. Noise flanking is when travels along a continuous path due to insufficient isolation/break within the building wall & floor elements. One of the most common flanking paths is along the inner leaf of an external cavity wall. This may be due to lightweight block construction resulting insufficient mass to prevent noise transference.  

Unwanted noise travelling along flanking paths makes the building structure vibrate and this causes the sound to radiate into your room. One solution is to build another wall or ceiling in front of the original, but not connected to it (often called an independent wall or ceiling). APT can help to locate the flanking sound and propose a cost effective design that will pass the sound testing and satisfy Part E of Building Regulations.

For the smaller projects, we undertake a more simplified acoustic design service consisting of a review of the design drawings, such as to floor plans and sections. This usually takes place straight after planning has been approved as increased cost savings can be realised at the earliest stage. We can also undertake sample sound testing if the client is not sure of the existing onsite construction.

We can then evaluate the building design to ensure that it the walls and floors are capable of meeting the acoustic requirements of Approved document E.

Some of the main areas we consider are:

•             There are no potential flanking points, where isolated partitions are wrongly mechanically fixed together to caused noise bridging or the wrong materials have been specified such as lightweight blocks etc.

•             The acoustic treatments for Soil Pipes, Stair Cases Steel Beams etc. to ensure they are acoustically fit for purpose, as these are some of the many areas that get missed.

•             Acoustic floor treatments are compatible with the proposed floor finishes i.e. Carpets, Laminates, Floor Tiles and under floor heating systems.

•             The Lighting specification to, ensure they are acoustically complaint to the overall design i.e. down lighter design etc.

If you would like more information in regards to sound testing please follow our blog at: http://soundtestinguk.blogspot.co.uk/, or contact us on 01525 303 905 or visit the APT Sound Testing website.

Acoustic & Sound Testing Terms

Acoustic & Sound Testing Terms

Posted on May 20, 2022

In the field of acoustics and sound insulation testing, there are a large number of terms and abbreviations can be quite hard to follow.

To try and make this easier to understand, we have written the following list, which should help you to decipher the main terms and abbreviations relating to acoustics and sound insulation testing:

Pre-Completion Sound Insulation Testing (PCST) – A new requirement to Part E where structures not conforming to the RSD will be tested prior to completion to check they reach the required standards.

Decibel (dB) – The most commonly used unit to measure sound.

Ctr – The correction to a sound insulation quality to take into account low frequency noise.

DnT,w – The measurement used to measure the airborne sound insulation between two rooms (on site).

DnT,w+Ctr – See above, but with the low frequency correction factor included.

Rw – The measurement used to relate the sound insulation of a material or building element in a laboratory.

Airborne Sound – Sound that’s transmitted through the party wall and/or floor via speech, radio & TV etc.

Impact Sound – Sound that’s transmitted through the party floor via footsteps, jumping or moving furniture usually from the dwelling above.

Flanking Noise – Flanking noise transmission occurs when sound travels along elements shared by adjacent structures. Sound does not always travel straight through the building element. If the wall, floor, or partition concerned has good sound-reducing capabilities, the sound will travel from A to B by the easiest route, often around the sides, top or bottom of the party wall or floor. It’s worth noting that flanking transmission can exceed direct transmission and damage the overall capabilities of the construction if flanking constructions and details are not correctly specified and constructed.

Flanking Transmission – Sound transmitted between two rooms using an indirect path e.g., the top, bottom, or sides of a separating wall.

Frequency – The number of pressure variations per second that gives a sound its distinctive tone.

Hertz (Hz) – The unit of the frequency of the sound.

Impact Sound – Sound resulting from direct impact on a building element.

Internal Floor – Any floor that is not a separating floor.

Internal Wall – Any wall that does not have a separation function.

Separating Floor – Floor that separates flats or rooms for residential purposes.

Separating Wall – Wall that separates adjoining dwellings, houses, flats or rooms.

LnT,w – The measurement used to measure the impact sound insulation of floors (on site)

Lnw – the measurement used for laboratory impact sound testing.

Noise – Unwanted sound/excess sound

Pre-Completion Testing (PCT) – A new requirement to Part E where structures not conforming to the RSD will be tested prior to completion to check they reach the required standards.

Robust Standard Detail (RSD) – A collection of pre-approved constructions that, if used, negate the need for PCT

Sound Reduction Index (SRI) – A quantity measured in a laboratory that characterises the sound insulation properties of a material or building element in a stated frequency band.

sound-testing-equipment

Sound Proofing Design and Testing

Getting the soundproofing design right from the word go, is key, and APT Sound Testing can help in all areas of acoustic design and sound insulation testing. For more information on our UKAS accredited sound testing or acoustic  design services, please contact us at info@aptsoundtesting.co.uk  or call us on 01525 303905.

Alternately for more information on how to prepare for your precompletion sound testing please download our sound testing checklist, or visit our website at www.aptsoundtesting.co.uk