Improving Air Tightness in Buildings
Improving Air Tightness in Buildings
Darren Helliwell of APT Sound Testing looks at how construction companies can improve the air tightness of their buildings to ensure they pass their airtightness test first time.
With the Building Regulations and planning requirements and energy assessments pushing buildings towards ever-lower energy use it has become more important than ever to ensure your building is constructed as air tight as possible.
One of the most important steps to improve energy efficiency and occupiers wellbeing in both dwellings and the workplace is by reducing air leakage.
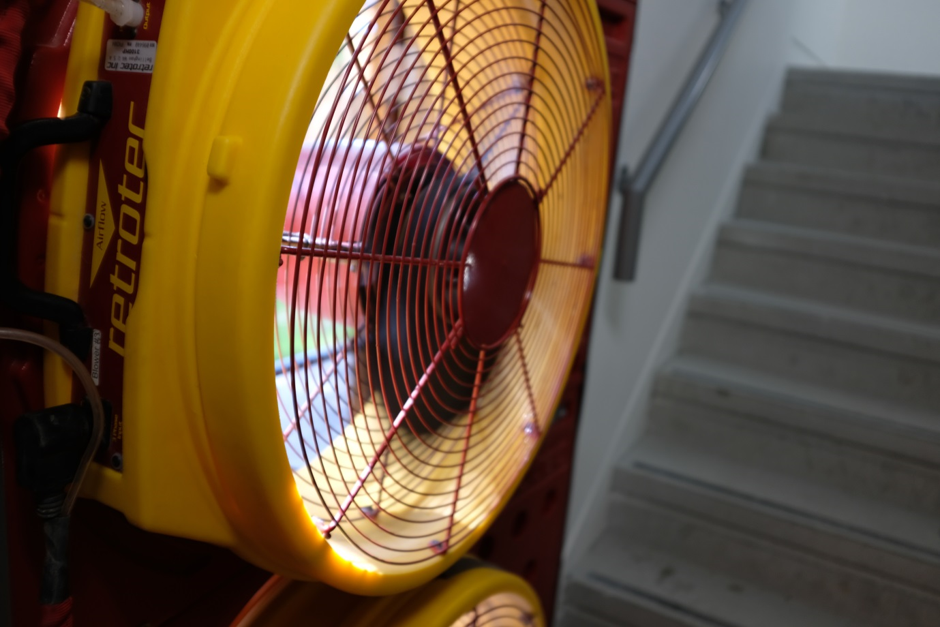
Detail showing a blower fan test equipment

Although the worst allowable air permeability stated in Building Regulations guidance has remained unchanged for some years at 10m3/hr/m2, the actual designed air leakage figure is much lower usually between 3 – 5m3/hr/m2; however, many construction companies are struggling to attain this lower air leakage figure.
If sufficient attention isn’t paid during the design and construction stages of a project, then the lower air leakage rate may be difficult to achieve and there is a much higher risk that the building will fail its airtightness test. Carrying out remediation sealing work and retesting when when a building fails can be a major headache, often leading to delays and cost over-runs.
In our experience, designing and constructing for Airtightness is not rocket science. While many things contribute to a building achieving its airtightness target, one of the biggest factors is usually down to the quality of on-site workmanship.
The key principles of achieving airtightness are as followings:
- Having a simple air tightness design and construction strategy defined at design stage.
- Drawings/details clearly identifying the location of the air-line from an early stage (the air-line is basically the elements that serve to provide an airtight envelope around the building).
- Using building envelope components that are specified as airtight, such as windows, doors, curtain walling, roof lights etc.
- Using common, easily repeatable details so reduce the chance of buildability issues.
- Ensuring the building is correctly prepared in line with the air tightness checklists
- Assigning a single individual to be the air tightness champion with overall responsibility for airtightness during the build and site preparation prior to the test.
- Communicating the importance or airtightness throughout the entire project team and involving also trades that interface with one another.
- Making it clear who is responsible for sealing in each instance and produce a sealing closing off sheet, so this process can be accurately monitored
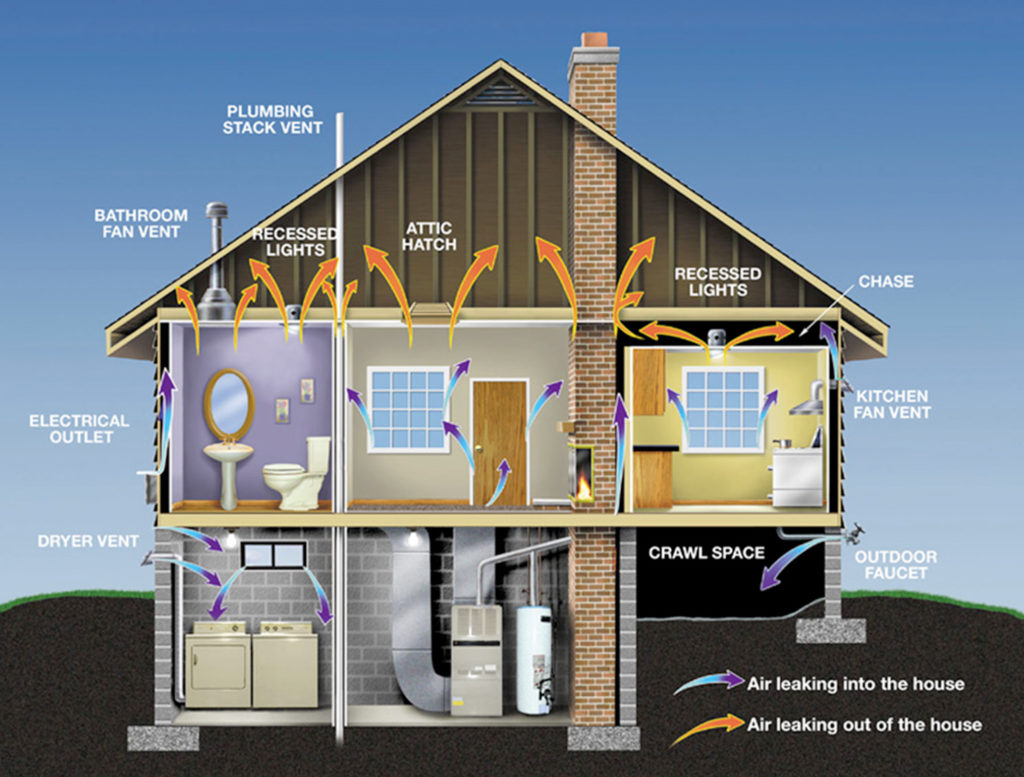
In our experience air leakage commonly occurs at interfaces between construction elements, such as service penetrations and wall-to-roof junctions. Also, air leakage paths may be circuitous, meaning air may travel some distance through the building fabric between the points of entry and exit such as wall cavities etc.
The main areas of Air Leakage:
- Seal all ducts and penetrations where the main services enter the building – we have encountered many tests where a water pipe duct has been left unsealed underneath kitchen units. After services have been installed in the duct, seal the rest of the duct.
- Seal behind kitchen and utility room units at the wall/floor junction.
- Seal all SVP and waste pipe penetrations passing through external walls and ceilings.
- Make sure that the tops, sides & ends of all pipe/SVP boxing’s are sealed to prevent air leaking into the boxing, and escaping through SVP/waste pipe penetrations. This is particularly important for SVP boxing’s behind kitchen unit. Often the bottom of the SVP boxing is not sealed to the bottom of the floor so the air can escape straight out.
- Bath and shower tray panels should be fitted and fully sealed.
- All penetrations through floors & ceilings should be sealed.
- The boiler flue must be sealed where it penetrates walls or ceilings.
- Make sure all external door/window seals (if applicable) are installed.
- In some houses, storage cupboards have been built into the roof space. The doors when closed should seal the room from the roof space. Fit draught excluder if necessary to top, bottom & sides of door/frame.
- In houses constructed from Timber Frame or where DOT & DAB plasterboard has been fixed to the inside face of block work perimeter walls, the gap.
- In between the bottom of the plasterboard and floors needs to be sealed at every floor level. Alternatively the gap between the bottom of the skirting board and floor can be sealed with mastic. This prevents air leaking behind the wall board and passing above the ceiling board, into the roof space.
Detail Showing the Main Air Leakage Paths

If you carefully check and prepare your building in-line with our air leakage checklist, it should help you pass your air tightness test at the first attempt. We have helped thousands of individuals and companies achieve their airtightness targets. Using our airtightness know how over many years of air testing and smoke surveys.
Whether you need air tightness test please contact us on info@aptsoundtesting.co.uk to obtain a no obligation quote. If you need more information on how to prepare your building for the air test please download our air tightness testing checklist.
Alternately, please visit our website at www.aptsoundtesting.co.uk for more information on our precompletion testing services.