Author: admin

Sound Insulation Testing & Consultancy

Sound Insulation Testing & Consultancy

Sound Insulation Testing & Consultancy
We offer a no nonsense professional proactive approach to acoustic design, onsite construction checks and pre-completion sound testing. Using our on-going, proactive approach we ensure clients receive professional advice every step of the way, with an on-going continual consideration of cost.

The importance of undertaking design reviews and on site construction checks is often forgotten resulting in sound test failures at the end of the project prior to building control signoff. This can be extremely costly in terms of programme and possible claims by the client. By undertaking careful acoustic design from the initial design stage through to completion it greatly reduces the risk of sound testing failure.

Acoustic Design
We have considerable experience in all matters related to architectural acoustic design and detailing. We can help develop the initial acoustic design of the project from the initial design scheme stage. Our approach is robust and does not leave any room for errors using our In-depth knowledge of acoustic materials, construction systems and Regulations we can provide the following:

>>> Provision of cost-effective and practical acoustic solutions

>>> Thorough understanding of the desired character of the space

It is essential that strong communication among the members of the design team members is essential, to facilitate this we can undertake design meetings and site inspections to finalise the acoustic solutions in full accordance with the project’s aims.

Specification of External Building Fabric and including walls, doors and windows in order to minimise noise break-in, or break-out for privacy and overall acoustic quality within dwellings.

Acoustic testing of existing wall façades to ISO 140-5, to check the existing sound levels so new targeted wall upgrades can be specified.

Acoustic Investigation and design of rooms/spaces for a wide range of environments such as schools, offices and commercial spaces.

Site Visits
We offer a site survey service which allows our clients to feel confident about the outcome of their sound testing at the end of the build. The site visits let us check that the installation teams are installing the acoustic materials as per manufacturers avoiding crucial onsite mistakes. You can often have a compliant design which still fails due to poor workmanship; the site survey visits negate the risk of sound testing failure.

A Few Simple Design Considerations
The use of suspended ceilings will help improve the performance of the floor partition. Including a resilient acoustic layer or adopting an “acoustic” flooring system will improve the impact and airborne performance of a floor

Avoid using lightweight blocks in the inner envelope construction as sound will travel along these both vertically and horizontally from dwelling to dwelling.

Use carpet in hallways/corridors to lower reverberation levels.

Key considerations of acoustic design are:

>>> Careful design consideration for all separating walls and floors

>>> Careful design consideration for all internal wall and floor performance

>>> Careful design consideration for the external/internal building façade.

>>> The specification of glazing/curtain walling

>>> The specification of doors

>>> The specification of ventilation

>>> The building/s orientation and layout

>>> Careful design consideration if using lightweight external walls and roofs

>>> Careful design consideration for all internal wall and floor performance

>>> Careful design consideration to reverberation control and room acoustics

>>> Acoustic screening from external noise such as fencing etc.

>>> Acoustic protection from plant rooms, communal areas etc.

>>> Noise exposure of outdoor spaces such as gardens, balconies.


Defect Diagnosis & Remedial Advice
We occasionally get involved with projects that have failed the sound testing – even though we weren’t initially involved with the project. Often it is due to the inclusion of inadequate materials or robust acoustic design and isolation of materials.

Using our considerable experience in building acoustics, we are able to diagnose the reasons for potential the sound testing failure and recommend a cost-effective solution. Often, the reasons for the partition failure are obvious to the test engineer in which case the advice will be minimal and subsequent design advice costs will be minimal; however sometimes, there are more technical issues which require detailed diagnosis and invasive investigation, such as the use of lightweight blocks throughout the inner envelope wall on a block of flats.

Whatever the acoustic problem we can usually find an acoustic solution that will provide a sufficient acoustic design to satisfy Part E of Building Regulations. If you have suffered a sound testing failure then get in touch with us as soon as possible, as we should be able to offer you an expedient solution helping you to achieve practical completion in the quickest time possible.

If you would like more information in regards to sound testing or acoustic design, please follow our blog at: http://soundtestinguk.blogspot.co.uk/, or contact us on 01525 303905 or visit our website at: www.aptsoundtesting.co.uk  

Designing Buildings to Pass Sound Testing

Designing Buildings to Pass Sound Testing

Designing Buildings to Pass Sound Testing
From the very start of the design phase of a new building, it’s extremely important that careful consideration is given to the acoustic element the building.

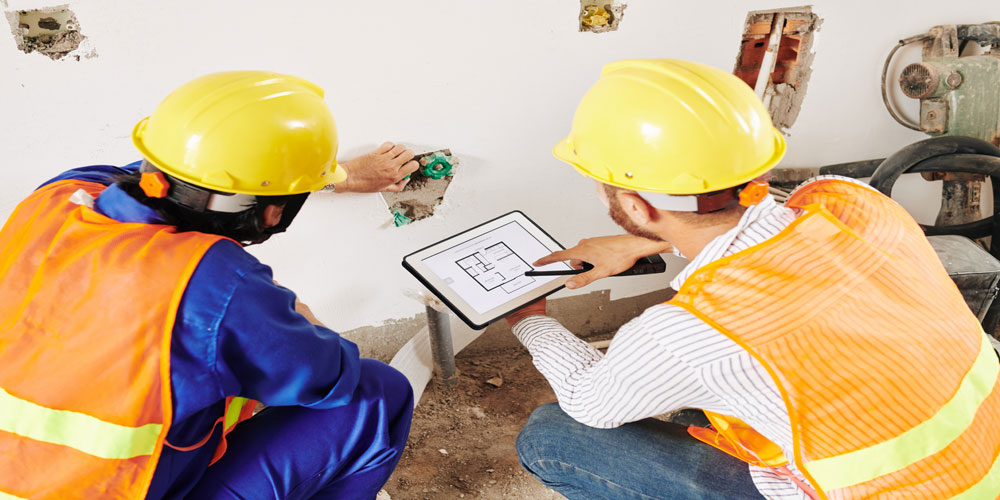
By getting us involved at the start of the design process we can undertake a comprehensive acoustic design reviews and on-going site surveys. We always advocate meeting with the design team at the earliest opportunity to go through all acoustic elements for the building’s design, taking into account the site constraints and the most cost effective method of achieving Part E of Building Regulations. We try to forward of any possible ‘onsite’ construction problems and difficulties in achieving successful acoustic construction and subsequently the sound testing for Part E.

Acoustic Design Services

Acoustic Design Services
Once we have completed the acoustic design review our services don’t finish there. We provide the site team with on-going design support and site visits. You will have direct contact with the allocated acoustician from the start of the process through to the successful completion of the project.

Once the first phase of the building is completed, we can undertake sample sound testing to ensure the acoustic design and onsite construction methods are sufficient to pass Part E sound testing.

When it comes to refurbishment projects i.e. house converted into flats and/or an office block into flats we can undertake a sample test of the existing wall and floor construction. Once we have established the sound levels for the existing construction we can then look at extent of the acoustic upgrades to attain Part E Complaisance. This is much more effective than just forwarding an acoustic design that may be to excessive and expensive when the existing construction is already ‘acoustically’ robust and therefore only needs to improve by a few dB.

One problem we often encounter (without our design input) is that the building marginally fails during the sound test. The potential problem that is often overlooked is that many types of acoustic design/materials have attained an acoustic rating within a laboratory. It is very difficult and extremely unlikely that the sound levels achieved on a construction site will be as good as in the confines of a stringent laboratory environment.

When the construction assembly is tested in the lab, it is also certified and an exact description of the materials and the installation techniques are described in detail and followed to the letter, obviously this should be replicated on the your site as closely as possible, however this seldom happens. This is one of the reasons why a 5dB point difference is allowed between the construction design on paper and the actual on site construction performance. When you consider that sound doubles every 10dB, then 5dB can make a huge difference to the overall performance of the dividing partition under test. If consideration is not allowed for during the design process then there will be a greater chance of a sound test failure on your project. 

Another potential problematic area of sound transference and potential sound test failures is down to flanking sound. Noise flanking is when travels along a continuous path due to insufficient isolation/break within the building wall & floor elements. One of the most common flanking paths is along the inner leaf of an external cavity wall. This may be due to lightweight block construction resulting insufficient mass to prevent noise transference.  

Unwanted noise travelling along flanking paths makes the building structure vibrate and this causes the sound to radiate into your room. One solution is to build another wall or ceiling in front of the original, but not connected to it (often called an independent wall or ceiling). APT can help to locate the flanking sound and propose a cost effective design that will pass the sound testing and satisfy Part E of Building Regulations.

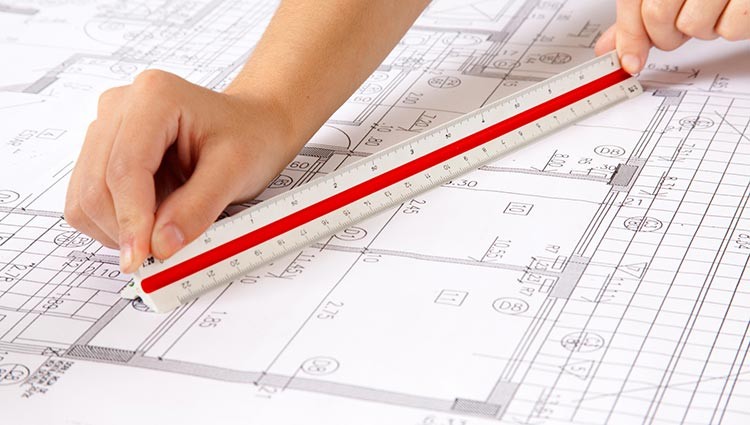
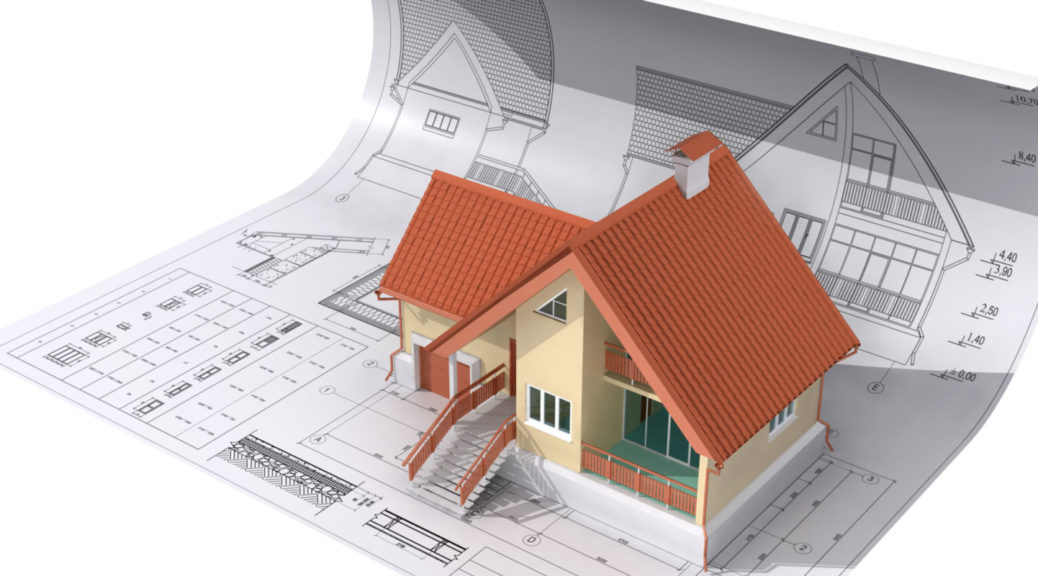
For the smaller projects, we undertake a more simplified acoustic design service consisting of a review of the design drawings, such as to floor plans and sections. This usually takes place straight after planning has been approved as increased cost savings can be realised at the earliest stage. We can also undertake sample sound testing if the client is not sure of the existing onsite construction.

We can then evaluate the building design to ensure that it the walls and floors are capable of meeting the acoustic requirements of Approved document E.

Some of the main areas we consider are:

•             There are no potential flanking points, where isolated partitions are wrongly mechanically fixed together to caused noise bridging or the wrong materials have been specified such as lightweight blocks etc.

•             The acoustic treatments for Soil Pipes, Stair Cases Steel Beams etc. to ensure they are acoustically fit for purpose, as these are some of the many areas that get missed.

•             Acoustic floor treatments are compatible with the proposed floor finishes i.e. Carpets, Laminates, Floor Tiles and under floor heating systems.

•             The Lighting specification to, ensure they are acoustically complaint to the overall design i.e. down lighter design etc.

If you would like more information in regards to sound testing please follow our blog at: http://soundtestinguk.blogspot.co.uk/, or contact us on 01525 303 905 or visit the APT Sound Testing website.

Acoustic & Sound Testing Terms

Acoustic & Sound Testing Terms

Posted on May 20, 2022

In the field of acoustics and sound insulation testing, there are a large number of terms and abbreviations can be quite hard to follow.

To try and make this easier to understand, we have written the following list, which should help you to decipher the main terms and abbreviations relating to acoustics and sound insulation testing:

Pre-Completion Sound Insulation Testing (PCST) – A new requirement to Part E where structures not conforming to the RSD will be tested prior to completion to check they reach the required standards.

Decibel (dB) – The most commonly used unit to measure sound.

Ctr – The correction to a sound insulation quality to take into account low frequency noise.

DnT,w – The measurement used to measure the airborne sound insulation between two rooms (on site).

DnT,w+Ctr – See above, but with the low frequency correction factor included.

Rw – The measurement used to relate the sound insulation of a material or building element in a laboratory.

Airborne Sound – Sound that’s transmitted through the party wall and/or floor via speech, radio & TV etc.

Impact Sound – Sound that’s transmitted through the party floor via footsteps, jumping or moving furniture usually from the dwelling above.

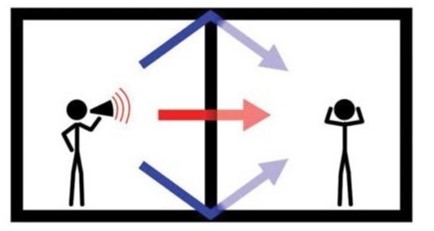
Flanking Noise – Flanking noise transmission occurs when sound travels along elements shared by adjacent structures. Sound does not always travel straight through the building element. If the wall, floor, or partition concerned has good sound-reducing capabilities, the sound will travel from A to B by the easiest route, often around the sides, top or bottom of the party wall or floor. It’s worth noting that flanking transmission can exceed direct transmission and damage the overall capabilities of the construction if flanking constructions and details are not correctly specified and constructed.

Flanking Transmission – Sound transmitted between two rooms using an indirect path e.g., the top, bottom, or sides of a separating wall.

Frequency – The number of pressure variations per second that gives a sound its distinctive tone.

Hertz (Hz) – The unit of the frequency of the sound.

Impact Sound – Sound resulting from direct impact on a building element.

Internal Floor – Any floor that is not a separating floor.

Internal Wall – Any wall that does not have a separation function.

Separating Floor – Floor that separates flats or rooms for residential purposes.

Separating Wall – Wall that separates adjoining dwellings, houses, flats or rooms.

LnT,w – The measurement used to measure the impact sound insulation of floors (on site)

Lnw – the measurement used for laboratory impact sound testing.

Noise – Unwanted sound/excess sound

Pre-Completion Testing (PCT) – A new requirement to Part E where structures not conforming to the RSD will be tested prior to completion to check they reach the required standards.

Robust Standard Detail (RSD) – A collection of pre-approved constructions that, if used, negate the need for PCT

Sound Reduction Index (SRI) – A quantity measured in a laboratory that characterises the sound insulation properties of a material or building element in a stated frequency band.

sound-testing-equipment

Sound Proofing Design and Testing

Getting the soundproofing design right from the word go, is key, and APT Sound Testing can help in all areas of acoustic design and sound insulation testing. For more information on our UKAS accredited sound testing or acoustic  design services, please contact us at info@aptsoundtesting.co.uk  or call us on 01525 303905.

Alternately for more information on how to prepare for your precompletion sound testing please download our sound testing checklist, or visit our website at www.aptsoundtesting.co.uk

Sound Testing Walls

Sound Testing Walls

APT provides acoustic design and sound insulation testing and consultancy to help architects, developers and homeowners achieve the minimum requirements of Part E of the Building Regulations for new build and/or conversion projects. Sound transfer between walls  in dwellings is a common problem and its often down to poor-quality construction – this is often down to the contractors installing party walls and floors being on price work and not taking time and care during the construction process resulting in poor workmanship.

Sound Testing Walls

Sound Testing Walls & Sound Transfer
Excess sound transfer occurs as a result of airborne noise such as tv, music, voices. The airborne sound wave strikes the wall, and the pressure variations cause the wall to vibrate resulting in noise. This noise (vibrational energy) is transferred through the wall partition and radiated as airborne sound.

The 4 elements of robust soundproof design to pass party wall sound testing

There are 4 main elements of soundproofing that need to be considered to pass sound testing through walls. It’s worth noting that all 4 elements throughout the process, all of which have a direct relation to the conduction and transmission of sound vibrations, they are: Mass, Decoupling, Absorption and Damping. If you incorporate all the four elements into your party wall design, then airborne sound transference should be kept to a minimum and you will pass your precomplation sound testing.

If all four elements are undertaken to your project, then there is a higher chance  you will pass your party wall sound insulation testing at the first attempt.

Adding mass to pass party wall sound testing

The first element of a robust soundproofing design is the adding of mass.  if the wall construction has a higher mass, the soundwave will struggle to vibrate the wall itself in order to permeate through it as it will have less movability, making it less probable for sound vibrations to travel through.  One the most common ways to add mass by the inclusion of cement board or soundboard. This adds mass and makes the walls as heavy and thick as possible. Adding mass to walls is one of the easiest ways to decrease sound vibration, although will not reduce deep bass sounds from being heard.

Working out required mass required for wall to pass the sound insulation test can be quite difficult. For instance, the acoustic rating of a typical masonry wall increases from 45 dB to 50 dB when the thickness is increased from 100 mm (block laid on edge) to 215 mm (block laid flat). This doubling of mass does not need to be achieved by a doubling of thickness of a wall, as you can greatly increase the mass by opting for a masonry that has a minimum mass of 1900kg/m3 or (190/m2) whereas many lightweight blocks such as thermalite are only 500kg/m3 (50kg/m2), which can easily lead to sound test failure if used in the wrong situation such as the inner envelope construction and or a single skin construction for party walls.

It’s worth remembering for sound to conduct through a wall, it has to actually move or vibrate the party wall ever so slightly. A heavy mass wall is always much harder to move than a lighter wall. It is very important to note that a heavy wall will still vibrate, just not as easily as the lighter one, with this in mind we then need to use the 2nd element of soundproofing design which is the Decoupling of materials.

If all the above updates relating to adding mass are undertaken to your project, then there is a higher chance  you will pass your party wall sound insulation testing at the first attempt.

Adding Decoupling to Pass Party Wall Sound Testing

The second element of a robust soundproofing design is decoupling. Basically, the term definition of decoupling is to separate objects or construction. With decoupling, you can introduce a cavity between two layers of drywall and/or masonry which separates the two wall constructions. By doing this, a layer of air is created in-between the walls which provides good sound insulation. Decoupling materials within party wall construction is mostly done with resilient sound clips, resilient acoustic channel, or extra framing i.e., double stud or staggered stud walls. In most instances, sound vibrations will transfer easiest from material to material with solid connections, rather than through open space such as cavities.

In our experience coupled wall constructions usually have the worst sound insulation performance, this is because the sound has a solid sound transfer path via the direct fixed plasterboard to the framing and then through the direct fixed plasterboard on the other side. To improve the sound insulation performance of the party wall you need to introduce acoustic decoupling by reducing the number of connections by installing resilient sound clips, or by breaking the path entirely via the introduction of a 2nd wall leaf and cavity.

Resilient sound clips are small metal and rubber connections that attach to the timber of blockwork with screws. Resilient bars are then installed to the clips and plasterboard is then fastened to the channel. Sound clips provide acoustic decoupling by suspending the plasterboard on the resilient bars approx. 25-40mm from the timber or blockwork wall. This type of system is often favoured by developers as it has a minimal build up in comparison to constructing a double leaf wall with cavity and is much quicker to install.

If all the above decoupling updates are undertaken to your project, then there is a high change you will pass your party wall sound insulation testing at the first attempt.

Adding absorption to pass party wall sound testing

The third element of a robust design is the introduction of noise absorption materials within the party wall construction. In all cases, careful selection of good quality soundproofing insulation materials will contribute towards a successful sound test in compliance with Approved Document E. Absorption materials can be acoustic slabs and acoustic rolls.

The introduction of acoustic insulation materials such as Gyproc RW3 mineral wool (min mass 45kg/m3) can be a good place to start. The material is placed into the wall in order to absorb these soundwaves, but the insulation is not compressed. Acoustic insulation is good at removing low-level noise issues and can be quite easy to handle and install.  The acoustic slabs are dense and effectively block out noise frequencies across party walls and floors in blocks of flats etc.

When you’re working on metal of timber stud walls, you can simply insert the acoustic slab straight onto the wall, making sure it’s fitted neatly between the metal /timber studs with no sagging or holes in the material. You can then install the rest of your acoustic solution such as resilient bars and acoustic plasterboard and apply an acoustic sealant around all gaps and holes.

If all the above absorption updates are undertaken to your project, then there is a higher chance you will pass your party wall sound insulation testing at the first attempt.

Adding damping to pass party wall sound testing

The 4th element of a robust soundproofing design (or acoustic design) is the introduction of noise damping within the party wall construction. Noise damping materials can be acoustic resilient layers and rubber panels which help to reduce vibration within the party wall construction. Dense recycled rubber panel systems are high performance wall soundproofing solution aimed at providing good noise damping performance. Unlike other acoustic solutions, this dense recycled rubber is fairly easy to install and will provide a reliable soundproofing-barrier.

Noise damping materials are usually quite easy to fit, as the acoustic rubber panels just need to be cut to size and stuck to the party wall covering the entire party walls surface. Proprietary adhesives are usually supplied with the rubber panels. The wall can then be finished off by adding two layers of acoustic plasterboard. When used correctly, this simple upgrade system, can improve the performance of a single skin brick wall by 7-10dB or achieve 46dB to 48dB Dnt, W +CTr which exceeds the requirements of Approved Document E for party walls 43dB Dnt, W +CTr in conversion projects.

If all the above damping upgrades are undertaken to your project, there is a higher chance of passing your party wall sound insulation testing at the first attempt.

Watch out for noise flanking transmission through party walls.

Flanking sound transmission occurs when sound is transmitted from one space to another indirectly, through adjoining parts of the structure. For example, impact sound may be transmitted from one room to another via a continuous timber floor, but also through the supporting wall. This can be as simple as the party wall been built straight off the top of the timber floor finish, so the noise travels under the party wall via the continuous timber floor.

Sound Testing Walls

Another common noise flanking issue encountered on many office conversions, is the inclusion of lightweight (thermalite) blockwork in the original inner envelope and party wall construction.  The mass of a blockwork wall should be approx. 1850kg/m2; however, a standard thermalite block may be as low as 450kg/m2, approx. one quarter of the recommend mass. This means the noise can pass to neighbouring flats via the lightweight walls, even when the party wall has been designed and built to pass Part E by a large margin.

Flanking noise transmission is always a potential problem within any structure buildings being converted and depending on the intensity of the acoustic energy received via flanking transmission paths, the effectiveness of sound insulation of separating partitions can be much lower than expected from their construction. We often carried out precompletion sound testing to wall partitions that should have achieved around 50dB, but only achieved 40dB, due to onsite noise flanking resulting in sound test failure.

Careful consideration must be given to the effect of flanking noise transmission within all party walls within new and conversion projects, and all potential flanking paths must be identified and eliminated prior to the installation of any sound insulation system.

If all the above noise flanking considerations are employed on your contract, then there will be a much higher chance you will pass your party wall sound insulation testing at the first attempt.

Sound proofing masonry party walls to pass precompletion sound testing

There are many soundproofing solutions for masonry walls; however, it depends on what types of masonry have been used for the existing/new wall construction. To try and help you on your soundproofing journey, I have listed four acoustic solutions for masonry walls; however, each solution should be carefully checked with the material manufactures prior to onsite installation.

Here are three ways to soundproof a masonry party wall:

  1. For High mass Masonry – Check that all masonry and mortar pointing is complete, then apply a timber baton to the wall, then add resilient bars and a layer of 15mm sound insulation board. This only needs to be done to one side of the wall, where high mass masonry has been used.
  2. For Low mass Masonry – Check that all masonry and mortar pointing is complete, then apply a layer baton to the wall, then add resilient bars and RW45 acoustic insulation. finish with 15mm Sound Board. This needs to be done to both sides of the wall, where low mass masonry has been used.
  3. For Low mass Masonry (higher spec) – Check that all masonry and mortar pointing is complete, then apply a Gyproc G.L 1 wall lining solution to the wall, then add RW45 acoustic insulation to the inside of the metal frame. Then finish with two layers of Sound Board.

Where high levels of sound insulation are required – Check that all masonry and mortar pointing is complete, then creating a new partition wall using 70mm met-sec with a cavity void to the party wall, fill the metal frame with acoustic insulation (min mass 60kg/m3) and finish with 2 layers of Acoustic Plasterboard. Unfortunately, this reduces the width of the room by up to 125mm.We can help with the party wall sound proofing design

Sound Proofing Metal Party Walls to Pass Precompletion Sound Testing

Metal stud walls are the most common type of interior wall; however, they are also extremely popular when it comes to party walls between dwellings.  While metal walls are quick and easy to install, they’re really not very soundproof. Luckily, it’s possible to soundproof a stud wall, although it will take some acoustic design knowledge.

One of the simplest ways of soundproofing a metal stud wall is to isolate each side of the wall and add mass. To soundproof a stud wall effectively, you can either add a completely independent wall in from of the existing wall, although you can also attain the required soundproofing levels by upgrading the existing wall.

Here are three common ways to soundproof your metal party wall:

  1. For internal metal walls –fill the metal frame (min width 70-100mm) with acoustic insulation (min mass 45kg/m3) and install 1 x 15mm layer of soundboard to either side of the metal frame – please note this will not comply with the levels required for Approved Document E.
  2. For dividing metal party walls – fill the 100mm metal frame (with Rw45 acoustic insulation (min mass 45kg/m3) and attach “resilient channel” to each side of the studs and install 2 x 15mm sound board to either side of the wall.
  3. For high spec dividing metal party walls – use 2 x 70mm met-sec wall, with a 50mm cavity. Fill both metal frames with acoustic insulation (min mass 45kg/m3) and finish with a single layer of 15mm Acoustic Plasterboard.

If the walls are existing i.e., it is a conversion project, you may need to gain access to the base and head of the party wall, to undertake the acoustic upgrades within floor and ceiling voids, this is also required to reduce the chance of flanking noise.

The importance of sample sound testing for Part E compliance

Unfortunately, retrofitting to improve sound insulation performance is difficult to achieve and not always 100 per cent successful. We always recommend you have sample sound testing undertaken between dwellings before embarking on expensive insulation works and on conversion projects as this provides an accurate overview of the sound insulation performance of existing walls and floors, as well as highlighting noise flanking issues. For block of flats, it’s worth remembering that you will need to consider require both airborne and impact sound tests to ensure compliance with the 2014 Building Regulations Technical Guidance Document E (Sound). For houses you just need to consider walls.

Our roadmap to sound testing success

APT Sound Testing works with hundreds of builders, architects and property developers helping them with the acoustic design of their developments. Consequently, we are well placed to understand the challenges that adequately sound proofing party-walls poses to new build and/or conversion projects.  Our roadmap to soundproofing success includes:

  1. Sample Sound Insulation Testing – We undertake sample sound testing to identify the sound levels for the existing party walls and floors. Thereafter a more targeted acoustic design can be undertaken to the partitions saving time and money through the construction process.
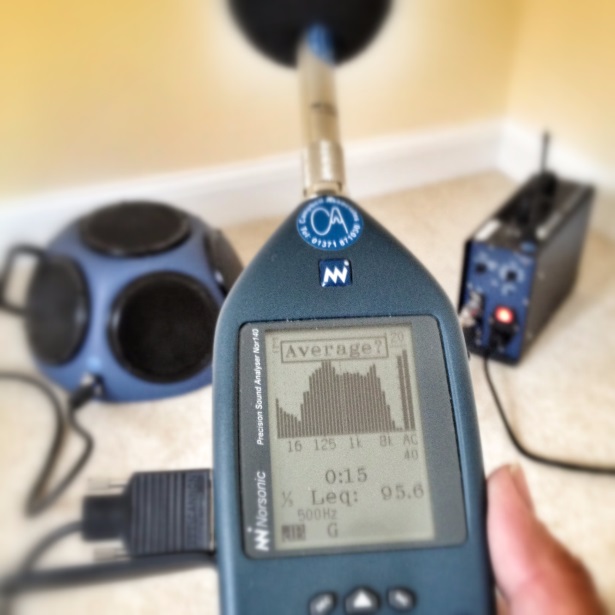
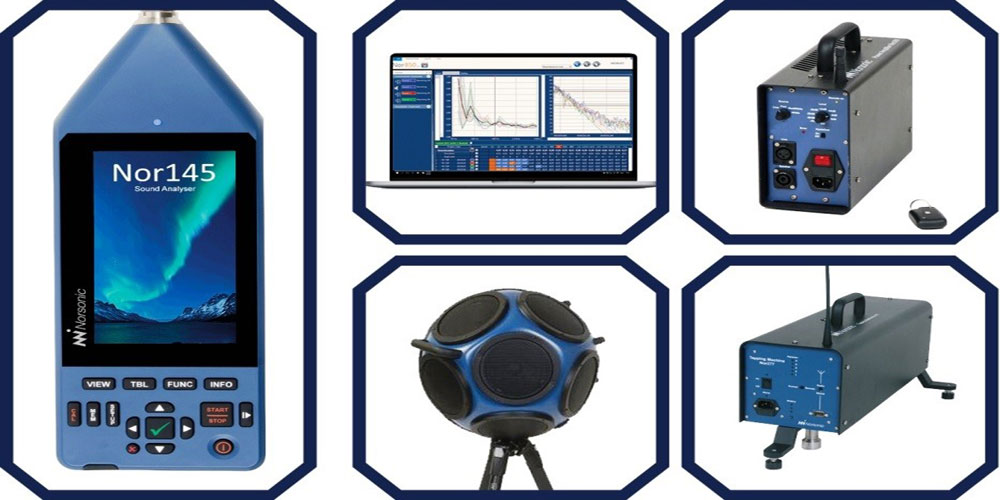
  2. Acoustic Consultancy – We have considerable experience in all matters related to architectural acoustic design and detailing. We can help develop the initial acoustic design of the project from the initial design scheme stage, in particular acoustic isolation, and interior acoustics. We also use the latest Norsonic equipment analysers and sound sources for conventional and binaural acoustic measurements.
  3. Site Visits – we undertake site visits which allow you (the client) and your contractor to feel confident about the outcome of testing at the end of the build. The site visits let us check that the installation teams are installing the acoustic materials as per manufacturers avoiding crucial onsite mistakes. You can often have a compliant design which still fails due to poor workmanship; the site survey visits negate the risk of sound test failure.
  4. Precompletion Sound Insulation Testing – We visit site and undertake the final pre-completion testing to ensure compliance with Building Regulations Part E and achieve building control sign off for the acoustic elements of the project.

Using our friendly and proactive approach our acoustic engineers will work with you to achieve the required level of performance, however complex the project. Using the APT Sound Testing team, you will benefit from:

  1. all in one acoustic solution, that considers sample sound testing, acoustic design, and final pre-completion sound testing.
  2. vast amount of technical knowledge gained from providing consultancy on a wide range of projects for over 25 years (from small housing developments to multi-residential, mixed-use, or commercial sites) as well as experience from carrying out over 10,000 sound insulation tests.
  3. ongoing impartial independent advice – we are not affiliated with any acoustic manufacturers so the advice you receive is completely impartial. All correspondence with you remains strictly private and confidential.
  4. we endeavour to provide the cheapest acoustic solution to try and reduce costs and buildability issues. This will an off the shelf solution wherever possible.

Getting the soundproofing design right from the word go, is key, and APT Sound Testing can help in all areas of acoustic design and sound insulation testing. For more information on our UKAS accredited sound testing or acoustic  design services, please contact us at info@aptsoundtesting.co.uk  or call us on 01525 303905. 

Alternately for more information on how to prepare for your precompletion sound testing please download our sound testing checklist, or visit our website at www.aptsoundtesting.co.uk

Please Note: although we take every care to ensure the information was correct at the time of publication. Any written guidance provided does not replace the user’s professional judgement. It is the responsibility of the duty-holder or person carrying out the work to ensure compliance with relevant building regulations or applicable technical standards.
Indoor Air Quality Testing for BREEAM

Indoor Air Quality Testing for BREEAM

Depending on the building certification standard you are wanting to achieve i.e., BREEAM, LEED and/or WELL certification, you may need to carry out an initial detailed assessment of air quality followed by ongoing long-term monitoring. Typical indoor air quality pollutants that require monitor range from volatile organic compounds (VOC’s) Formaldehyde to key gas indicators such as carbon dioxide.

In most instances, levels of VOC’s and Formaldehyde will typically be at their highest levels soon after a building is refurbished or constructed; however, during the lifespan of the building other common indoor air quality pollutants such as dust levels (PM 2.5 / 10), carbon monoxide, carbon dioxide and humidity can be a problem for the building occupants.

  • Independent Consultants – We undertake 3rd party testing and do not carry out main contracting works ourselves and have no links to contractors. This means we can provide impartial advice free from bias and external pressures.
  • Executive Summary – A simple, clear summary of the main findings of the report.
  • UKAS Laboratory Analysis – Samples are analysed at 3rd party UKAS accredited laboratories.

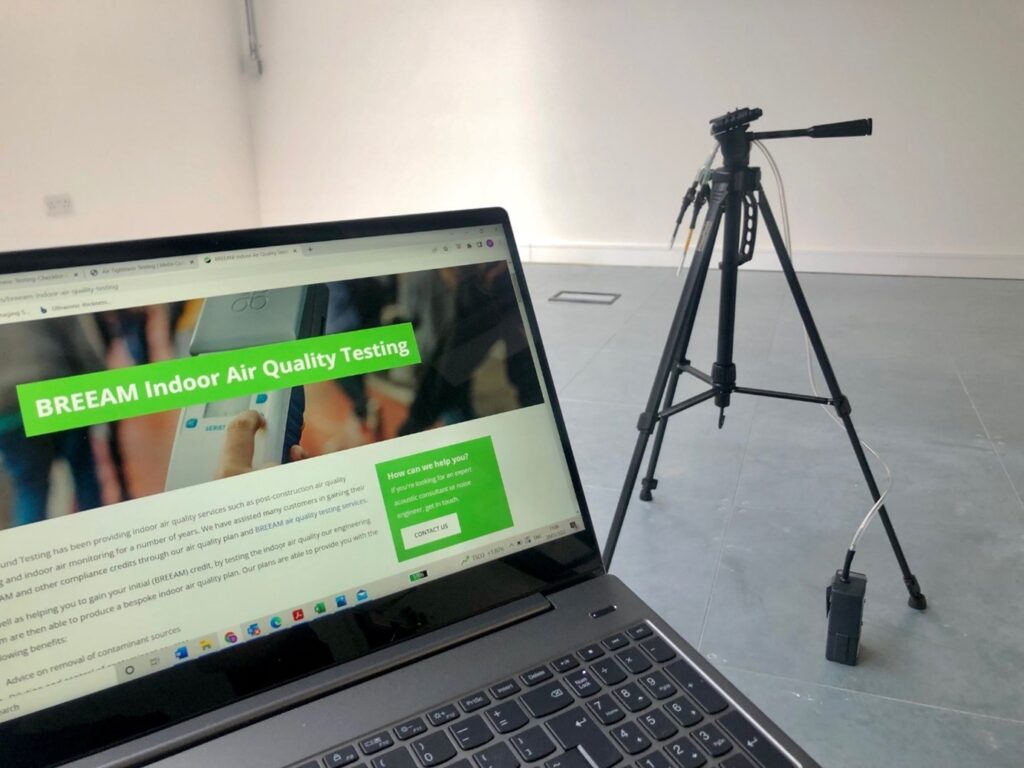
APT Sound Testing have the expertise to carryout indoor air quality testing to meet your building certification standard.  We can carry out one off in-depth assessments to achieve extra points for BREEAM etc. or install a range of air quality sensors for ongoing measurements over the lifecycle of the building.

Indoor Air Quality Testing

What potential pollutants need to be monitored as part of the air quality check

There are a few potential elements and factors to bear in mind when undertaking a comprehensive air quality check – they are:

Measuring Volatile Organic Compounds (VOC’s) – these are gases that are given off by many indoor sources. Concentrations of most volatile organic compounds are higher in indoor air than outdoor air. VOCs can include a nasty combination of chemicals that can cause nose, eye, and throat irritation as well as fatigue, nausea, shortness of breath, headaches, dizziness and skin irritation.

Measuring Formaldehyde – this is a very common chemical compound that exists in various forms and at room temperature, is a colourless, distinctive, strong and even pungent smelling, flammable and gaseous substance and is heavily used in industries such as the manufacturing of building materials.

Measuring Mould – mould can affect offices and/or workplace environments, especially if there is water damage and there is high levels of humidity or dampness. There is a huge amount of different indoor mould types that can cause health problems if an individual is exposed to it during their everyday working activities.

Over exposure to moulds can cause symptoms such as nausea, coughing, wheezing nasal issues, stuffiness, and eye irritation. Also, it doesn’t stop there, many people can have more acute allergies to moulds which can result in more severe reactions and hospitalisation.

Measuring Carbon Dioxide – many air conditioning systems (HVAC) re-circulate indoor air to maintain comfort and reduce energy costs associated with both heating and cooling outside air. When building occupants sense air flow out of air supply ducts, it’s very difficult to check how much of this air is simply re-circulated or external air. Carbon dioxide is generated by the human respiration process and therefore high occupancy office environments often result in elevated levels of this gas.

Measuring Temperature – Air conditioning units are commonly found in offices across the UK. Some are used for purely cooling an office environment, whereas some are used to heat also.

Measuring Humidity – humidity levels should be kept between 40% and 60% in offices. Humidity levels below 40% will begin to cause problems for workers with nasal/breathing conditions such as asthma.

Indoor Air Quality Testing

We can help with your indoor air quality testing

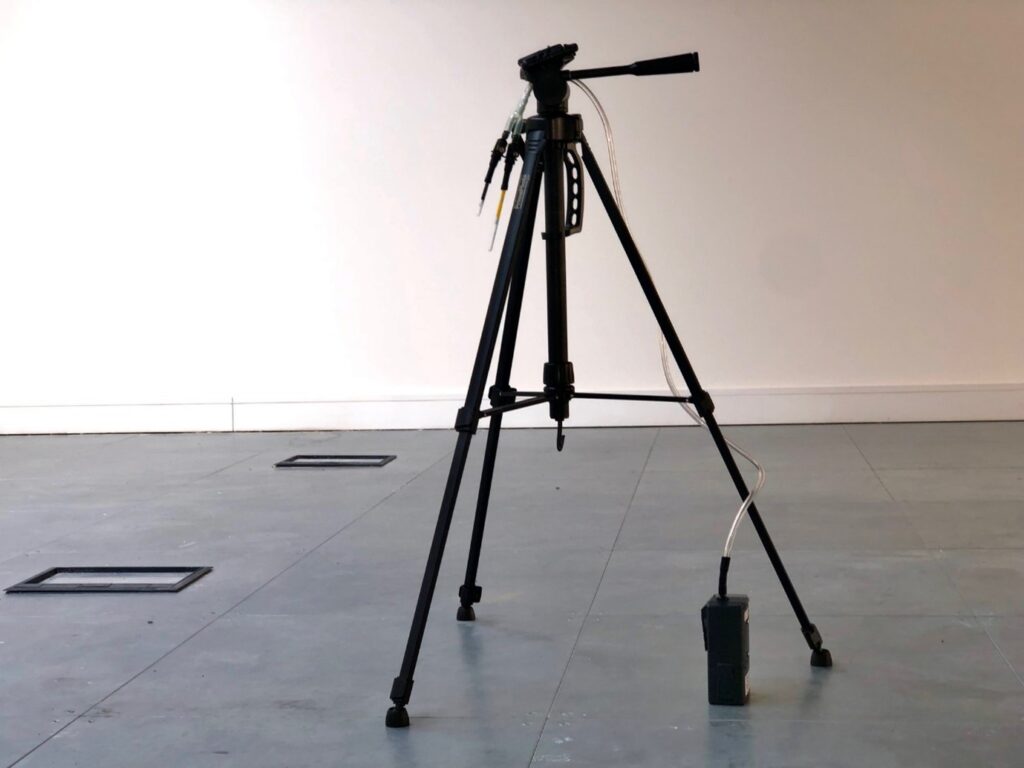
Apt use the latest technology to perform indoor air quality assessments in the workplace. Our expert air quality technicians will perform a series of exposure sample testing to determine whether your building poses a potential health hazard from VOCs etc.

We always strive to improve the standard of the services we offer, which is reflected within the company’s UKAS & ISO accredited quality systems and  industry approvals.

Providing both consultancy and laboratory testing services, you can rest assured that our dedicated team have the necessary industry knowledge to see the project through to successful completion, whatever the requirement.

If you require any further information on our indoor air quality testing services, please call APT on 01525 303905 or email us at: info@aptsoundtesting.co.uk

Improving your Air Testing

Improving your Air Testing

Improving your Air Testing with Good Construction Detailing

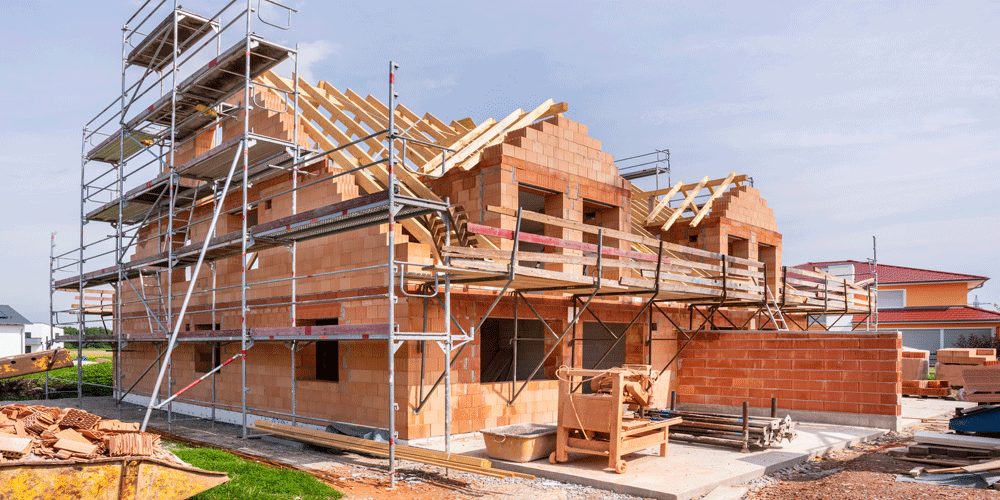
Air Testing is the simplest and most popular method used in the construction industry to confirm compliance with Part L of the Building Regulations. The air test is simply a test of the building fabric integrity. Draughts and heat loss often occur wherever there is a hole or gap in the building envelope, resulting in the loss of heat/cooling which in turn will add to energy bills.

Since April 2006, air testing has been required to be tested for Air Permeability, in order to comply with Part L1 & L2 of the Building Regulations.  Since 2011 the air leakage target has reduced from 10m3/hr/m2 to 5m3/hr/m2. In the next 2 years it is expected that the target may be reduced to 3m3/hr/m2.

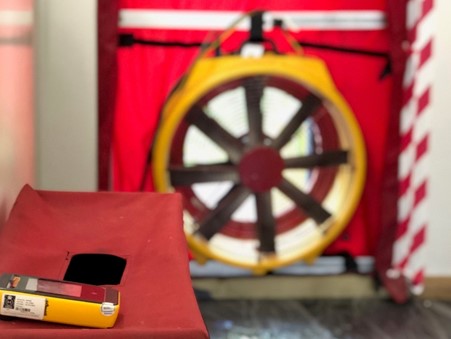
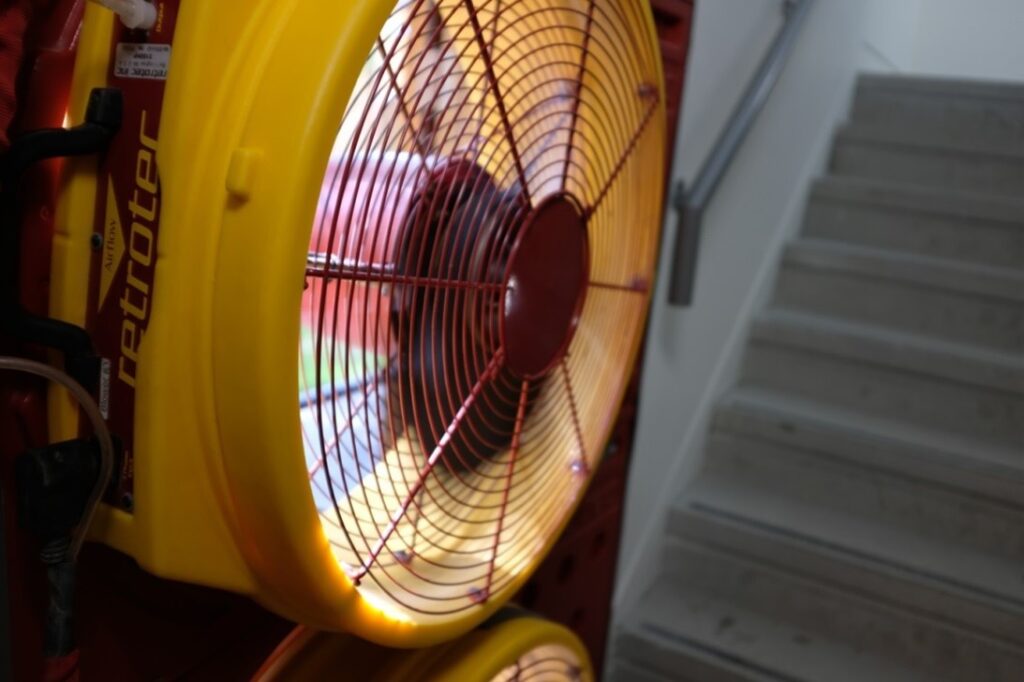
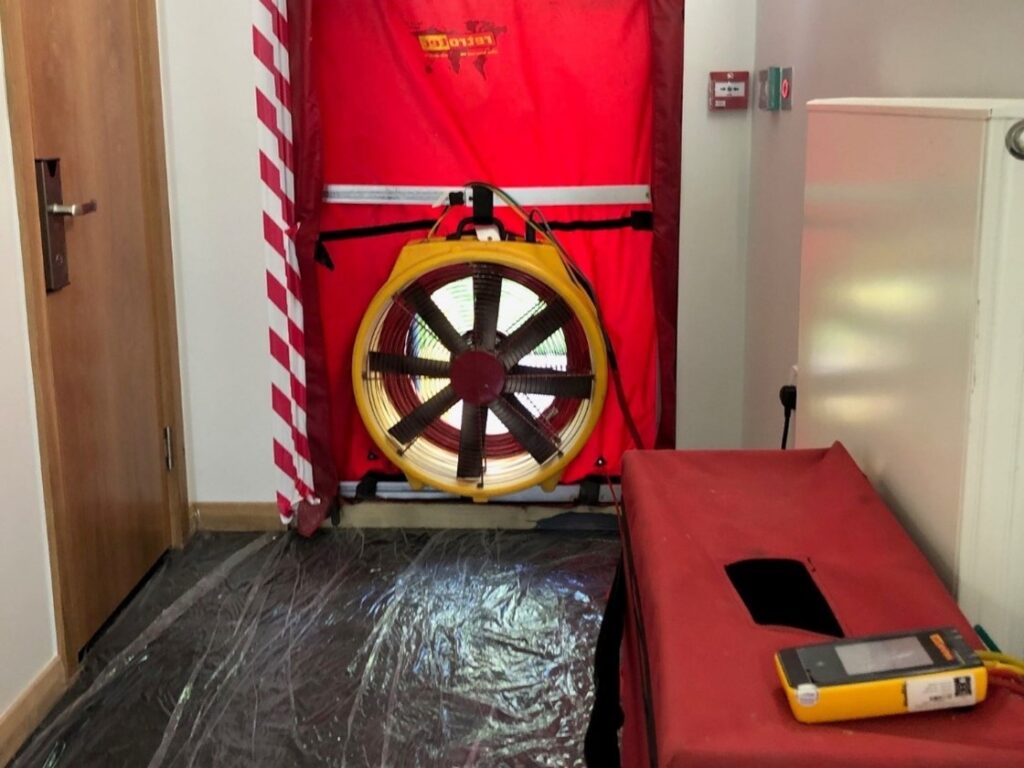
We provide a personal, helpful, efficient and cost effective air test service to our clients. Using the latest high power, portable door fans systems, we offer air testing to all building types, ranging from small rooms, flats & houses to office blocks & large distribution warehouses in accordance with the Building Regulations Part L1 & L2

Our air test fan systems are compact, discreet and fit simply into a personnel door. The system can easily be transported through areas of limited access or up to high level areas. Many contractors use us to undertake the testing in busy city centres or other tight access areas as we eliminate the site disruption caused by the larger trailer type air testing equipment.

In the event of a building failing an air test we then offer smoke testing – both hand-puffer for dwellings and large scale smoke testing for commercial buildings. This highlights the areas of air leakage through the building fabric. We can then undertake a full written and photographic survey as reference for your site management and relevant subcontractors. We will also offer FREE advice on the best method to seal any leaking areas. The main benefits of this are:

•             Air leakage paths are quickly identified in the event of a test failure

•             A full written air leakage report is forwarded so remedial works can start straight away

•             Building handover/practical completion and handover can be achieved more quickly
 

Construction Phase Consultancy

Air Pressure Testing has a practical ‘hands on’ approach during building construction and prefers to be involved as practically possible during this stage. We undertake periodic site visits to inspect the building envelope assembly as it is constructed and provide both written and photographic reports to enable any further works / remedial works deemed necessary to be accurately targeted. Site visits are generally to allow us to identify:

•             Insulation placement, continuity and effectiveness at thermal bridge junctions

•             Air barrier continuity within elements and at interfaces (particularly at sub-contract  package interfaces) 

Foundation/ground floor Initial works (Air Test risk factor 8)

a.            Ensure that any penetrations through the air barrier (e.g. service pipes) have been dressed. Pre- formed collars, sometimes referred to as ‘top hats’, which seal to the membrane and around the throat of the pipes are effective means of achieving a good airtightness seal.

b.            Ensure that the wall and floor damp-proof course/membrane forms an adequate airtight layer.

c.             With using timber frame construction, check that the sole plate is sealed to the foundation/floor-slab.

Internal Floors (Air Test risk factor 9)

a.            Using joist hangers can limit penetrations through the air barrier.

b.            If joists are to be supported by the wall, check that there is no air leakage into the cavity and the wall between the joists is fully filled/completed.

c.             Ensure timber floor sheets/boards are well fitted and sealed at their edges as well as at junctions with perimeter walls with mastic.

d.            Ensure the ceiling-to-wall joint has been sealed with mastic.

Eaves Level (Air Test risk factor 8)

a.            Ensure the airtightness layer between the wall and ceiling/roof is continuous ceiling below the roof space.

b.            Ensure there is a continuous air barrier over the whole ceiling area.

c.             Ensure all service penetrations (ventilation ducts from extract fans and light fittings) have been properly sealed where they penetrate the air barrier as this is a major air leakage path.

d.            Ensure all loft hatches are airtight and surrounds are sealed where they penetrate the air barrier.

External Doors & Windows (Air Test risk factor 7)

a.            Ensure you always specify good quality windows and doors.

b.            Always check that the wall-to-frame junction is properly sealed and continuous with mastic against the wall’s airtightness layer

c.             Ensure all windows and doors have an appropriate weather-seal between the opening unit and the frame – check for missing weather seals.

d.            All external doors should be fitted with draught excluders.

e.            Ensure the letterbox is fitted with a draught excluder.

Envelope Service penetrations (Air Test risk factor 10)

a.            Check for seals at service entry points (pipe and cable routes), e.g. around incoming water pipes,  gas pipes, electrical cabling, as well as waste water pipes for sinks, baths, washing machines,  dishwashers, etc. Seals should be provided internally and externally.

b.            Where multiple services penetrate at the same point, there should be sufficient space to fully seal round each of them.

Brick/block masonry construction (Air Test risk factor 7)

a.            Ensure the quality of construction as the work proceeds. Good mortar joints are required (i.e. no gaps around the blocks or bricks) on both internal and external faces – this also reduces sound transmission.

b.            Ensure all block-work is paint grade and painted were possible.

c.             The application of wet plastering, parging or the addition of fully-sealed dry lining will create a good air seal.

d.            Parging is an effective method of sealing around joists that penetrate the inner leaf of an external wall.

e.            Check that there is a good seal around all services that penetrate the masonry.

Plasterboard Dry lining (Air Test risk factor 10)

a.            Check the plasterboard is continuous (e.g. there are no large holes behind the kitchen units/bath). 

b.            Ensure that airtightness measures have been incorporated at all edges, particularly at the floor/ceiling junctions and around openings.

c.             Check the plasterboard is correctly detailed at joints, corners, reveals and window sills. Plasterboard should be mounted on ribbons of plaster or adhesive around all the edges (rather than dabs) to  prevent air leaking through the porous block-work behind.

Sealed Membranes & Vapour barriers (Air Test risk factor 9)

a.            Where the vapour barriers have been used as the air tight barrier, check that it is complete, that all joints have been sealed and it’s not damaged.

 Timber frame construction (Air Test risk factor 8)

a.            It’s usually easier to make timber frame dwelling airtight than other forms of construction. This is partly due to pre-fabricated construction and the use of the impermeable vapour barrier as the air barrier. The plasterboard layer can also become an air tight layer.

b.            Where vapour barriers have been used special care will be needed to avoid it being torn. Any damage to the vapour barrier must be carefully repaired.

Remedial Air Sealing Solution

1.            Smoke Investigation with Air Testing Fans:

APT’s Air Sealing Team utilise smoke investigation to identify the air leakage paths and prioritise which can be sealed first to attain an air test pass.

2.            Remedial Air Sealing Works:

APT can carry out the air sealing works. Typically allow for a 2-4 man Remedial Air Sealing Team. Adequate access must be provided for all sealing works. We provide all air sealing Materials – Rates provided on Request.

3.            On-going Air Tightness Assessments:

Enables the APT Sealing Team to seal the building until the fans indicate that the air

test would pass – thereby minimising the remedial works and time on site.

4.            Final Air Test:

APT’s Air Test Technician carries out a final independent test for compliance.

Whether you need a full on-going air tightness design/consultancy service, or just a simple air test, Air Pressure Testing have the knowledge and experience to ensure your building passes first time.

If you are unsure of the air tightness services you require, please visit our website – APT Sound Testing, call us on 07775 623464 and one of our Air Tightness Consultants will guide you through the process, ensuring that you receive the right level of advice at the right time.

What can APT Sound Testing do for you?

What can APT Sound Testing do for you?

At APT Sound Testing, we offer Airborne and Impact Sound Insulation Testing in accordance with Part E of the Building Regulations and, where required sound testing on Schools BB93 & BREEAM. Under Part E of Building Regulations, this is a requirement for new and converted dwellings where there is a separating partition wall or floor. The sound insulation testing of existing buildings is carried out to assess current levels of sound insulation and to allow for the design of remedial measures, where the performance needs to be increased.

The buildings that currently require sound testing are:

  1. Dwelling-houses, flats or rooms for residential purposes created by conversion of existing buildings or new build rooms for residential purposes will need to be tested if work starts after 1 July 2004.
  2. New build dwelling-houses and flats will need to be tested if work starts after 1 July 2004.

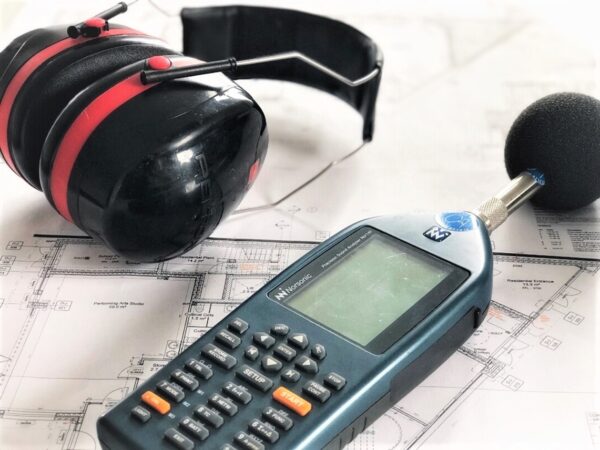
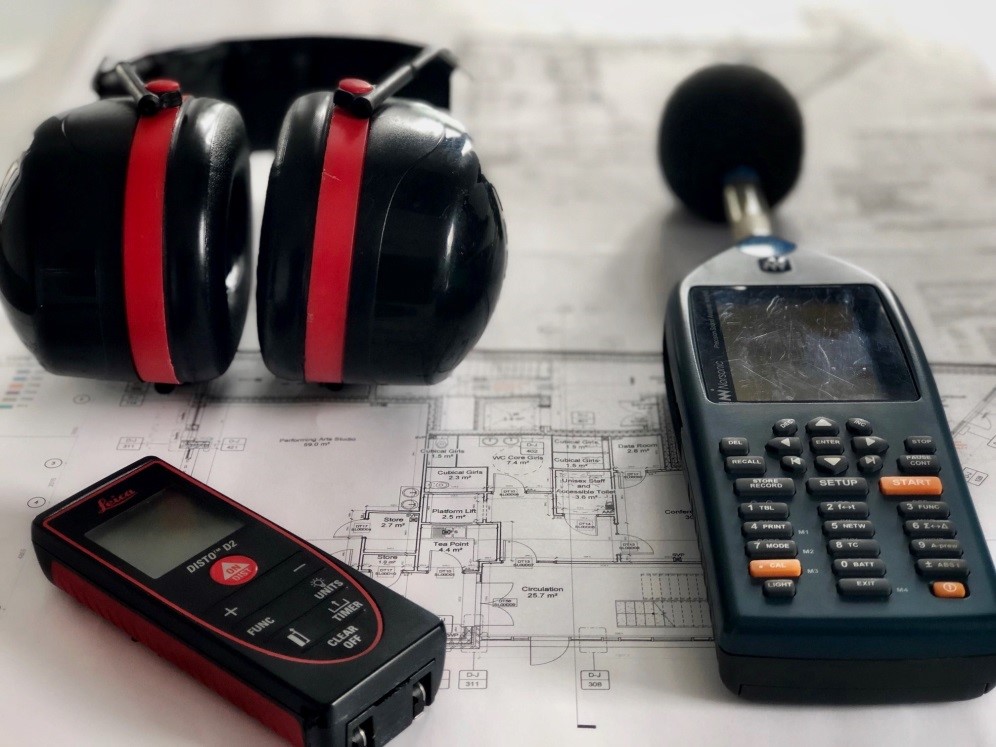
Sound insulation testing is carried out to ensure that minimum standards of sound resistance have been met to ensure the well-being of new tenants is not compromised by adverse sound transmission. The testing checks that the dividing partitions have not been compromised by poor workmanship and poor design. We use the latest sound testing equipment as shown below:

What can APT Sound Testing do for you?

You are normally required to undertake sound testing to each type of construction, i.e. if you have a mixture of brick, blockwork, timber and metal studwork walls all four types would need to be tested, followed by a 10% sample of that type. For instance, if you have a project with 25 flats you would be required to do 3 x 6 pack of tests – 18 tests in total. Each 6 pack contains 2 airborne wall, 2 airborne floor and 2 impact sound tests; however if any test failures occur, then the number of sound tests may need to increase on the development.

We are also able to provide an acoustic design service, consisting of consisting of a new-build or conversion design reviews and site inspections, to ensure that proposed acoustic constructions and detailing of a new building will comply with the acoustic targets of the development.

What can APT Sound Testing do for you?

In our experience the usual areas of concern are:

  1. Dividing Wall Partitions – Through the wall partition if the insulation has not been installed correctly or isolation strips have not been used within the wall construction.
  2. Dividing Ceiling Partitions – Above and Through the Ceiling Space (where an adequate acoustic break has not been carried on through the ceiling void)
  3. Dividing Floor Partitions – Through Floor and Floor Joist Space (if insulation has not been installed or direct fixing to joists without a drop ceiling below the partition under test)
  4. Shared Structural Building Components – Floor Boards, Floor Joists, Continuous Drywall Partitions, Continuous Concrete Floors, and Cement Block Walls.
  5. Through Structural Steel (structural steel beams are often a major cause of noise transmission as plasterboard is often fixed directly to the steel without sound breaks)
  6. Plumbing Chases – Junctures Between the Walls & Floor Slab Above or at the Exterior Wall Juncture (this should be filed with mortar etc. to add mass to this weakened area)
  7. Through Windows (if they are not double glazed or have secondary glazing as a minimum)
  8. Minimal dimensions between windows – if windows are built very tight to the dividing wall/floor partition this can be a weak point.
  9. Fixtures & Outlets – Light Switches, Telephone Outlets, and Recessed Lighting Fixtures (if penetrations have been cut back to back with the opposite dwelling under test)
  10. Structural Joints – Perimeter Joints at Wall & Floor, Through Wall & Ceiling Junctures (these should be filled with acoustic mastic)
  11. Around the End of the Partition Through the Adjacent Wall (acoustic mastic should be used to seal this junction)

We can also undertake reverberation time assessments – and testing where required) for communal areas, as required by Document E of the Building Regulations. Excessive reverberance is a common problem in large spaces such as community halls etc. leading to poor audibility or speech intelligibility negating the room’s effectiveness for meetings etc.  

If you are unsure whether the Regulations apply to your development or if your site needs sound insulation testing, please call your local office or email us at info@aptsoundtesting.co.uk where our team will be happy to discuss all aspects of acoustics or sound insulation within buildings, and explain the testing procedure.

All APT’s test engineers carry the latest sound testing equipment, and our sound testing is completed to a strict quality controlled standard. We provide full ISO & UKAS complaint sound testing. If you would like more information in regards to sound testing please contact us 01525 303905 or visit the APT Sound Testing website today.

How Many Air Tightness Tests do I need?

How Many Air Tightness Tests do I need?

How Many Air Tightness Tests do I need?

The air tightness test can be carried out on a selection of dwellings/ building types – three units of each type or 50% of that type, whichever is fewer. It many cases it is necessary to test all plots, otherwise a 2m3/hr/m2 penalty must be applied to all the plots on the site, this means that you will need to 3m3/hr/m2 if your SAP report stipulated a designed air permeability rate of 5m3/hr/m2. So to summarise the following testing will usually be required:

  • All new dwellings (based on a sampling rate)
  • All commercial new buildings other than dwellings
  • ‘Large’ extensions to buildings other than dwellings (if the footprint of the building extension is 25% of the original buildings floor area)
Air Tightness Tests

The dwelling(s) to be tested should be taken from the first completed batch of units of each dwelling type. For a dwelling to class as the same’ type’ as another it should consist of the following:

  • The same generic form, i.e. detached house, end of terraced, mid-terraced, semi-detached, ground floor flat, mid-floor flat, top floor flat, bungalow etc.
  • Have the same principle construction details
  • Have an envelope area that does not differ by more than 10%
  • Include the same number of storeys
  • Have the same Design Air Permeability (Air Pressure Test Target)
  • Have a similar adjacency to unheated spaces such as garages, unheated stairwells etc.
  • Have a similar number of apertures and penetrations, for example doors, windows etc.

To help builders and developers, there are two building standards that provide in depth information in regards to air tightness testing, they are Building Regulation Part L and ATTMA TS1 & ATTMA TS2

What is my Designed Air Permeability Target?  

Building Regulations Part L1A and L2A are specially aimed at new buildings and most are now required to have an air-tightness test. Part L1B and L2B cover work to existing buildings and do not generally have a requirement for air-tightness testing.

All new dwellings are required to have a SAP (Standard Assessment Procedure) calculation prior to building control approval. It is ultimately the SAP calculation that determines the air permeability target needed to be achieved and whether it is a requirement.

All new non-dwellings are required to have a SBEM (Simplified Building Energy Model) calculation prior to building control permeability targets and will require testing.

The design stage SAP and/or SBEM assessments provide the required ‘air permeability rate’ you need to achieve on the project. Clients often mistake the maximum permissible air permeability rate of 10m3/hr/m2 as their target; however it’s the ‘designed air permeability rate’ which you need to adhere to, which is usually much lower than this at around 3m3/hr/m2 to 5m3/hr/m2. If your project is in London, the requirements are often more stringent. Most air tightness tests in London need to achieve 3m3/hr/m2.

We are here to help you with your

If you are unsure how many air tightness tests you require, please contact our friendly expert team for advice on helping properties achieve required emission rates for air testing. Simply the use our contact form on this page, or call our offices, to chat about your specific air testing requirements with our knowledgeable team of air tightness consultants.

APT Sound Testing can assist you through the process and help you determine the specific air tightness testing requirements for your project. If you require more information please visit our website at www.aptsoundtesting.co.uk

How to Pass an Air Tightness Test for Building Control Signoff

How to Pass an Air Tightness Test for Building Control Signoff

With the tightening of Building Regulations Part L later this year, it is now mandatory that air tightness testing is carried out to all new flats, houses and commercial buildings. Previously, it was possible to undertake testing to a just a sample of the units; however, this wasn’t deemed accurate and so the new regulations have been enforced. Another change to the building regulations Part L is the lowering of the maximum air leakage rate from 10m3/h. to 8m3/h, although it likely that you will need to achieve a much lower figure than this to comply with your deign state SAP Assessment.

Air Tightness Test

So accounting for the more stringent air tightness testing requirements, it is imperative that careful quality control is maintained at all times during the construction process, as this is the only way to ensure success of creating an airtight building and passing the air tightness testing at the first attempt avoiding costly remedial works and delays to the project handover.  

It’s worth remembering that with prefabricated buildings, an element of quality control is done in the factory by people who do know and build to an exacting standard within controlled factory conditions; however, on building sites there can be huge variables in regard to the quality of build, due to the quality of design, the fixing operatives and materials.

For Air tightness Consideration must be given to the following areas

There are literally hundreds of areas that need to be considered when creating an airtight building; however, the main are:

  1. The building fabric: the building fabric accounts for the walls, floor and roof. The type of build will dictate the amount of extra ‘onsite’ sealing works that may be required. For instance, it’s usually easier building with timber frame, than with masonry.
  2. Wall/floor/ceiling junctions: It is usually the wall/floor junction around skirting boards, and the wall/roof junctions by the eaves where the problems are usually worst.
  3. Doors and windows: doors and windows are often some of the worst areas of air leakage within a building fabric. Where the frame meets the wall reveal, is usually down to site detailing, but how the window or door closes against the frame is down to the window/door manufacturer and their installers. Sash windows or sliding patio doors can be susceptible to air leakage even if they are working properly. Twisted frames, missing seals and poorly (loosely) adjusted latches, are just a few issues that we find during smoke testing.
  4. M&E Service penetrations: service penetrations through the building envelope to allow for cables, pipes and ductwork are also a main area of air leakage. They’re not difficult to deal with if tackled at the right juncture i.e., before kitchen units are installed, and it is largely a matter of site supervision that they found and dealt with by a dedicated sealing team of an air tightness champion.
  5. Internal pocket doors – internal pocket doors, such as the type installed between living/dining rooms and bathrooms, can be a massive area of air leakage, so it’s really important that the builder builds an airtight pocket (sleeve) for the door prior to installing the running gear for the doors, and finally boxing out.
  6. Recessed ceiling lights – recessed ceiling lights in kitchens/living rooms etc. can also be large area of air leakage. In some large living areas, we have counted over 100 ceiling lights, with each light leaking the accumulated air loss can be huge. Many manufacturers provide airtight (fireproof) socks that go over the light housing (within the ceiling void) which can be an effective solution.
  7. Ceiling hatches – ceiling hatches, can also leak large amounts of air. Some manufactures offer proprietary door and frame systems, which are easier to install and will further reduce air leakage.
  8. Loft cupboards – the areas behind loft cupboards doors are often unsealed, sometimes there isn’t even flooring installed. it is essential that the walls ceiling and floors are completely finished, and the cupboard door are fully sealed with good quality seals.
Air Tightness Test

Can I lower my energy bills with an air tight home?  

Yes, it’s known that airtightness improves thermal efficiency and reduces heating costs in buildings. As a rule of thumb, if you lower your airtightness from 10m³/hr to 5m³/hr it will reduce your energy demand and heating costs cost by approx. 30-40%. With heating bills expected to hit around £2000 per year, that’s around a £700 annually, which is a huge saving, especially when you consider a dwelling air test is only £250!

At the start of your design and build process, your architect should be specifying what needs to be done in regard to air tightness, and the importance of having an air tightness champion on site to reduce the chance of an air tightness test failure.

We have put together our informative air tightness checklist – which should provide builders with helpful information on how to prepare dwellings for the air tightness test. often the best step is to ensure the contractor uses a project manager that has built at least one airtight house or building to a robust air tightness standard, and therefore has the knowledge and experience to manage and provide an air-tight building to achieve a precompletion air tightness test at the end of the project.

We can help you pass your air tightness test

By working with our customers throughout their design and construction stages, we can provide advice and guidance on the most feasible ways to avoid air leakage and pass your air tightness test.

At APT Sound Testing, we are happy to provide you with general air leakage design advice for your building envelope and onsite guidance. Upon completion of your project, we provide Nationwide UKAS Accredited Tightness Testing for domestic and commercial buildings to help you demonstrate Building Regulation Part L Compliance.

To find out more about our air tightness testing service or if you wish to discuss your project, please contact us by email at info@aptoundtesting.co.uk or visit our website.

Air Tightness Testing on all New Dwellings

Air Tightness Testing on all New Dwellings

Is Air Tightness Testing Mandatory on all New Dwellings?

Yes! From June 2022 all new builds need to demonstrate a minimum level of air permeability of 8m³/h.m²; however, this figure is often lower to align with the design stage SAP assessment. There won’t be an option to undertake ‘sample testing’ with the new Building Regulations Part L, it will be mandatory to undertake air testing to all dwellings on your project.

The final air permeability is done through an onsite, pre-completion air tightness test. The design air permeability for a particular building may need to be lower to achieve the overall carbon emission rate for the building via and/or within an employer’s requirements/specification.

Air Tightness Testing

Should I undertake sample air testing on a show home?

Its good practice to undertake an air test on a sample unit, such as show home/s – to check that they can pass the air test, as any problems identified during the test can be highlighted and addressed on future units. As show homes are often the first building to be completely finished it’s a good place to start. We often visit sites at the end of the project, where no thought has been given to air tightness which leads to unts failing the air testing, which leads to costly and disruptive remedial work.

Avoid Leaky Buildings

The quality of a buildings construction and design will have a major effect on the amount of air leakage through a building’s fabric. If a building is leaky, it can create a drawing effect, pulling air in through gaps in the ground floor and walls especially if the buildings is turned up high. This may result in cold untreated air being drawn into the home through gaps on the ground floor, walls and ceiling resulting in cold draughts. Treated ‘warm’ air leaking out through gaps in the dwelling’s fabric is one of the main causes of heat loss and wasted energy.

The main disadvantages of leaky dwellings are:

Damage to Building Fabric – Excessive air leakage can allow damp air to penetrate the building fabric, causing mould and the effectiveness of the insulation. It can also lead to an increase in dust and pollen.

Raised CO2 emissions – A leaky dwelling will result in higher emissions, if a house has an air leakage rate of 10m³/h.m², as opposed to 5m³/h.m² you may be losing over 1/3 of your heating into thin air.

Inadequate heating – The increased heat loss will mean that the correctly designed/sized heating system may not be able to attain the required temperatures. it also means that extra load will be placed on the heating system thus shortening the lifespan of the system.  

Discomfort – Excess draughts and localised cold spots can cause major discomfort. In extreme cases, excessive infiltration may make rooms uncomfortably cold during the winter months and too hot during the summer months, which often leads to complaints from residents.

Air Tightness Testing

The benefits of an airtight buildings

There are many benefits for lowering the air tightness rate in new and existing buildings, they are:

  • Lower energy costs for the lifetime of the building.
  • Less chance of ongoing damage due to the reduced risk of interstitial condensation within the building fabric.
  • Lower initial capital costs due to downsizing of plant and equipment required for heating/cooling.
  • A longer life cycle for the plant and equipment as it doesn’t need to work as hard to maintain target termperatures.
  • A safer building as fire compartments as well as external envelopes should be more robust.
  • The building environment should be less drafty and potentially warmer and/or cooler as required.
  • A raise in staff productivity – a happier worker is a usually  a more productive worker.

The most common air leakage paths

There can be literally hundreds of air leakage paths within the home which can lead to air test failures. however, in our experience (having undertaken thousands of air leakage tests) these are the most common problem Areas:

  • Floors – Unsealed wall/floor junctions can be a major area of air leakage. Also, services such as water pipes, gas pipes and electric cables that pass through external floor can also leak air.
  • External Walls – Air can escape through the external walls, around areas such as joists that are built into the wall, unfinished mortar joints, service pipes, water pipes, gas pipes, boiler flues and electric cables that pass through external walls. They are often hidden behind kitchen cupboards, bath panels, sink pedestals, toilet basins. Also, draughts in bathrooms are much more noticeable and are particularly uncomfortable for occupants.
  • Roof Spaces – Leakage into ceiling voids and the roof space. Air can leak past a poorly fitting loft hatch from the unheated roof void. Light fittings and gaps around them can offer a path into the roof void and also into the void between the ceiling and the next floor. Also, eaves cupboards can be a major area of air leakage as well as waste stacks and other service penetrations.
Air Tightness Testing

Where do I find more information on Air Tightness Testing?

There are many places to find information in regard to Air tightness testing. Basically the testing is carried out in accordance with the procedures detailed in ATTMA TSL1 (Please use the website www.bindt.org   for a free download) and BS EN:13829 (2001). ATTMA TS1 describes how to carry out the air test and the analysis required to determine the air permeability of the building under test. Air permeability is expressed as volume flow per hour (m3/hr/m2) of air supplied to the space per square metre (m2) of envelope area for an internal to external pressure difference of 50 Pa.

Also, Building Regulations Part L also offers lots of useful information in regards  to Air Tightness Testing, such as which plots should be selected and what parts of the building can be temporally sealed etc.   If you would like more information on how to prepare your building to pass an air tightness test then please download our air tightness checklist.

A summary of our air tightness test procedure

Our air tightness testing procedure involves connecting a fan, or a number of fans, to a suitable aperture such as a standard external doorway in the building envelope. a number of environmental readings are taken (temperature and barometric pressure) and then the fan is turned on to pressurise the building over a range of pressure differences – usually between 25-70Pa, in 5Pa increments. Air volume flow rate through the fan (equal to the air leaking through the building envelope) and the pressure difference across the building envelope are recorded at each fan speed. In calculating air permeability rate, corrections are made for temperature and barometric pressure.

Please Contact us for your Air Tightness Testing now

It’s our ongoing aim to help all customers throughout their design, construction and final precompletion air tightness stages. We are happy to provide you with general air leakage design advice for your building envelope and onsite guidance. Upon completion of your project, we provide Nationwide UKAS Accredited Tightness Testing for domestic and commercial buildings to help you demonstrate Building Regulation Part L Compliance.

If you would like more information on our air tightness testing service, then please visit our website at www.aptsoundtesting.co.uk or contact us at: info@aptsoundtesting.co.uk. To have a chat about your project please call:  01525 303905