Month: February 2022

Air Tightness Testing Services

Air Tightness Testing Services

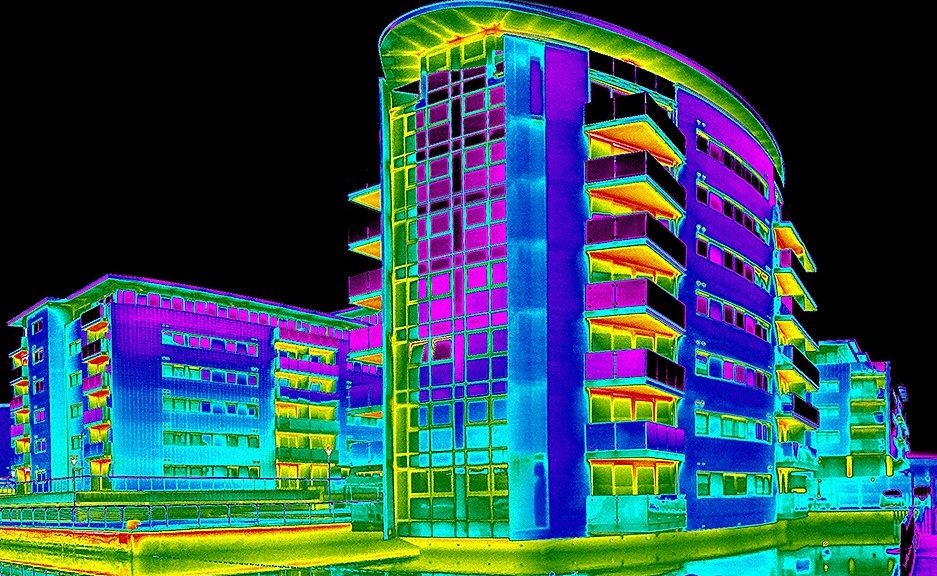
Air tightness testing to achieve satisfactory levels of airtightness became a legal requirement in 2006 in England and Wales, under Building Regulations Part L and is becoming increasingly important to help produce greener buildings, via reducing carbon emissions due to the fact that energy is not being needlessly lost from residences via large air leakage paths etc. Building Regulation Part L defines ‘air leakage’ as the uncontrolled flow of air through gaps and cracks in the fabric of a building. The general public recognise it as draughts.

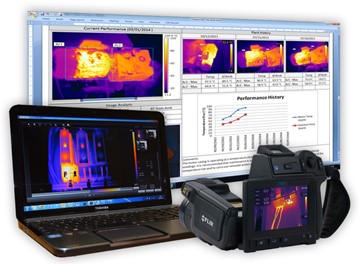
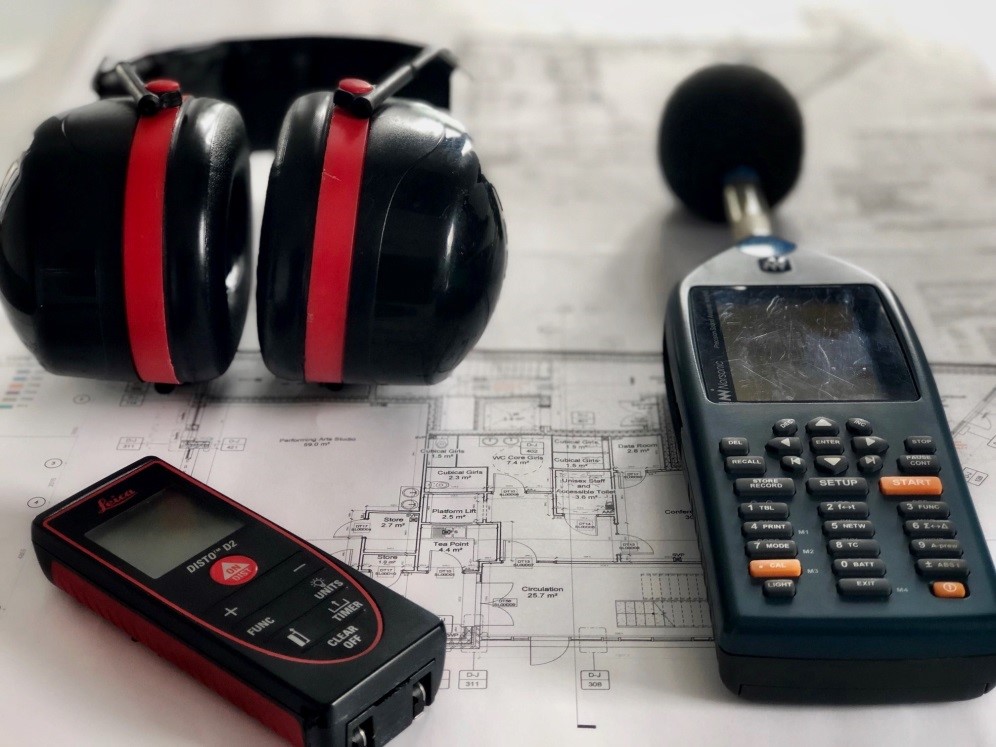
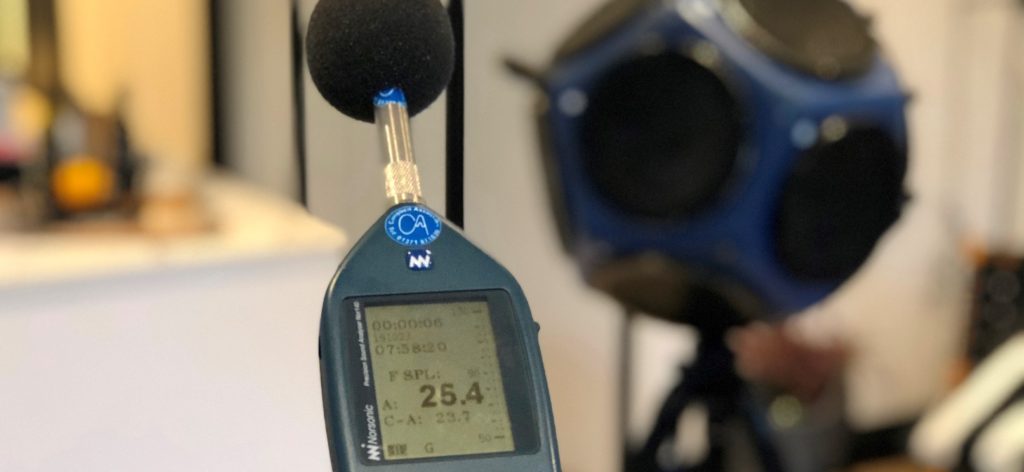
APT Sound Testing provides air tightness testing throughout the United Kingdom. We undertake air testing on all types of projects from a single dwelling to the largest commercial buildings. We are one of the few companies that are UKAS accredited to undertake both Air & Sound testing in compliance to Building Regulations and Standards. This means we can undertake Air, Sound and Vent Testing Packages during the same visit which provides our clients with cost savings and improved on-site coordination. Unlike many companies, we do not subcontract our works.

Air Tightness Testing

When you lose energy through the building fabric this is known as the building emission rate. New projects/developments must meet specific requirements for air testing and emission rates. The usual target for a standard dwelling is 3.0-5.0m3/hr/m2; however, for commercial buildings, the target rate is often much lower – around 3.0m3/hr/m2 and below.

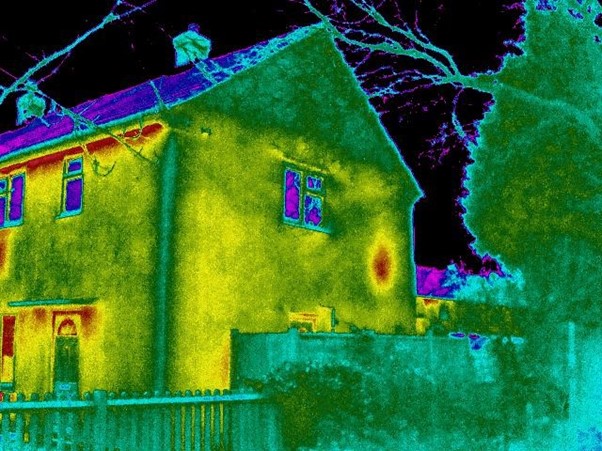
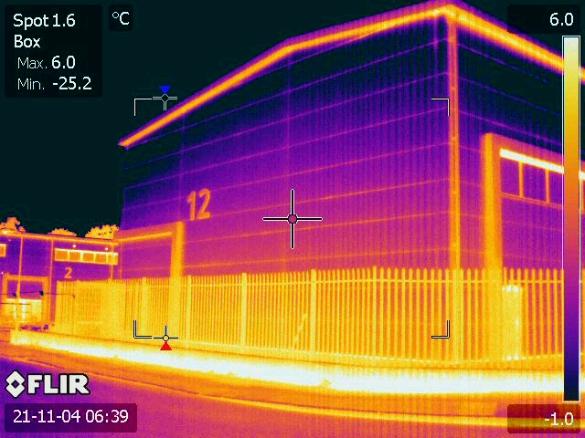
Wherever air leakage (air infiltration) occurs, there is usually exfiltration somewhere else in the building. During the summer, infiltration can bring humid, outdoor air into buildings. In winter, exfiltration can result in moist indoor air moving into cold wall cavities and may result in condensation and mould and/or rot which could result in serious damage to the property.

Our services include air tightness testing and desktop consultancy to help support our clients from the design stage (checking the building’s air leakage line) of the project through to the pre-completion air testing to achieve building control signoff. If you need to undertake your testing on Saturdays or Sundays, we offer an ‘out of hours testing’ service to help reduce the impact of testing during working hours.

We also offer substantial cost savings for combined air and sound testing packages. This is due to our multi skilled engineers being UKAS accredited to carry out the Air & Sound Testing, in fact most of our clients now use our ‘3 step’ precompletion package as it negates the need to employ multiple companies.

On site co-ordination is also improved, with both tests being undertaken on the same day in a planned methodical manner. We can also provide out of hours testing (if required) to help reduce the impact of testing during working hours.

Air Tightness Testing
Why do we need air tightness testing?

Air testing is mandatory in the United Kingdom and is governed by Part L of the Building Regulations, this split into two parts; for domestic properties Part L1A should be used and for commercial properties Part L2A should be referenced.

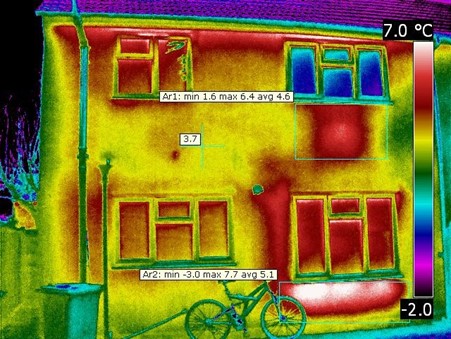
Air tightness testing is carried to check the air leakage that occurs through a building’s envelope. The air test checks amount of conditioned air that escapes or gets wasted through gaps or air leakage paths through the building fabric. If the building is more air tight, less energy will be being needlessly lost, thus lowering the carbon emissions of the building. Air tightness testing also shows how efficient a building is at retaining conditioned air which will also put less straight on your mechanical and ventilation system. Failing to maintain adequate air tightness can lead to up to 50% of heat loss from within a building to the outside atmosphere.

The main benefits of air Tightness Testing:

The main benefits of air tightness testing is to measure the total air lost through leaks in the building fabric. It can identify poor build quality within new developments. With the introduction of tougher regulations, building designs will often consider air tightness early in the construction process to their building complies, so they don’t end up with a leaky building.

If you have a leaky building, you can end up with the following issues:

  1. unwanted heat loss through the building fabric
  2. unwanted draughts resulting in discomfort for occupants
  3. cold homes resulting in increased heating bills
  4. greater CO² emissions, as a result of the additional heating required to heat the building
How long will my air tightness testing take?

Most air tests can be completed in 1-2 hours although some can take much longer, if low air leakage rates are required to comply with Passivehaus standards etc. Also other factors such as the size of the property, how many apertures need to be taped over; however even on very large dwellings the duration of the actual air test should take no longer than 2 hours if the building has been adequately prepared.

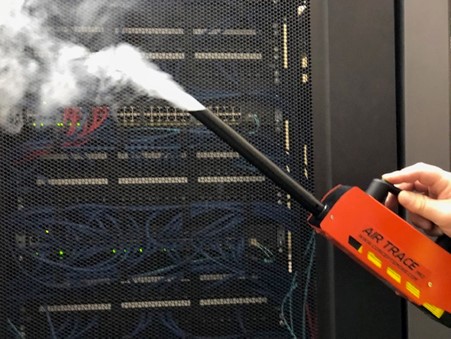
What is a smoke Test?

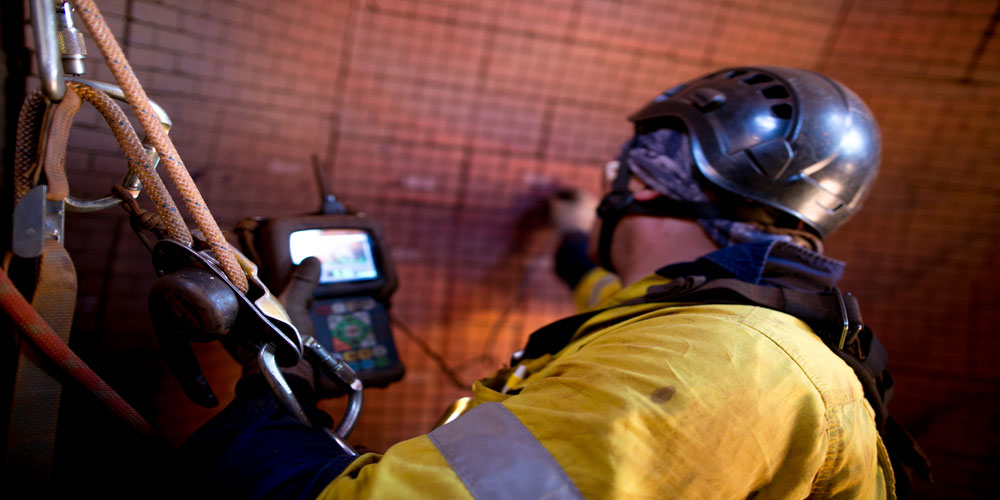
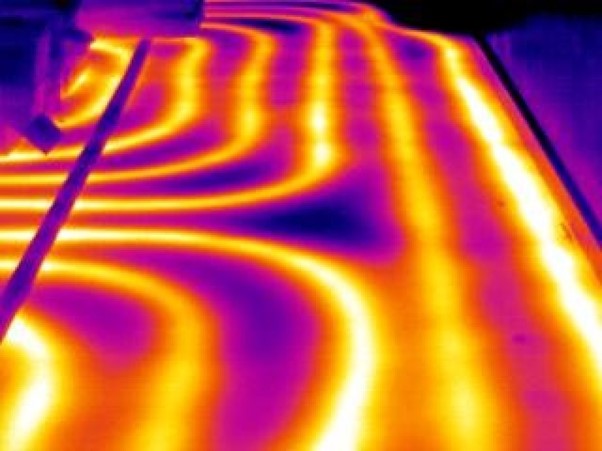
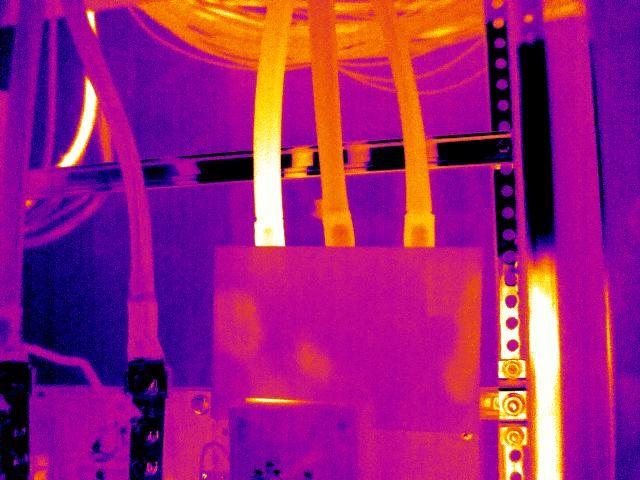
In the event of a test failure and/or a specific test to identify air leakage pathways, we also offer a smoke testing service to locate the air leakage paths within a building envelope. This can take a varying amount of time to undertake depending on the size of the building, as this may require multiple large smoke machines.  We have all types of smoke machines at our disposal, from small handheld smoke machines right up to large commercial smoke machines. We always allow clients time to seal and pass their building in the event of an air test failure.

Air Tightness Testing
How much does air tightness test cost?

It depends on the location and the number of tests that are required on each site; it can be as low as £75 plus VAT per unit if we are undertaking multiple tests, right up to large commercial tests costing thousands of pounds. Please contact us at info@aptsoundtesting.co.uk to obtain a no obligation quote along with some friendly advice for you project.

What is a good air leakage rating for my building?

The current building regulations usually require all new dwellings achieve a minimum air leakage target of 5m3/hm2 or less. That is the air leakage rate per hour, per square metre of envelope area. An air test results between 3 – 5m3/hm2 would usually be acceptable by building control and your SAP assessor as a good and acceptable result, although you need to check each your designed SAP Assessment as there may be items within your buildings design that that may affect this figure as the dwelling may be struggling to meet its emissions targets and a low air leakage may compensate for other areas, either arising from poor design, or factors beyond the developer’s control.

What is the designed ‘air permeability rate’ and where do I find it?

Before we can undertake an air tightness test, we need to know the designed air leakage rate of the building. This information can be found in the design stage SAP assessment, which should have been done at the beginning of the project.

The air leakage target will usually be expressed as a quantity of air leakage (m3 per hour) per square metre of building envelope (m3/h/m2). Its worth noting that the designed ‘air permeability rate’ for each dwelling can vary depending on the carbon

emission target for your building; however, its usually between 3-5 m3/h/m2.

If you are unsure of the air leakage target, please send across your design stage SAP and we will find it for you.

 
How do you undertake an air tightness test on my project?

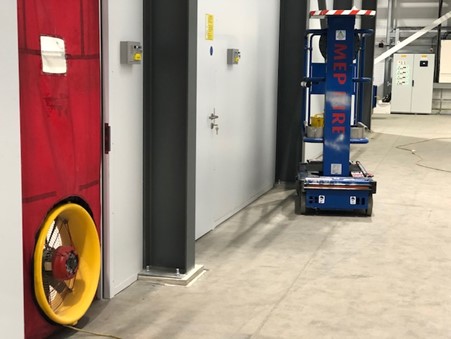
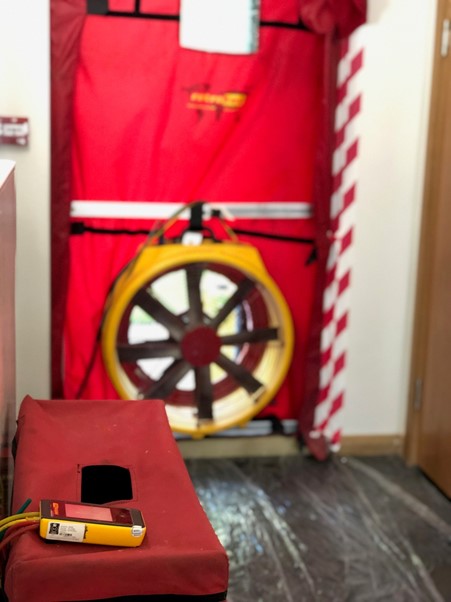
The air tightness testing is undertaken in-line with Part L and the ATTMA standard. The pressure differential is measured across the envelope of the building by means of the temporarily installation of a large fan inside a door panel. Thereafter, a range of static pressures and environmental readings are taken. The fan is switched on and the air pressure in the property is gradually increased or decreased and the differential pressure is recorded at each step. The total air flow required to achieve a pressure differential of 50 Pa is calculated and divided by the total building envelope area to provide the leakage rate in m3/h.m2@50Pa.

How many air tightness tests do I need on my development?

The old days undertaking a sample of air tightness tests is over. You used to be able to undertake a minimum test of three air tests to each building type and/or or 50% of each type, whichever was less. However, for sample testing to be permitted, the dwellings being tested needed to average at least 2m3/hr/m2 less the target of the dwelling not being tested, so if your air tightness target was 5m3/hr/m2, you needed to achieve a figure of 3m3/hr/m2 

This is now coming to an end, and under Part L Future Homes Standard Update: All new dwellings will require an air test; sample testing will no longer be an option. Also, it’s worth noting that dwellings without mechanical ventilation will received no benefit in SAP for scores below 3 m3/ (h.m2).

Air Tightness Testing
How do I prepare my dwelling for a residential air tightness test?

The more complete a development, the more likely it is to meet air testing requirements. When we send out our quotation, we also forward a specific air leakage checklist to help our client prepare for the testing.

Basically, if you meet the following criteria will generally have a much better chance of passing the testing at the first attempt. The main areas of concern are usually:

  1. External Doors: Check the seal around all external door surrounds and check the window is closing properly
  2. External Windows: Check the seal beneath the sills and around the frames and check the window is closing properly.
  3. Chimneys: Open fireplaces must be sealed.
  4. Electrical Meter Boxes: Check all external supplies are sealed appropriately.
  5. Electrical Sockets: Check the seal around the sockets.
  6. Light Fittings: Check the seal around all light fittings and switches.
  7. Drainage traps: Check they are filled with water or sealed with tape.
  8. Skirting boards high level Coving: Check above and below all skirting and coving, sealing where necessary.
  9. Radiators: Check the seal around all pipes and wires.
  10. Fans & Heaters: Check the seal around all fan/heater housings and wires.
  11. Internal Boilers: Check the seal around the boiler supply and flue.
  12. Extractor Fans: Check around the edge of the extracts, only the front of the grill can be sealed.
  13. Cooker Hoods: Check the seals around all penetrations.
  14. Soil pipes: Check the seal around all soil pipes and sink waste pipes especially those boxed in or behind kitchen cabinets.
  15. Bath Panels: Check all pipes behind bath panels are sealed properly.
  16. Hot water tank: Check the seal around all supply pipes.
  17. MVHR Systems: Check seal around all MVHR terminals.
  18. Air Bricks: Any air bricks should be sealed for the test.
  19. Tumble drier extracts: Check the seal around the extract.
How do I prepare my building for a commercial air tightness test?

Similar to the residential air test, the complete your commercial building/development, the more likely it is to meet air testing requirements at the first attempt.  When we send out our quotation, we also forward a commercial or residential air leakage checklist depending on the development, to help our client prepare for the testing.

If you ensure the items on the checklist below, have been actioned this will greatly increase your chances of passing at the first attempt:

  1. All external doors and windows should be closed (but not temporarily sealed). This includes door thresholds. The exception to this will be apertures to which test equipment is connected.
  2. External doors, windows & manual vents need to remain closed for the test. All internal doors need to be propped open.
  3. Internal doors to riser cupboards may be closed but should not be temporarily sealed.
  4. Lift doors should be closed (but not temporarily sealed). Any external lift shaft vent should remain open.
  5. All drainage traps should be filled with water.
  6. All incoming service penetrations (e.g. power, telecoms) should be permanently sealed.
  7. Smoke vents should be closed but not temporarily sealed.
  8. Background trickle ventilators, passive ventilation systems and permanently open uncontrolled natural ventilation openings should be permanently open.
  9. Uncontrolled natural ventilation openings should be temporarily sealed.
  10. Mechanical ventilation and air conditioning systems should be turned off. These systems should be temporarily sealed to prevent air leakage through the systems during the test.
  11. We require a door frame of standard size to fit our square adjustable frame and/or 3 fan hard panel. If your door is smaller/larger than this you may need to modify the opening to suit our template. Minimum size opening 700 x 1300mm/ Maximum 1100 x 2400mm
  12. Our test equipment is usually powered by 240v power supply. We must be informed in advance if this will not be available.

What Items can be temporally sealed for the air tightness testing?

We have been on projects where there has been lots of unauthorised temporarily sealing, this is usually the case when the buildings have not been sealed properly prior to our arrival on site. Please note only the controllable air flow pathways listed below can be temporarily sealed during the air tightness test, all the non-controllable leakage pathways must be permanently sealed. 

The following areas should temporarily sealed prior to our arrival on site:

  1. Extractor Fans: should be temporarily sealed (Please ensure these are off before sealing). 
  2. MVHR terminals: should be turned off and the vents sealed.
  3. Trickle Vents: Should be closed and can be sealed.
  4. Cooker Hoods: Should be sealed from the outside or inside.
  5. Chimneys Flues: Should be temporarily sealed.
  6. Air Bricks: Should be temporarily sealed.

Will I get an air tightness report if I pass the air tightness test?

Yes, if you pass the air tightness test, we will issue a UKAS and Building Regulations compliant test report. If you have a residential project, such as a house, this will need to be submitted to the SAP assessor who will then complete your ‘as built’ SAP assessment and produce the final EPC for Building Regulations compliance.

If you are working on a commercial building, the test result will be passed to the SBEM assessor who will then update the calculations, establish that a pass has been achieved, and issue final ‘as built’ SBEM report and an EPC.

Why Choose us to undertake your Air Tightness Testing

We provide air tightness testing throughout the United Kingdom. We undertake air testing on all types of projects from the largest building for companies such as Mace down to the single air tightness tests for self-builders.

We are one of the few companies in the UK that are UKAS accredited for both Air Tightness & Sound Insulation Testing. This means we can undertake Air, Sound and Vent Testing Packages during the same visit, reducing costs and coordination issues for our clients. Unlike many companies we do not subcontract our works.

For more information on our air tightness testing services, please contact us at info@aptsoundtesting.co.uk or visit our website at www.aptsoundtesting.co.uk. Alternatively, for more information please download our Air Test Checklist.

Thermal Imaging Surveyor

Thermal Imaging Surveyor

As thermal imaging surveyors we have undertaken hundreds of thermal imaging surveys in all types of buildings, usually for checking for continuity of insulation and possible heat loss, ensuring your home or workplace remains as energy efficient as possible through summer to winter.

Using thermal imaging surveys, we can check for:

In our experience, thermal imaging surveys is one of the best no destructive methods of finding the root cause of problems within buildings, not only can thermography do this quickly and accurately, but it can also be undertaken without any impact to the site works and everyone involved within the process.

Thermal Imaging Surveyor

Our Thermal Imaging Surveyors undertake Heat Loss Surveys

Thermal Imaging Surveys are one of the best methods of tracking down sources of heat loss in your home or commercial building, whether that be poorly installed or missing insulation, cold air infiltration into voids or direct draughts through the building envelope.  

Recent studies have shown over 60% of the UK’s residential and commercial properties suffer from some form of heat loss. Heat loss can be due to many factors; however, the main ones are:

Our thermal imaging surveyors, undertake heat loss surveys to identify draughts and insulation problems all types of buildings.  A heat loss survey will identify draughts and insulation problems in your home or commercial building, it will also reveal areas where ineffective insulation is causing heat loss through the building envelope via the following areas:

  • Missing wall, floor, and ceiling Insulation – Possible causes include damage or inadequate installation and water ingress. 
  • Thermal Bridging – The movement of heat through the building structure tvia material bridging
  • Windows and Doors – poor draft excluders and poorly installed fixtures and fittings allowing heat escape through gaps.
  • Structural Integrity – roofs and walls and floors

The benefits of thermal imaging for new building purchases

Thermal Surveys can be extremely useful when acquiring a new or existing building such as:

  • Identifying defects in a new or existing building, prior to purchase allowing you to negotiate a better price with the seller, considering the costs for the remedial works.
  • Check for upgrades to the building and structure.
  • To check if the cost of maintenance outweighs the use and value of the building.

If you are purchasing a new or existing building, we can start to save you money by identifying heat loss quickly and with no fuss. A quick survey with our thermal cameras will identify areas of heat loss and you can then put actions into place to ensure your energy consumption goes down. The short-term costs of extra insulation will save you money in the long run. The survey may also identify building defects that may turn out to be costly in the long run. Taking all of this into account can you afford not to do a thermal imaging survey.

Thermal Imaging Surveyor

What equipment does our thermal imaging surveyors use?

Our thermal imaging surveyors only use the best high-resolution cameras to ensure we always attain a high standard of reportage. Our most popular camera is the FLIR 640 Thermal Imaging cameras, as they have very good thermal imaging capabilities to meet most standards. The 640 x 480-pixel detector resolution provides APT’s thermal imaging surveyors with some of the highest thermal resolution and sensitivity on the market for high accuracy temperature measurements up to an impressive 2000°C.

This high resolution combined with 5-megapixel digital cameras allows us to produce very sharp visible light and thermal images required for the comprehensive documentation of a system’s thermal condition. Our thermal cameras also have FLIR MSX Technology, which makes it easier for our engineers to find an identify problems. Our cameras Multi-Spectral Dynamic Imaging extracts high-contrast highlights from the camera’s image and then uses FLIRs patented technology to superimpose the enhanced details over the infrared image. This offers incredible clarity on thermal images, providing sharper looking thermal images with more texture, which in turn allows for more accurate and professional looking thermography reports, which is essential for our clients.

Why Choose our thermal Imaging Surveyors

Our experienced and highly qualified thermal imaging surveyors produce higher quality and more technically consistent thermography inspections. Highly trained Level 3 thermal engineers can troubleshoot, calibrate equipment, interpret data, and create reports.

When you are employing a thermographer, you should check to see that they incorporate the high specifications possible for their inspections. Are they certified to Level 3 and do they use large format FLIR thermal imaging cameras?

Their specification should include:

  • Level 3 thermographic certification
  • Level 3 qualified thermographers
  • Large format FLIR cameras with 45-degree lenses

Each thermal imaging report is reviewed and approved by our experienced and certified PCN Level 3 thermographers to ensure the highest quality for analysis and recommendations

Contact our thermal surveyors for more information

If you are looking commission a thermal imaging survey and require estimation on cost or some friendly advice, please contact us on info@aptsoundtesting.co.uk for any questions and/or visit our website on www.aptsoundtesting.co.uk or if you need advice on how to prepare your building for a thermal inspection, please download our thermal imaging checklist

Different Types of Sound Testing

Different Types of Sound Testing

Different Types of Sound Testing
Sound Insulation Testing needs to be carried out between pairs of rooms separated by party walls or floors. In most cases, the rooms to be sound tested will be the two main habitable rooms – living rooms and bedrooms. The sound testing procedure involves setting up a noise source in a room on one side of the party wall or floor and measuring the noise on both sides of the partition.

Sound Testing for Part E of Building Regulations has been a mandatory requirement since July 2003. All new build dwellings and conversions that were built after this date require 10% of each party wall/floor construction type to be tested.

Types of Sound Testing

There are two mains types of sound tests that need to be carried out prior to the building handover, they are:

Airborne Sound Tests
Airborne sound tests are usually required between horizontally and vertically separated pairs of rooms. The sound tests are undertaken by using a sound source, amplifier and loudspeaker to generate a high noise level in one room (the source room). Noise measurements are then taken in both the source and receiver rooms using a prescribed number of source and microphone positions. The background levels in the receiver room are measured and the reverberation time in the receiver room is also measured.

From the results, the airborne sound insulation (DnT,w + Ctr) is calculated and compared to the requirements of Approved Document E. For new build projects, you are required to achieve 45dB for airborne sound testing through walls and floors and 62dB for Impact sound testing for floors. For refurbishment projects this changes to 43dB for airborne and 64dB for impact.

Impact Sound Tests
For vertically separated rooms, an Impact sound test may also be required. This sound test is undertaken using a “tapping machine”, (as above) which drops a series of weights onto the floor of the upper room. The noise level in the lower (receiver) room is measured for a prescribed number of source and microphone locations. The background levels in the receiver room are measured and the reverberation time in the receiver room is also measured. From the results, the impact sound insulation (L’nT,w) is calculated and compared to the requirements of Approved Document E.

All APT’s test engineers carry the latest Norsonic sound testing equipment, which is class one rating. All of our sound testing is completed to a strict quality-controlled standard. We provide full ISO & UKAS compliant sound testing.

If you would like more information in regards to sound testing please contact us at 01525 303905 or visit the APT Sound Testing website today.

Sound Testing Services for New Build Dwellings

Sound Testing Services for New Build Dwellings

Sound Testing Services for New Build Dwellings
Sound Insulation Testing became mandatory in England & Wales in 2003, when Approved Document E was updated. Approved Document E requires new and converted to achieve a reasonable level of sound insulation between dwellings. The simplest way to comply with the requirements of Approved Document E; is to have on-site pre-completion sound insulation tests carried out on your project. We carry out full sound testing services in compliance with Approved Document E.

In our experience, there is usually a level of apprehension with our clients having to undertake pre-completion sound insulation tests.  This is often down to the fear of failure. It should be remembered; however, that if the acoustic design specification is closely followed, and a good standard of onsite workmanship is maintained there is very little chance of failure.

Sound Testing Services for New Build


Sound Testing New Build
Approved Document E requires a minimum of one ‘set’ of tests for every ten units in each group and/or sub-group.  Is usually broken down to the following: two airborne walls, two airborne floor,s and two impact sound tests. For example, if you have a block of 100 flats, all of the same construction, you would usually conduct 10 ‘sets’ of tests. If you have a development of 25 houses, with five different sub-groups (5 units in each) then you would usually conduct 5 ‘sets’ of tests.  As previously stated a set of tests usually consists of two airborne tests of separating walls and two airborne tests and two impact tests on separating floors; however, if no separating floors are available, i.e. in semi-detached or terraced houses, one set of tests would consist of two airborne tests of separating walls only.

To test the airborne sound insulation properties of a floor or wall, a sound source that consists of an amplifier and loudspeaker is set up on one side of the wall or floor partition that is to be tested. We then turn the setting to turn on Pink noise. Pink noise sounds like the static that can be heard on a radio that is off station or the old TV test card noise.

This type of noise is used because it is made up of a wall of sound that has a wide spectrum of frequencies. This provides an indication of sound insulation performance for a wide range of sounds that may be experienced within a dwelling from speech to a kettle boiling. The pink noise is measured in the room which contains the speaker or sound source using a Class 1 Norsonic sound level meter; thereafter the noise is measured on the other side of the wall or floor partition that is being tested. In layman’s terms, the difference between these two levels is the amount of sound that is stopped by the sound insulating qualities if the wall or floor partition/s.

The result is then corrected and adjusted depending on the echo or reverberation time within the receiving room, and any background noise such as builders’ work noise etc. to give the airborne sound insulation result (DnT,w). The results of these tests are then compared to the performance criteria of Approved Document E – 45dB new build & 62dB for conversions) and a pass or fail sound test certificate is produced

Testing Impact Sound Insulation Performance
To test the impact sound insulation performance of a floor, a Norsonic tapping machine which consists of five small hammers that are dropped onto the floor to simulate footfall, is placed on the floor. The resultant noise in the room below is measured with a Norsonic Class 1 sound level meter and the amount of noise that passes through the floor is the impact sound transmission level and is expressed as a single number. This result is then corrected and adjusted depending on the reverberation time of the rooms as well as any background noise to give the impact sound transmission result (LnT,w). The results of these tests are then compared to the performance criteria of Approved Document E – 62dB new build & 64dB conversions) and a pass or fail sound testing certificate is produced.

If pre-completion test results do not satisfy the performance criteria of Approved Document E, then our test engineer will attempt to determine the possible causes of failure. This may be to do with construction detailing around services or at junctions or simply, poor acoustic design. Once the results have been finalised along with the associated graphs, our acoustician (with the aid of the information from the sound test engineer, we should be able to determine the specific cause of failure. Once a specific reason for failure has been determined, we can then advise the client on remedial actions that can be undertaken.

Contact APT Sound Testing
If you have a project that needs acoustic design advice or needs pre-completion sound testing then please contact us by visiting the  APT Sound Testing website or call today on 01525 303 905 and we should be able to offer you an acoustic solution to help your project achieve practical completion.

Thermal Imaging Heat Loss Surveys

Thermal Imaging Heat Loss Surveys

Thermal Imaging Survey helps track down the sources of heat loss in your home or commercial building, whether that be poorly installed or missing insulation, cold air infiltration into voids or direct draughts through the building envelope.  

It’s worth noting that over 60% of the UK’s residential and commercial properties suffer from some form of heat loss. Heat loss can be due to many factors; however, the main ones are:

  • Missing wall, floor, and ceiling Insulation – Possible causes include damage or inadequate installation and water ingress. 
  • Thermal Bridging – The movement of heat through the building structure tvia material bridging
  • Windows and Doors – poor draft excluders and poorly installed fixtures and fittings allowing heat escape through gaps.
  • Structural Integrity – roofs and walls and floors
Thermal Imaging Heat Loss Surveys

Excess heat loss can result in increased energy usage which means higher bills to the end user/occupiers as well unhappy occupants experiencing drafts and cold areas within the building. If there are unexplained cold areas in your building and/or you think your energy bills are too high, then you should consider a Thermal Imaging Heat Loss Survey.

The main issues are:

Insulation problems

Poor Insulation is one main reasons for heat loss, the other being poor airtightness. Unfortunately, poor insulation is not usually visible to the naked eye, being hidden within the fabric of the building.

Thermal imaging inspections can quickly reveal where issues have arisen during the construction process, such as poorly installed, missing, or damaged insulation

Draughts

Draughts are very uncomfortable for occupiers and are usually an indication of heat loss through the building envelope.  Like insulation problems identifying the source of draughts is not always obvious. In many cases air can be coming into the building via multiple gaps and cracks in walls, floorboards and doors, windows.

A thermal imaging survey can quickly identify cold traces that give away the air leakage paths, where the cold air is entering the property.

Heating and damp problems

A thermal imaging inspection can pick up on air trapped in the heating system and unbalanced heating systems – radiators etc. it can Also identify leaking underfloor heating and uninsulated pipework hidden in service voids.  

Thermal imaging can also pick up problems with damp, although it is recommended that this is supplemented with an inspection using specialist testing equipment, such as combined thermal imaging and moisture meters.

Thermal Imaging Heat Loss Surveys

Common air leakage paths found during thermal surveys

There can literally be hundreds of air leakage paths through building envelopes, here are some of the most common areas we have previously identified during heat loss surveys: 

  1. Via ductwork and service penetrations where services enter the building.
  2. Around the bottom of the external cladding.
  3. Faulty or unpowered roof lights not shutting properly.
  4. Wall/floor junctions under kitchen and utility room cupboards.
  5. Around SVP and waste pipe penetrations passing through external walls and ceilings.
  6. Around services that pass behind all IPS panels in toilet/shower areas.
  7. Service riser cupboards that are not re compartmentalised from the rest of the building.
  8. Unsealed bath and shower tray panels.
  9. Damaged or poorly installed Background trickle ventilators, passive ventilation systems and any permanently open uncontrolled natural ventilation openings.
  10. Poorly installed ductwork to mechanical ventilation and/or air conditioning systems.  
  11. External door/windows that are not shutting tightly against their own seals and the frames are not sealed against the surrounding walls.  
  12. Internal doors that are not sealed at the floor junction.
  13. Internal sliding doors with unsealed pocket boxing into walls.
  14. Dot & dab plasterboard that has a unsealed gap In between the bottom of the plasterboard and the structural floor.
  15. Unsealed perpendicular mortar joints
  16. Unsealed cavities and roof voids as well as holes that bridge the cavity or roof void.
  17. Unsealed block work that has not been painted
  18. Poorly finished cladding at perimeter joints of individual sheets, areas where it meets at different angles.
  19. Around areas within ceilings voids, to include steel penetrations, service penetrations and the perimeter/eaves junction.
  20. Around uninstalled and/or unsealed sockets, and light fittings housed in plasterboard.

Use a thermal imaging company with experience of heat loss surveys.

At APT Sound testing, we have 20 years’ experience identify heat loss using thermal imaging surveys. Our engineers hold a Level 3 certification which is some of the highest in the industry. We use the latest high resolutions cameras costing over twenty thousand pounds.

Our thermal specification includes:

  1. Level 3 thermographic certification
  2. Level 3 qualified thermographers
  3. Large format FLIR cameras with 45-degree lenses
Thermal Imaging Heat Loss Surveys

All of our thermal surveys are followed up with an extensive report, identifying problems and suggesting resolutions. We can also supply drones that are equipped with thermal cameras, perfect for identifying heat loss in roofs and elevated areas of a building were safe access is difficult and expensive. We can undertake Thermal Imaging to identify heat loss in all types of buildings from large commercial buildings to office spaces, schools, and historic houses.

Do I need an internal or external thermal survey?

Clients often ask do they need an internal or external thermal survey to best identify heat loss in their building? There is an easy answer to this question – Both!

Wherever possible its always best to gather the most gather information possible at the time of the survey, so to allow for this a thermal scan of both the inside and outside of the building needs to take place, to ascertain what’s happening both the internal and external building envelope. by undertaking an external and internal survey, we can gather different and complimentary data for both sides of a wall or roof. In many cases an internal survey will pick up different issues to an external survey and visa-versa.

Sometimes, it may not be possible to undertake both types of surveys, such as surveying a flat on the 20th floor of a high-rise block; however, wherever possible we will always strive to inspect both sides of every wall and roof we survey.

Is combined thermography and air leakage testing worthwhile?

Is combined air tightness and thermography worthwhile? A resounding YES! It’s a very powerful combination.

As air leakage testing becomes more important for compliance with Part L requirements and reduce energy loss there is a natural partnership between thermal imaging and air tightness testing; so, why is this?

Thermal imaging and air tightness testing are not interchangeable – they are important in their own right – but they provide a similar goal, to locate sources of heat loss in buildings.  In many cases, thermal inspections can help locate the air leakage paths that the blower door test has highlighted by pressuring the building. Combining the best parts of air tightness testing and thermography allows for clearer and more defined results to be generated to better highlight and target air leakage points around dwellings and commercial buildings.  

APT Sound Testing is UKAS accredited to undertake air tightness testing and we hold Level 3 thermal imaging certification. This allows us to provide a combined service to clients for combined thermal imaging and air tightness testing for compliance with BREEAM or other requirements.

Thermal Imaging Heat Loss Surveys

Thermal Surveys to Save Money & Energy

Using our well trained and equipped thermography engineers can quickly and accurately locate faults and provide the information you need to target the correct repair first time, saving you huge sums of money over traditional destructive investigations! Our Thermal Imaging Surveys highlight where your home or office building is losing massive amounts of heat and recommend where you can make improvements to conserve energy and keep occupiers happy!

Thermal Surveys can be extremely useful when acquiring a new or existing building such as:

  • Identifying defects in a new or existing building, prior to purchase allowing you to negotiate a better price with the seller, considering the costs for the remedial works.
  • Check for upgrades to the building and structure.
  • To check if the cost of maintenance outweighs the use and value of the building.

It doesn’t matter if you are halfway through a build or taking over a hundred-year-old block of flats, we can start to save you money by identifying heat loss quickly and with no fuss. A quick survey with our thermal cameras will identify areas of heat loss and you can then put actions into place to ensure your energy consumption goes down. The short-term costs of extra insulation will save you money in the long run.

Our thermal imaging heat loss surveys roadmap.

  1. APT will book in a convenient time to visit your project, allowing for optimal weather conditions – if it’s cold enough. In the event that the weather forecast is unsuitable then we will contact you to rearrange the thermal survey visit.
  2. When we arrive at site, we will undertake a site walk and discuss the problems you (or your building occupiers) are encountering with heat loss and draughts.
  3. Using the collected information, we will carry out a thorough thermal imaging survey of your building both inside and out – you should allow 1-3 hours for the survey depending on the size of your building.
  4. The detailed thermal imaging reports are typically supplied in 24 to 48 hours. You will receive your thermal imaging report in PDF format – this includes the images we have captured, along with our interpretation of the problems indicated.

What information do we need to undertake the thermal survey?

The usual information we require prior to being able to undertake a thermal imaging survey is:

  1. The type and size of building.
  2. Floor plans and elevation drawings for the building.
  3. Any site-specific items to actions, i.e. attending site inductions and/or bringing specific ID such as passports, driving licence etc.
  4. The amount of time required to safely undertake the survey.
  5. The type of equipment required to undertake the inspection.
  6. The project location and subsequent travel time.
  7. The project deliverables – what needs to be included within the thermal survey report.

Please contact us for more information

Our team of thermographers are highly experienced in carrying out thermal imaging surveys and have many years’ experience in all aspects of engineering, construction, maintenance, management, and professional survey work.

Our thermal imaging equipment is the best and most accurate on the market, ensuring we pick up faults that other equipment may miss. Our reports are professionally presented and are clear, concise, and easy to follow. We endeavour to give our clients a first-class service every time.

If you would like to contact us for more information on our thermal imaging services, please contact us on 01525 303905 or email us at info@aptsoundtesting.co.uk. Alternatively if you would like more information on how to prepare for your thermal imaging survey, please visit our website here or download our thermal imaging checklist

Improving Ceiling Soundproofing to Reduce Noise

Improving Ceiling Soundproofing to Reduce Noise

Improving Ceiling Soundproofing to Reduce Noise from Above
In most cases, the traditional upper floor structure, consisting of timber joists covered by chipboard boarding/or floorboard and a thin layer of plasterboard ceiling, offers little sound insulation and resistance. By itself, it won’t achieve the minimum standard requirement of the Building Regulations Part E of 45dB for new build or 43dB for conversion dwellings.

To improve the soundproofing in your ceiling partition, there are many things to consider such as: Improving the mass, isolation, absorption, resilience, and stiffness.

To try and reduce the ceiling noise in your flat below, you can add insulation a good-quality acoustic insulation between the joists – 100mm of mineral wool of at least 45kg/m3 density, then add resilient bars and 2 layers of 15mm plasterboard.

Unlike walls, floors can transmit impact sound as well as airborne sound and, in our experience, having helped with hundreds of clients suffering noise issues, impact sound is often more annoying than airborne noise transmission.

Improving Ceiling Soundproofing

One of the easiest ways to deal with impact sound is by installing an acoustic resilient membrane. For instance, a resilient layer can be installed on the subbase flooring (chipboard) prior to the installation of the final floor finishes. The membrane is very simple to lay and comes with its own glue to bond it to the sub-base flooring. The final flooring – such as engineered wood, simply floats on top of the membrane with the tongued joints glued on each board – no other fixing such as screws etc. are required. In fact, screwing or nailing down the final floor finish would actually create a sound path through the floor construction.

Acoustic resilient membranes are usually between 4-6mm; however, you can get a more expensive option that also deals with airborne sound which are 10-15mm depending on the material and specification. In most cases the acoustic membrane is rubber-based; however, the higher specification can be a composite material which is foam, rubber, and even cement board. When installing the membrane its often supplied with a propriety noise flanking strip which is installed between the skirting boards and the floor boarding, this helps to avoid direct contact between the skirting board and the floor boarding.

You can also help to improve the soundproofing, by installing a high-mass mineral wool batt. The depth of the wool should be 100mm and at least 45kg/m3. This is quite easy to install, and the batt should be cut tight against the joists with no gaps.

It is also worth checking that there isn’t too much movement or deflection in the floor joists – if you hear a loud booming sound, as well as the tapping of footfall fall noise, it maybe your joists are moving above. In this case, it would be best to install extra noggins between the joist to add stiffness to the construction.

Improving Ceiling Soundproofing

To help improve the airborne sound, install resilient bars below the joists running the opposite way to the joists and below the bars install 2 x 15mm layers of sound board. All boards must be properly lapped, and the perimeter joints filled with acoustic mastic. The plasterboard should be taped and jointed and receive a skim finish.

If you can afford the extra headroom, a secondary suspended ceiling formed beneath the floor joists is ideal, as this will be a totally independent construction. The ceiling can be supported by new timber joists that span from wall to wall, completely separate to the floor above. A minimum gap of 25mm is advisable between the bottom of the joists and the top of the new timber joists. Two layers of 15mm sound-quality plasterboard can be installed to the bottom of the new joists and a 50mm acoustic batt (min density 45kg/m3) fitted above the plasterboard.

It is worth noting that two layers of plasterboard can be 26kg/m2, so you should always check the joists’ size and spans with an engineer prior to the installation. To finish the boards always use acoustic sealant around the perimeter edges.

Approved Document E states that the minimum sound insulation values for New Building Properties is an airborne resistance of 45dB or more and impact 62dB or less. For conversion properties, it’s an airborne resistance of 43dB or more and impact 64dB or less. If you don’t want to suffer from noise issues, you should be achieving these targets as a minimum. Please note when trying to improve upon dB ratings for both types of noise, the higher the Airborne noise figure the better and the lower the impact noise the better).

We can help with acoustic design for your ceiling

It can be very time-consuming trying to identify the cause of excess noise through ceilings. To reduce the risk of acoustic issues its always best to hire an experienced acoustic consultant. We are a UKAS accredited company, so you can be sure of a friendly and professional service providing a ‘one stop’ solution for all your acoustic requirements. We also undertake sound testing for lease condition compliance, if you are changing the floor finish in your apartment and you need help with the acoustics please let us know.

If you would like more information in regards to sound testing service and/or acoustic design services in London, please contact us on 01525 303905 or info@aptsoundtesting.co.uk, for more information please visit our website at www.aptsoundtesting.co.uk or download our sound test checklist or visit our new sound testing  blog.

Thermal Imaging Inspection

Thermal Imaging Inspection

How Much Does a Thermal Imaging Inspection Cost?

We often get asked ‘what’s the cost of a thermal survey’. It depends on numerous factors, such as the size and amount buildings you need to be surveyed, the project location, and the detail required for the thermal survey report.

The Thermal Imaging Inspection

This is a very common question clients ask us and it has a simple answer: it depends on numerous factors.  When we sit down to work out our fee proposal for a Thermal imaging inspection, we ask the client a number of questions:

  1. The type and size of building.
  2. The amount of preparation required?
  3. The amount of time required to safely undertake the survey.
  4. The type of equipment required to undertake the inspection.
  5. The project location and subsequent travel costs/time.
  6. The required deliverables – what needs to be included within the thermal survey report.
  7. The amount of health and safety requirements i.e., some sites ask for 4-hour safety induction

So, taking the above into account we can offer a basic electrical thermal survey to a couple of distribution boards for £495 plus Vat, right up to the huge industrial areas, that may require multiple visits that may be in excess of £10,000 plus Vat, and of course everything in between. In all instances it’s best to call us so we gain a more accurate overview of our project and quoted; accordingly, so please contact us to discuss your project (along with any site-specific issues) and obtain a quote.

thermogrographicinspectiontocommercialbuilding.jpg

Is your thermal imaging company adequately trained?

When you are employing a thermographer, you should check to see that they incorporate the high specifications possible for their inspections. Are they certified to Level 3 and do they use large format FLIR thermal imaging cameras, anything less and you may not get the thermal imaging report you need to comply with BREEAM. 

Their specification should include:

  1. Level 3 thermographic certification
  2. Level 3 qualified thermographers
  3. Large format FLIR cameras with 45-degree lenses

The importance of clear and concise thermographic reports

We spend such a large amount of time on our thermal imaging reportage, that’s why it’s one of the best in the industry, this is obviously a part of the service which is off-site and clients don’t see. Whilst we may draw initial conclusions on-site, which may need more investigation; usually, our final conclusions and report will only be finalised after all the data has been studied. It’s our ongoing aim to provide thermographic reports that are clear, concise, and easy to reference. Our aim is to take the guesswork out of the equation.

thermal_imaging_survey_electrical_distribution_board.jpg

Please contact us for more information on Thermal Inspection Services

Our team of Level 2 & 3 certified professional Thermographers is highly experienced in carrying out thermal imaging surveys and have many years of experience in all aspects of engineering, construction, maintenance, management, and professional survey work.

Our thermal imaging equipment is the best and most accurate on the market, ensuring we pick up faults that other equipment may miss. Our reports are professionally presented and are clear, concise, and easy to follow. We endeavour to give our clients a first-class service every time.

If you would like to contact us for more information on our thermal imaging services, please contact us on 01525 303905 or email us at info@aptsoundtesting.co.uk. Alternatively, if you would like more information on how to prepare for your thermal imaging survey, please visit our website or download our thermal imaging checklist.